Installing EVO Luggage Racks on a motorcycle
The Quick-Lock rack systems from the German manufacturer SW-Motech offer maximum flexibility. Quick-lock fasteners allow the side carriers to be removed without any tools, if required.
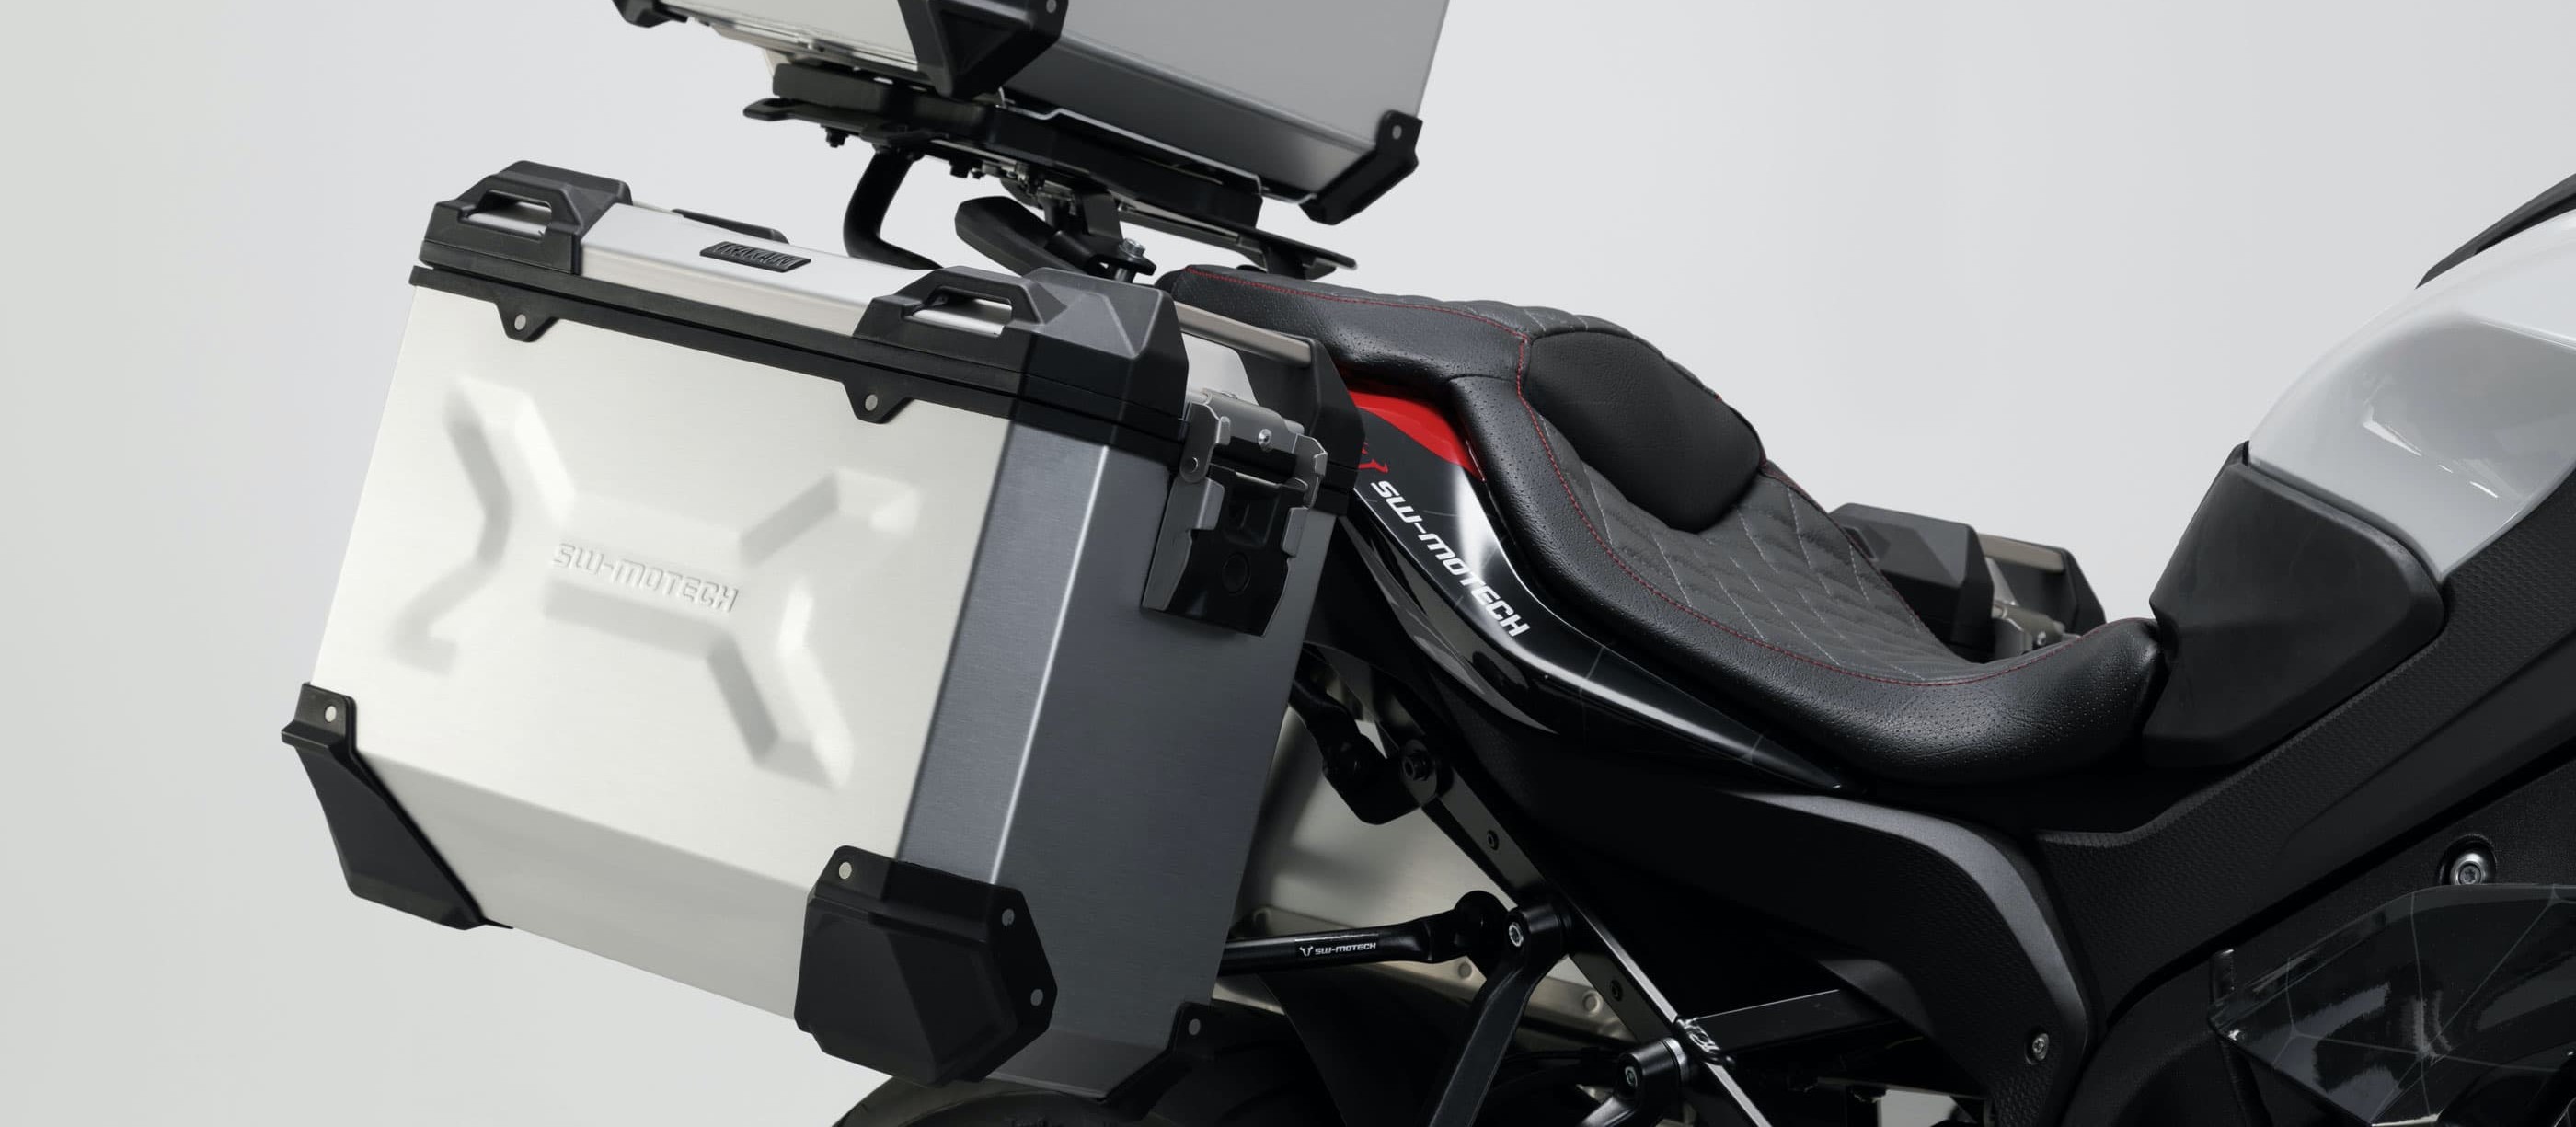
- Quick-Lock motorcycle luggage system
- Install the EVO Luggage Racks – now let's get started
- 01 – Preparing for installation
- 02 – Install the retaining bracket/luggage rack
- 03 – Install the retaining bracket/pillion footrest wing
- 04 – Install quick-lock fasteners on side carriers
- 05 – Attach the side carrier to the retaining bracket
- 06 – Install cross-connector
- 07 – Screw on adapter for the TRAX case
- 08 – Attach the side cases
- 09 – Install the ALU-RACK
- Quick-lock system
- Cross-connector and relocating turn signals
- Load capacities
powered by SW-Motech
Quick-Lock motorcycle luggage system
If you want to be flexible in your choice of motorcycle cases, and you're looking for a side carrier that you can quickly detach without the need for tools (e.g. when you reach your holiday destination), then the German manufacturer SW-Motech has the ideal system for you. As well as being very well engineered, the SW-Motech EVO rack offers two key advantages. Firstly, it can be removed in seconds by means of 6–8 quick-lock fasteners and, secondly, a range of adapters ensure compatibility with all popular brands of case. This means you can carry on using your existing cases of a different make – and installing such a flexible system is sure to enhance the resale value of your motorcycle. The design of the ALU-RACK top box carrier from the SW-Motech range blends perfectly with the lines of today's generation of motorcycles, instead of looking like a less than elegant afterthought.
Installing the EVO Luggage Rack with TRAX ADV cases on a BMW S 1000 XR.
Install the EVO Luggage Racks – now let's get started
Step 1: Preparing for installation
01 – Preparing for installation
Before you start, make sure you've got enough space to work and lay out all the parts. You will need a good socket wrench set (with ratchet) and, ideally, a torque wrench. First check that all fittings are present and correct by comparing against the accompanying instructions, and sort the parts into the relevant groups. A lot is explained with illustrations instead of written instructions. Check the pictures to see if there are any special steps to be taken into account, such as relocating the turn signals. Generally speaking, SW-Motech makes every effort to develop products that do not require any changes to the motorcycle.
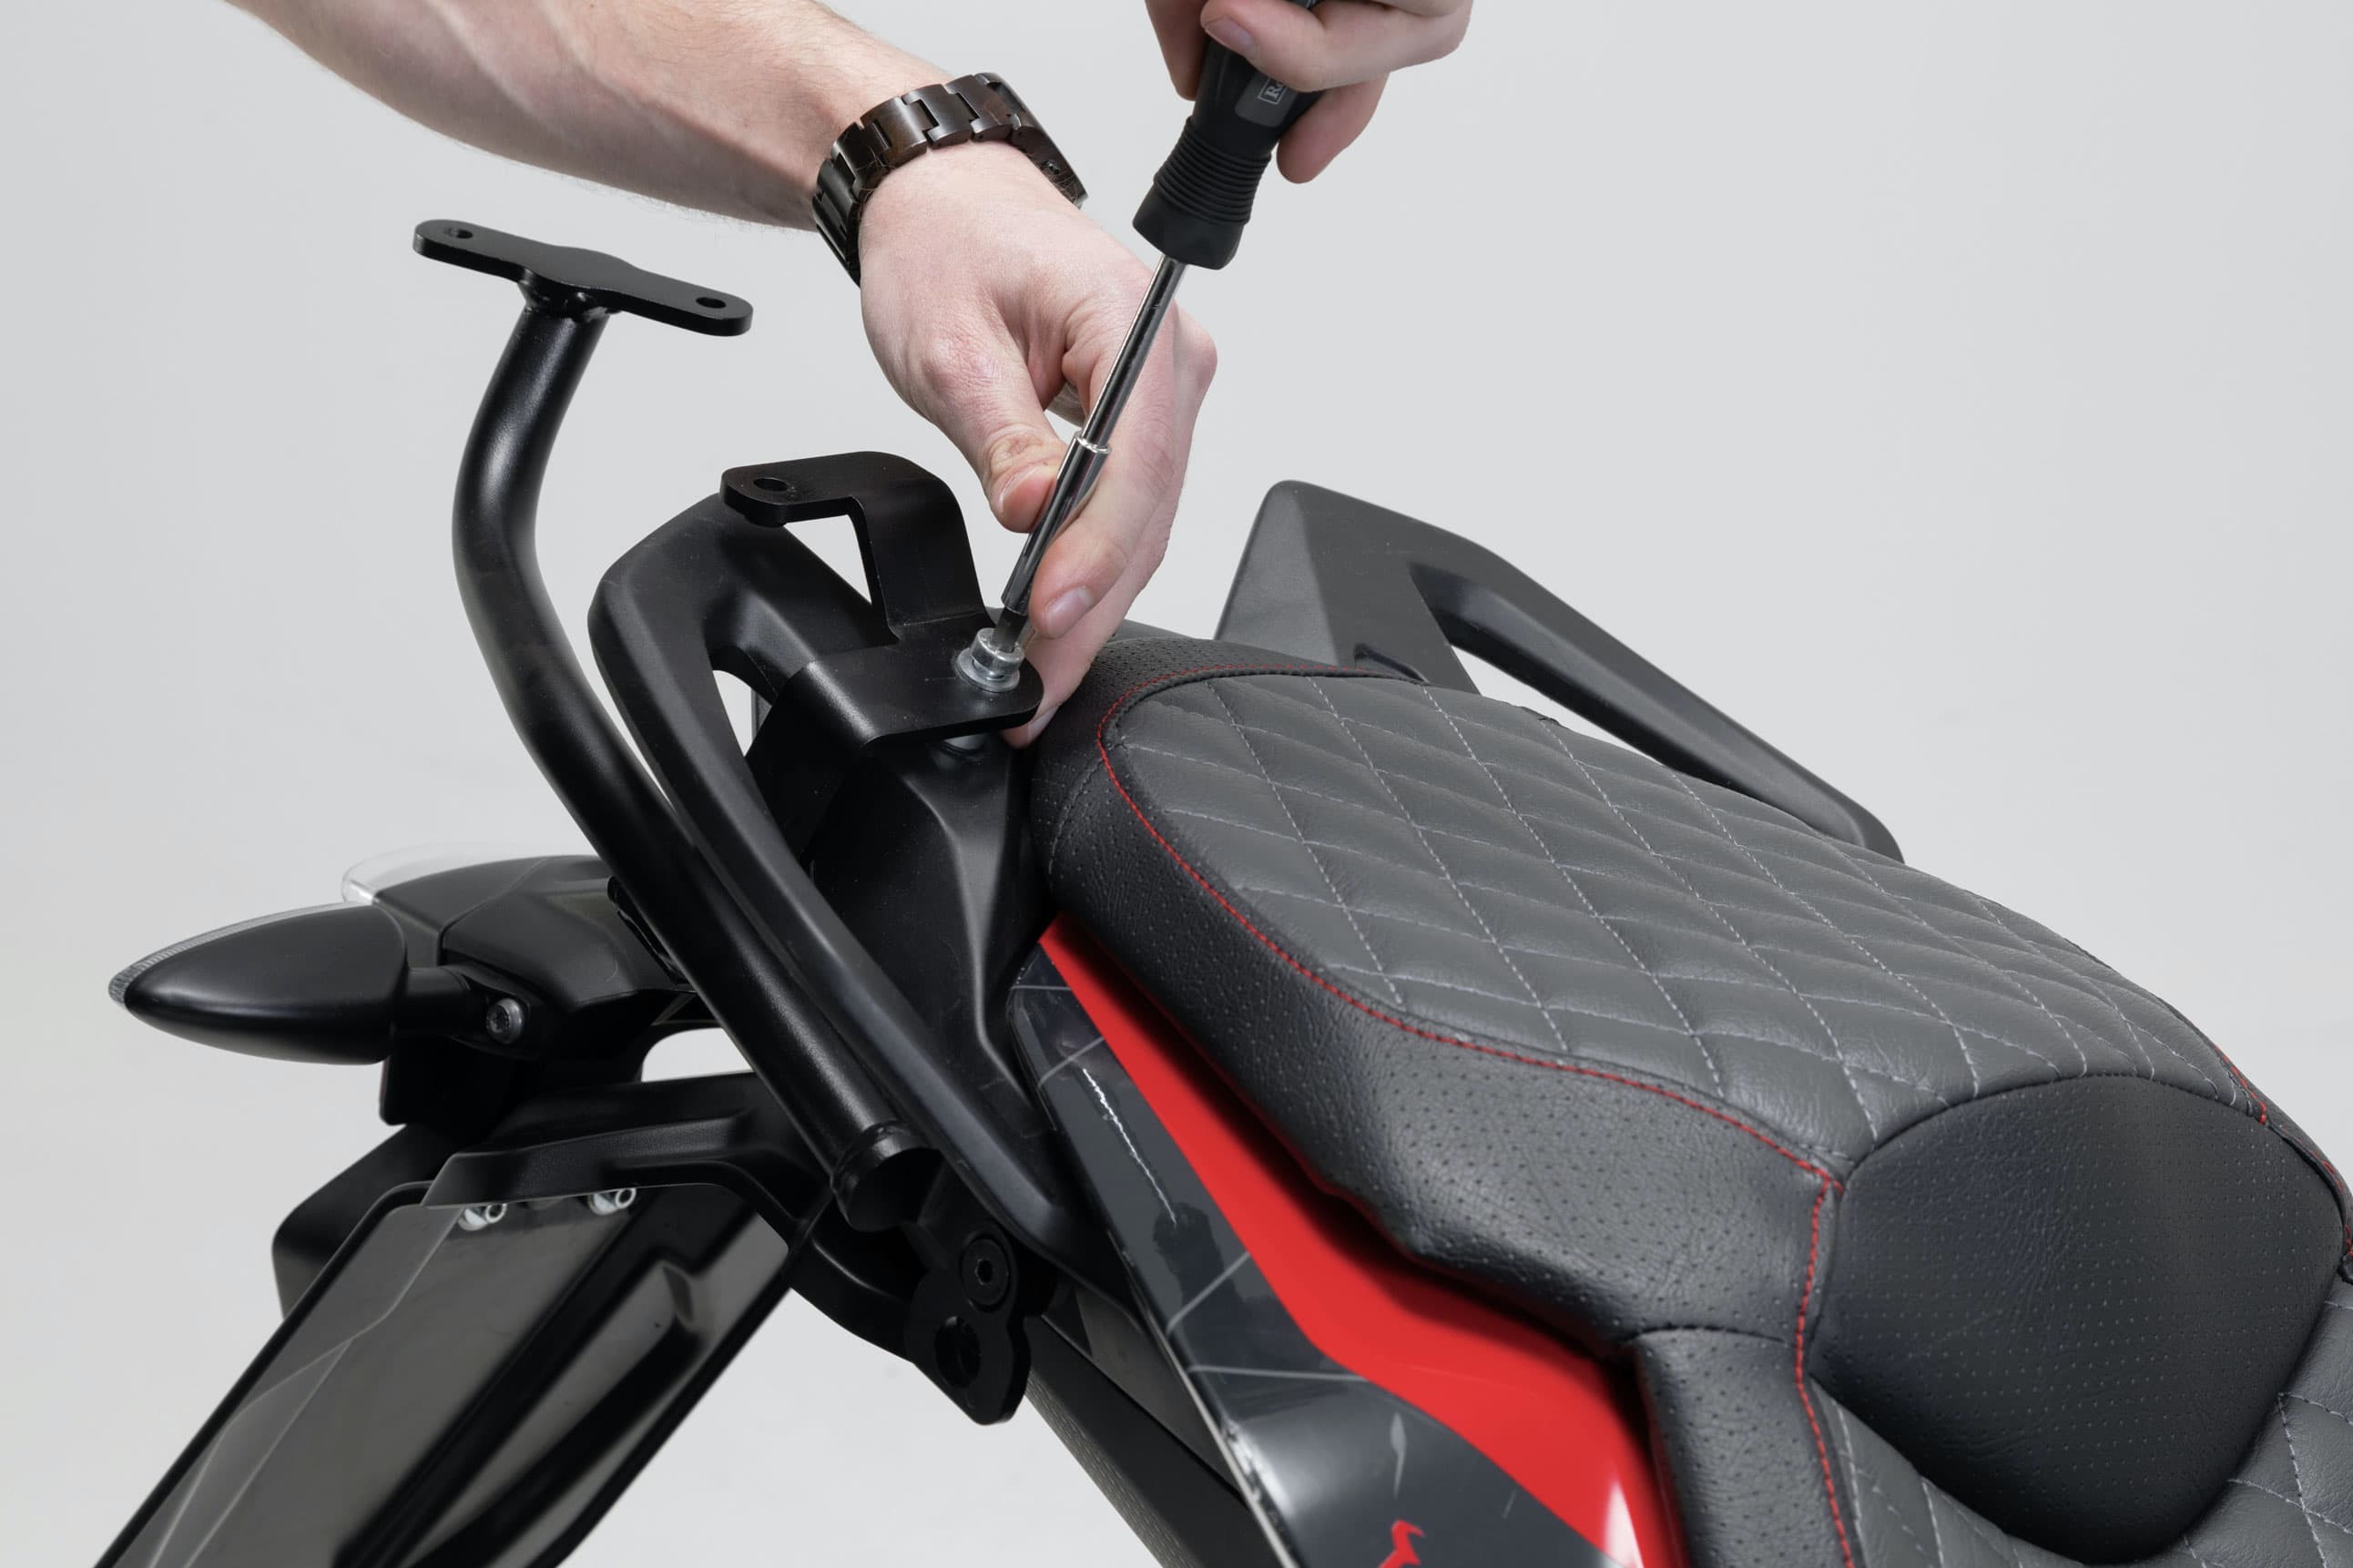
Step 2: Install the retaining bracket/luggage rack
02 – Install the retaining bracket/luggage rack
Jack up your bike safely (e.g. on the centre stand). Start by attaching the retaining brackets to the pillion grip. Check the instructions for possible variations in methods of detachment, depending on motorcycle model. During installation, only hand-tighten the screws initially. Once you have completed installation, align the carrier so that it is tension-free, and when you are satisfied that it's sitting correctly, tighten the screws to the torque specified in the instructions. This is important to prevent vibration damage to the carrier and also to ensure a symmetrical look.
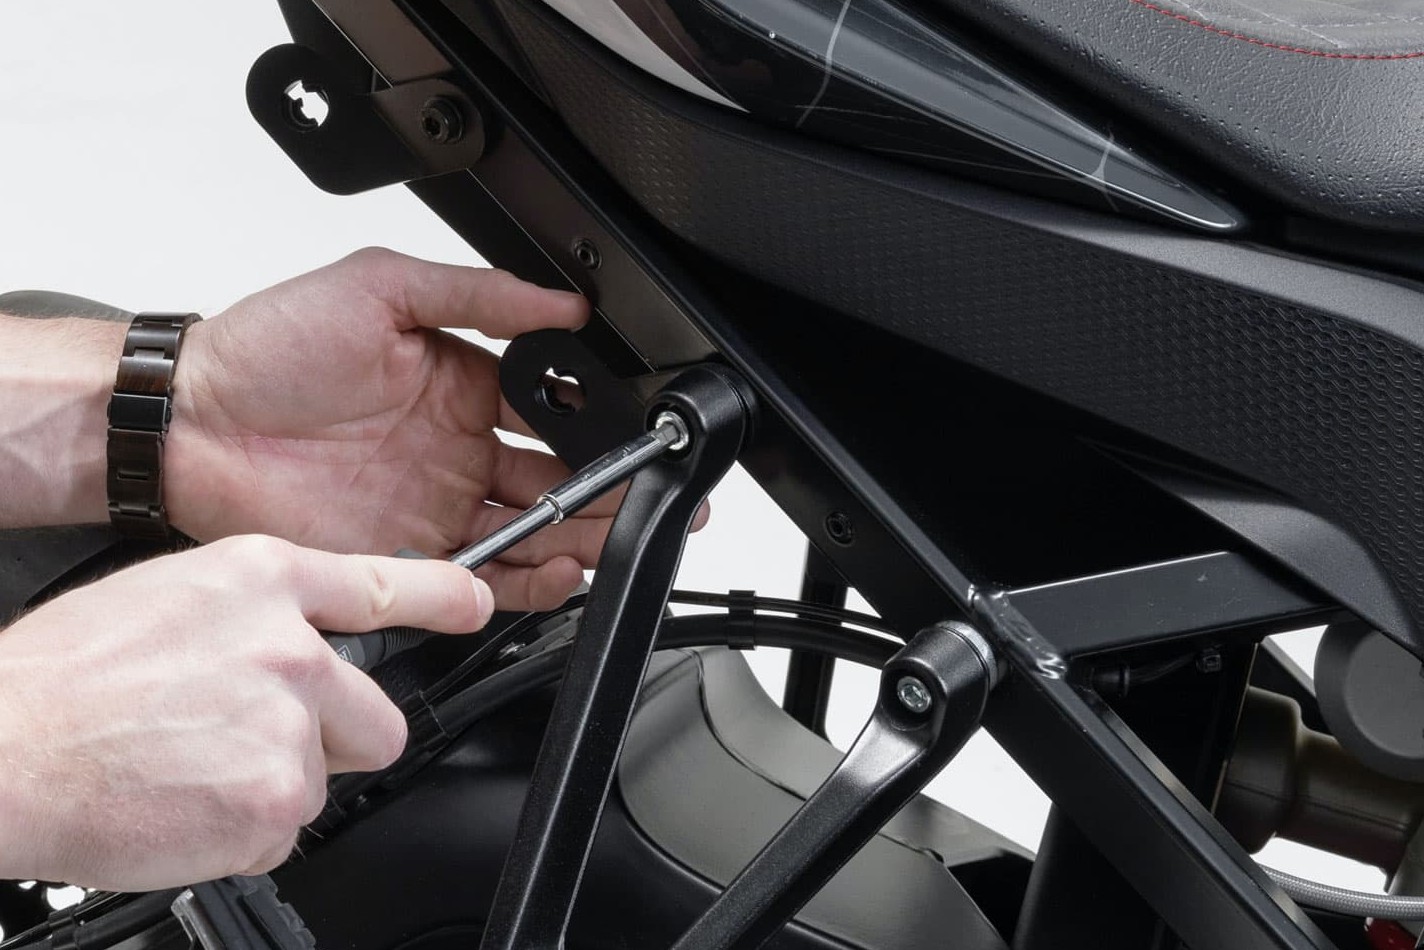
Step 3: Install the retaining bracket/pillion footrest wing
03 – Install the retaining bracket/pillion footrest wing
The next step is to attach the footrest plates, using the respective parts from the relevant group.
Step 4: Install quick-lock fasteners on side carriers
04 – Install quick-lock fasteners on side carriers
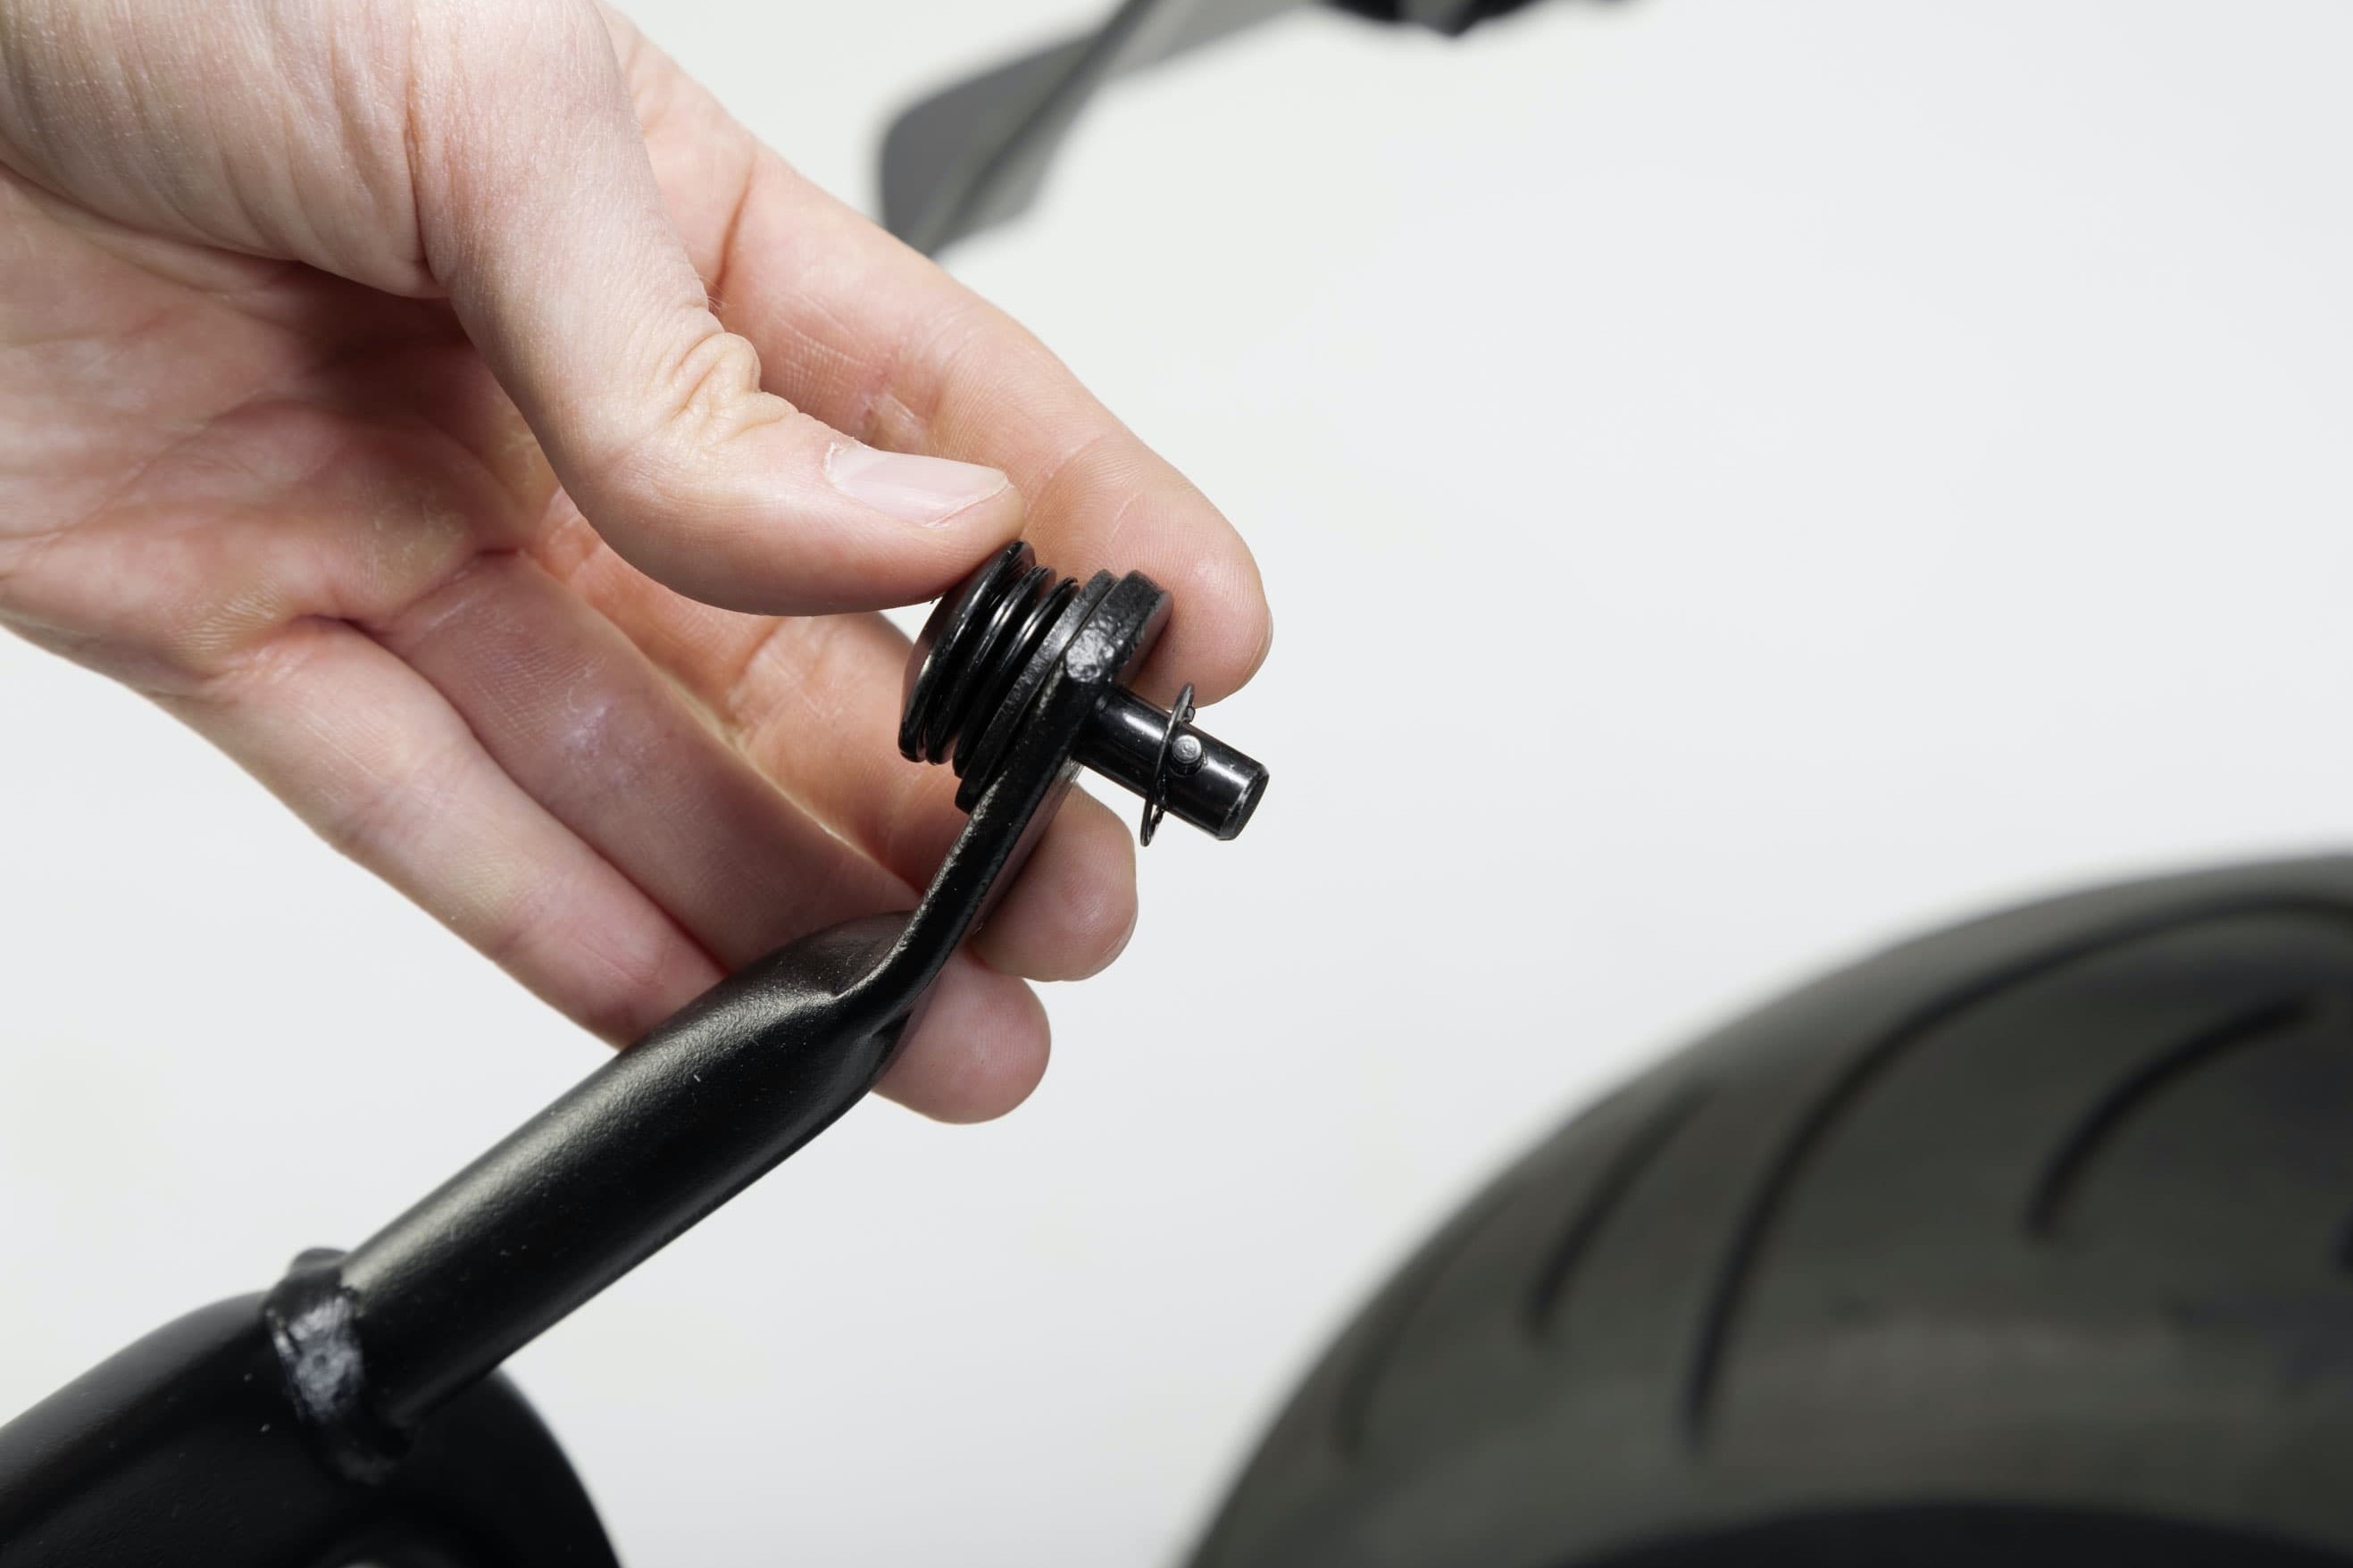
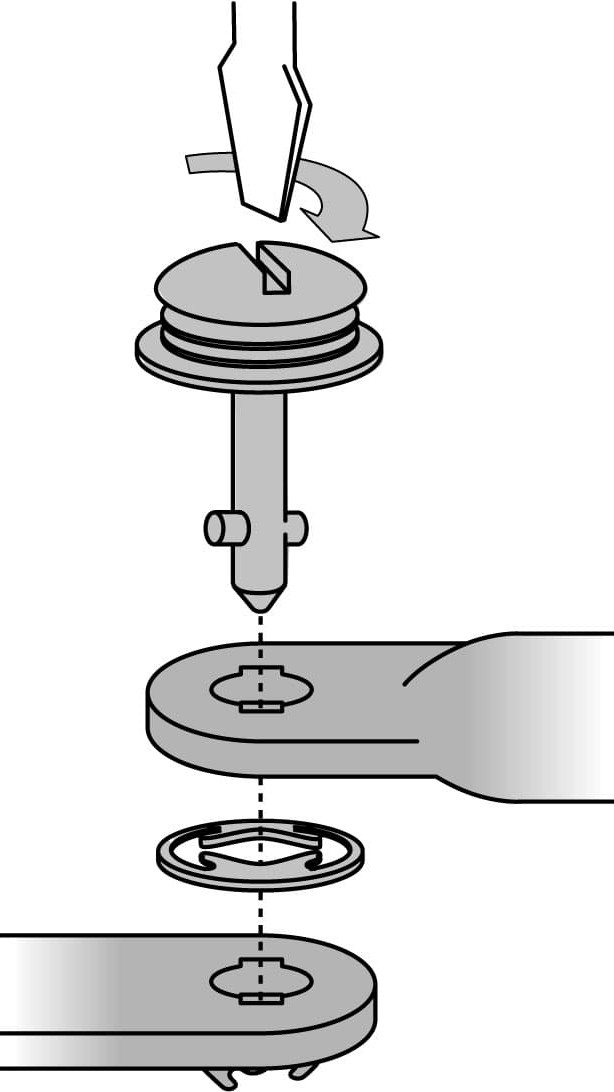
Now affix the quick-lock fasteners to the side carriers. The quick-lock fasteners are inserted through the holes at the end of the support arms. In order to minimise tolerance in the carrier system, the quick-lock fasteners sometimes need a little pressure to push them through the support arms. Make sure you push them through in the right direction. To prevent the quick-lock fasteners from falling out of the support arms, secure them from the other side with a lock ring. Once again, make sure you have the lock rings the right way round.
Important: Once installed, you will not be able to remove the lock rings.
Step 5: Attach the side carrier to the retaining bracket
05 – Attach the side carrier to the retaining bracket
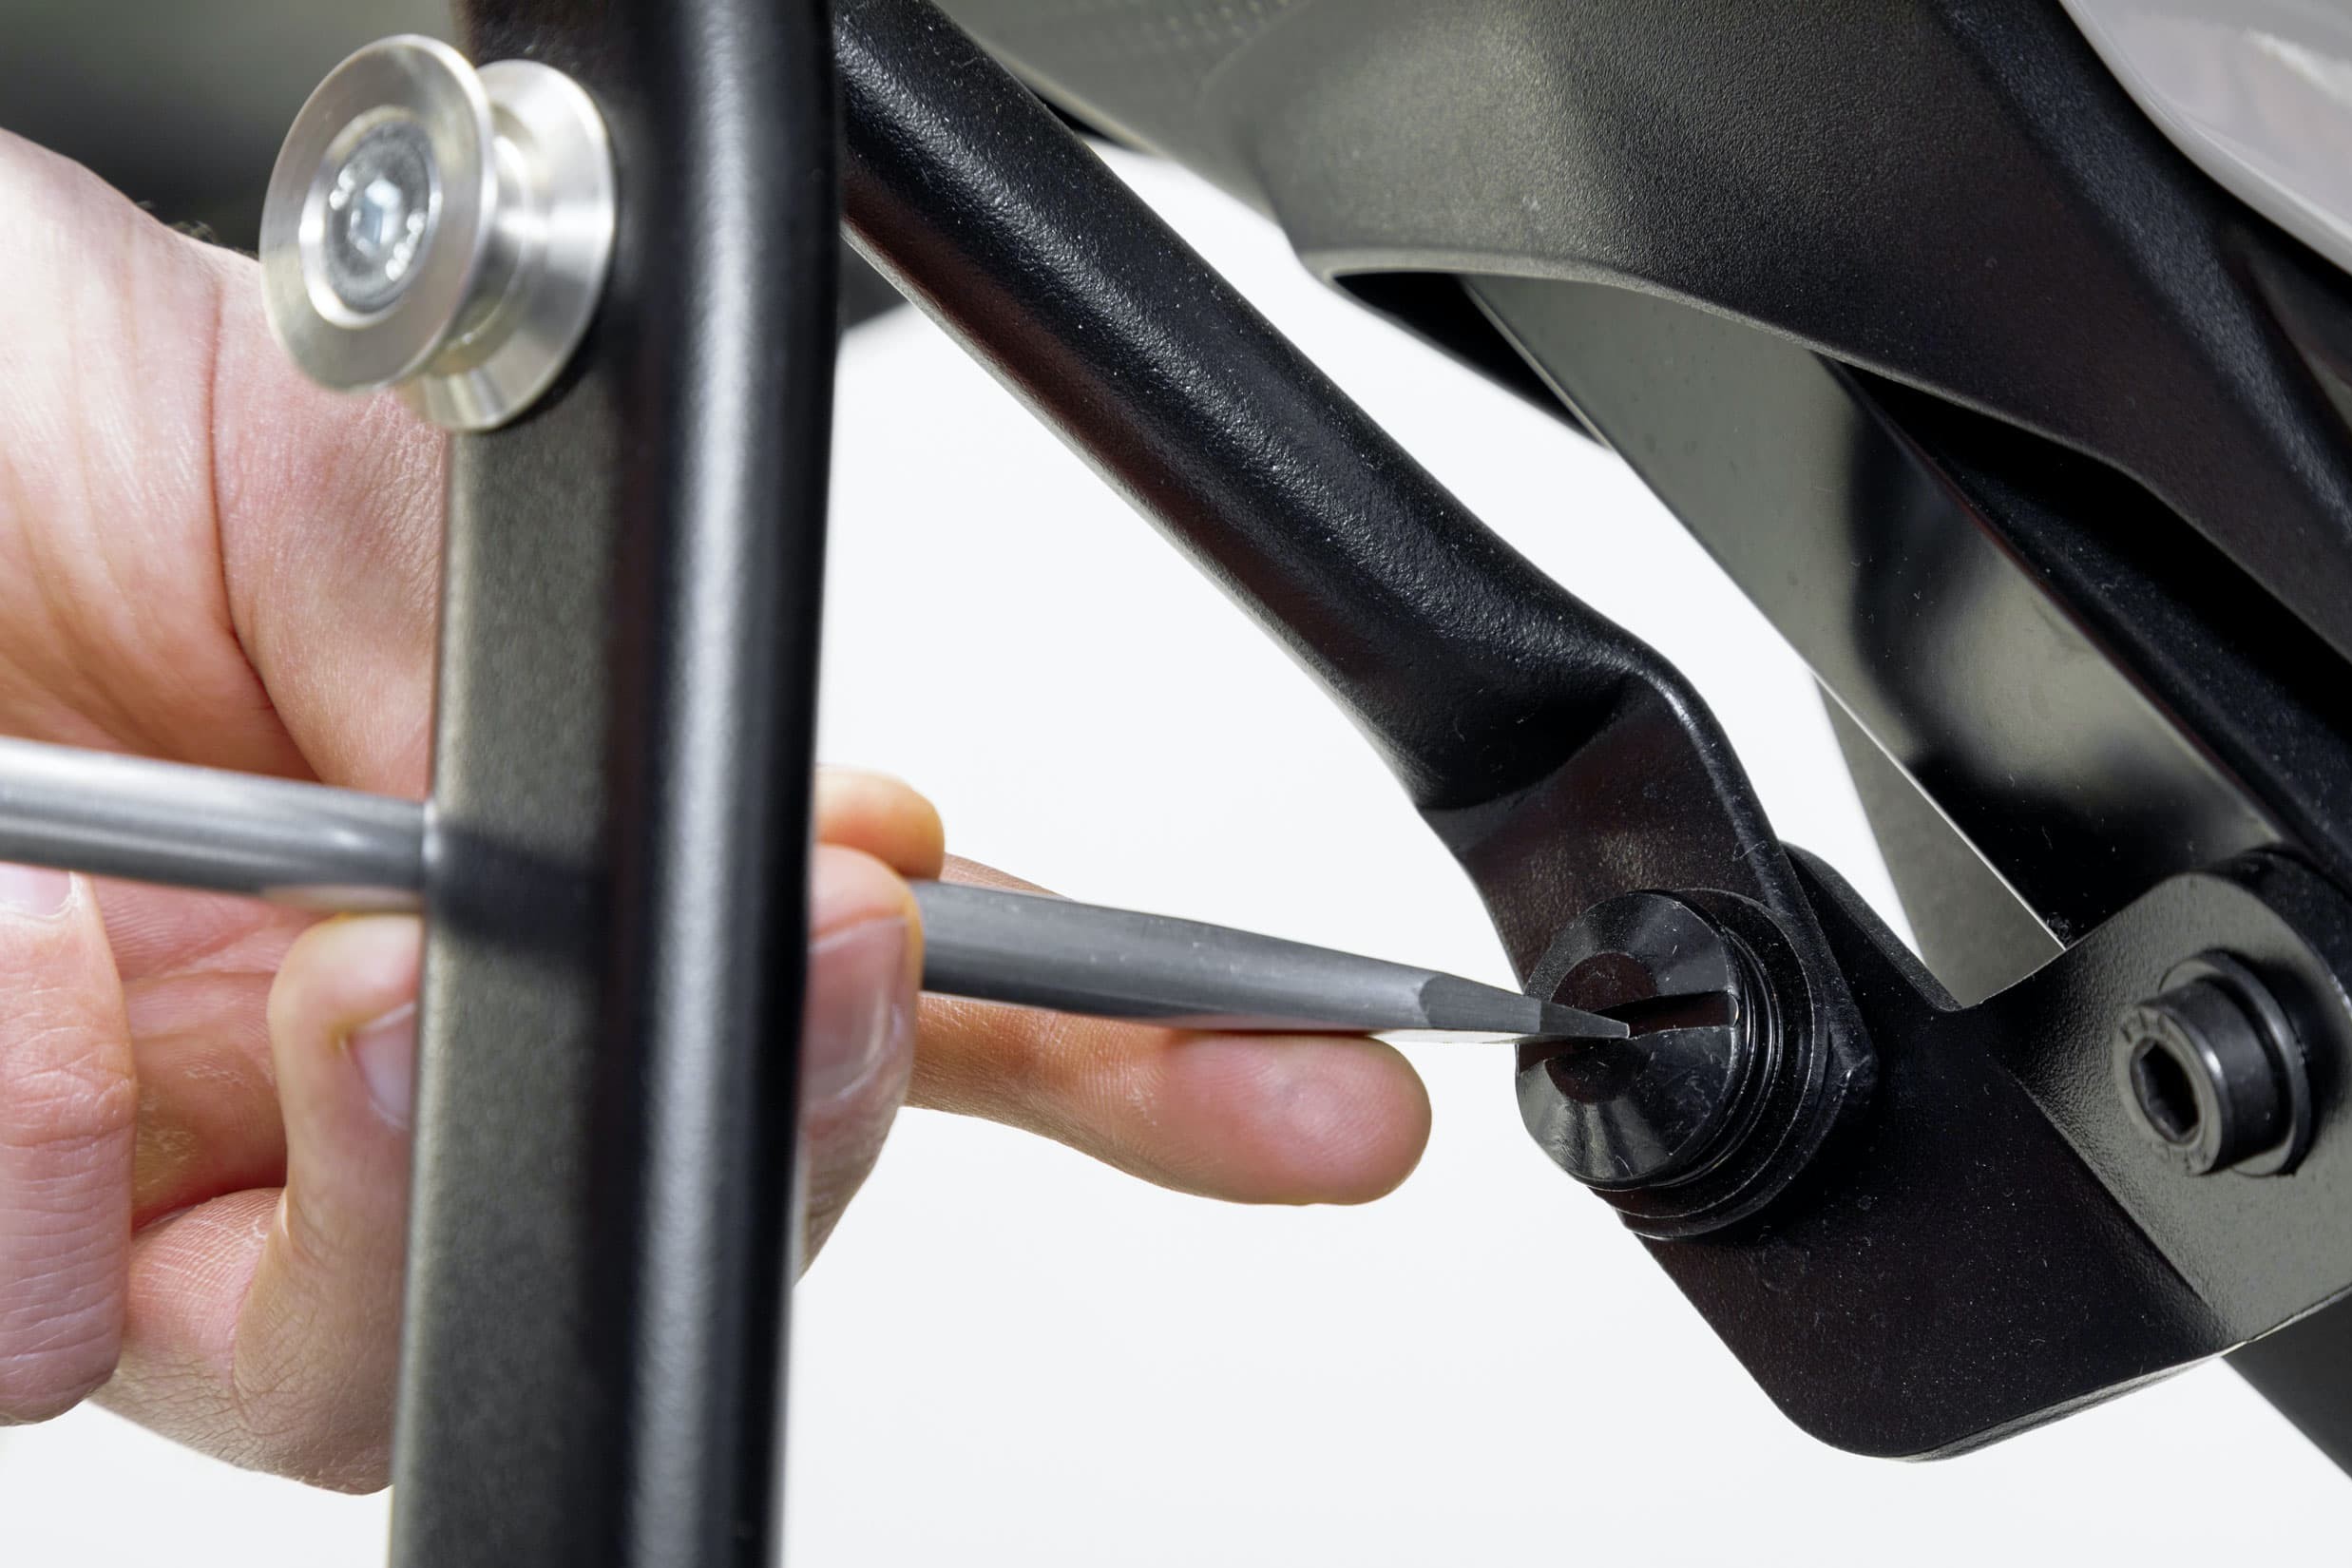
Now click the left and the right carriers onto the installed retaining brackets, ensuring that the side carrier arms rest properly on the mounting plates. In the next step, you need to align the hand-tightened retaining brackets so that the carriers are positioned on the brackets free of tension. Then tighten the retaining bracket screws to the specified torque.
Step 6, Fig. 1: Install cross-connector
06 – Install cross-connector
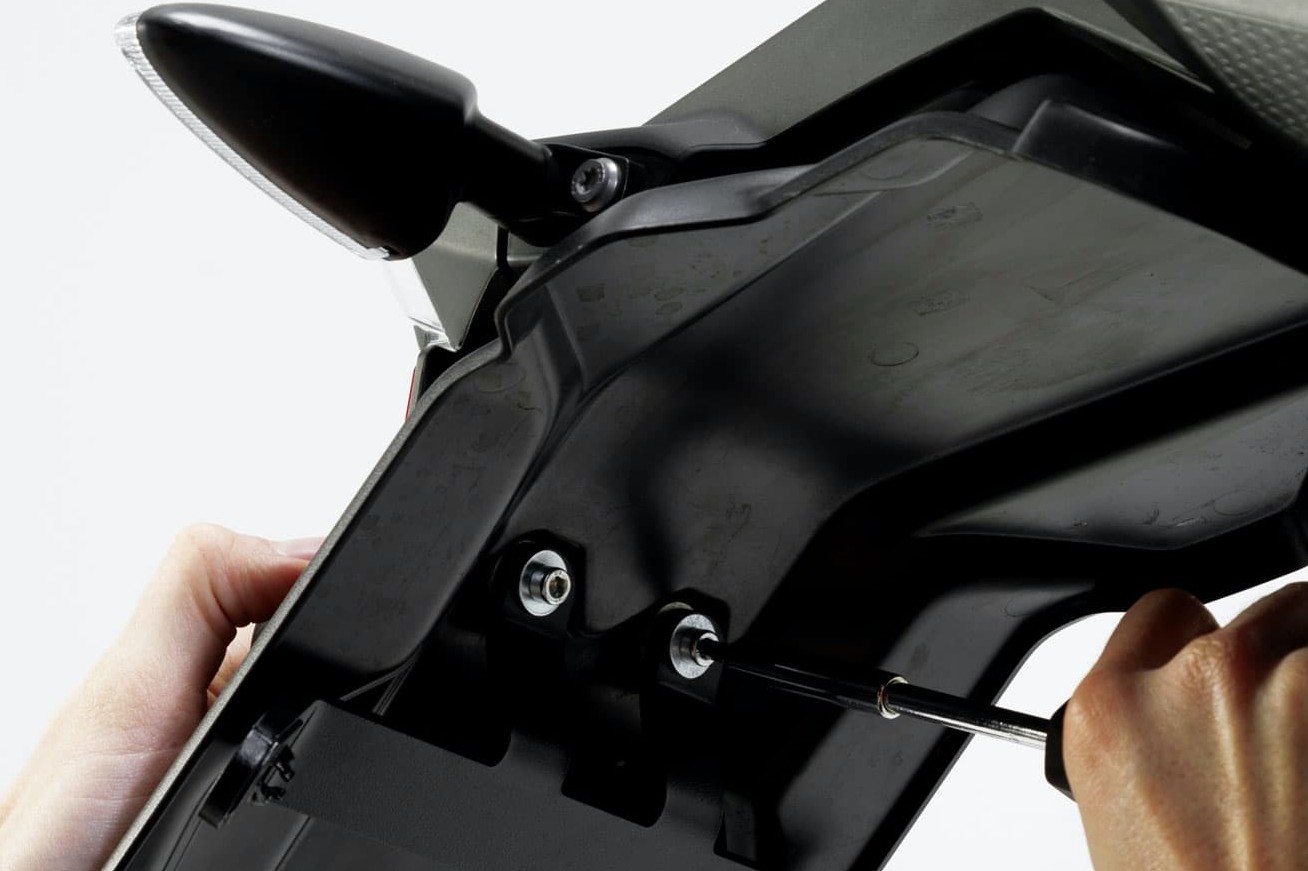
Now attach the cross-connector to the rear mudguard. To do this, remove the license plate, place the cross-connector behind it and remount both parts in the original position (see the box below for more details).
Step 6, Fig. 2: Connect cross-connector to side carrier
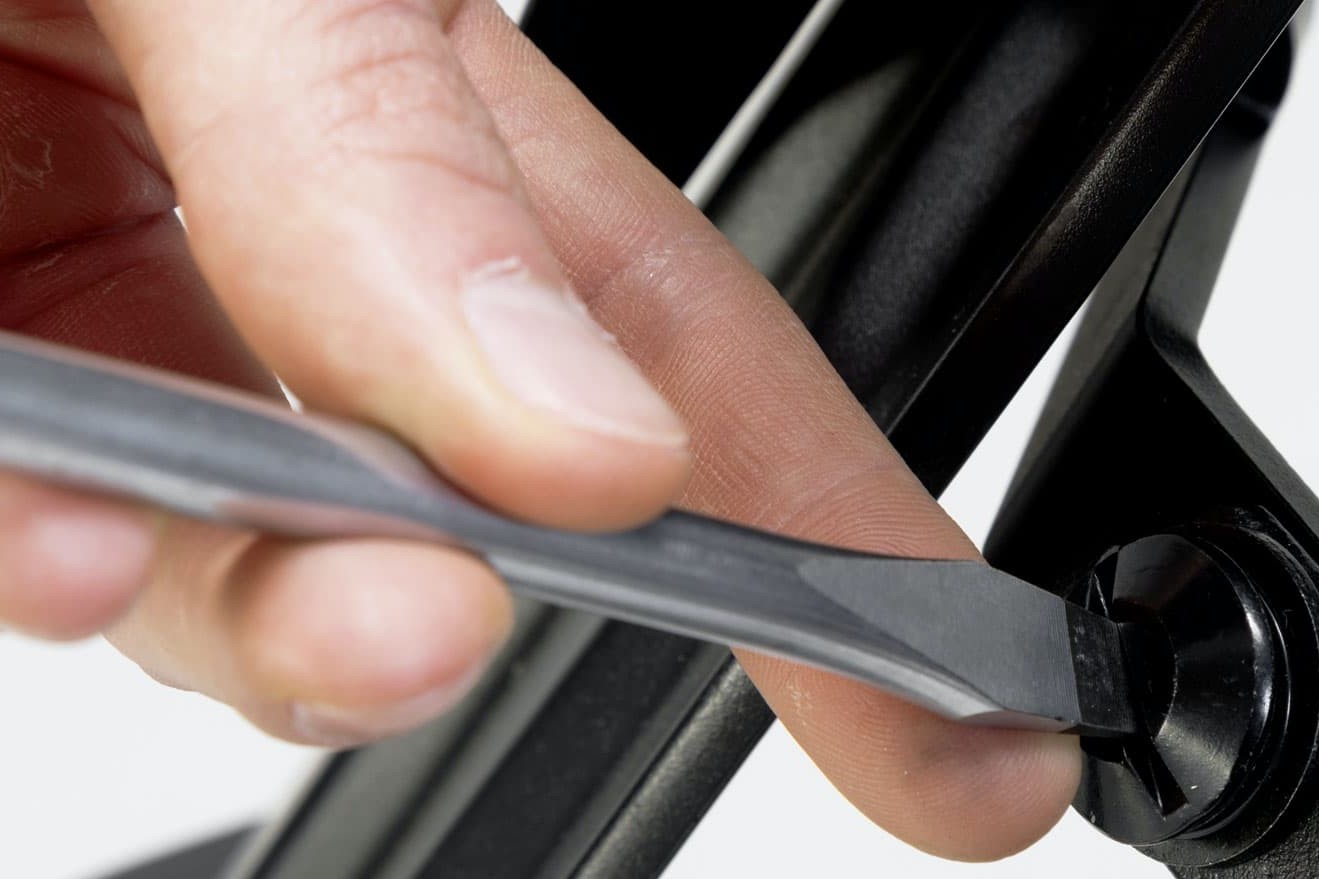
Then connect the cross-connector to the side carrier.
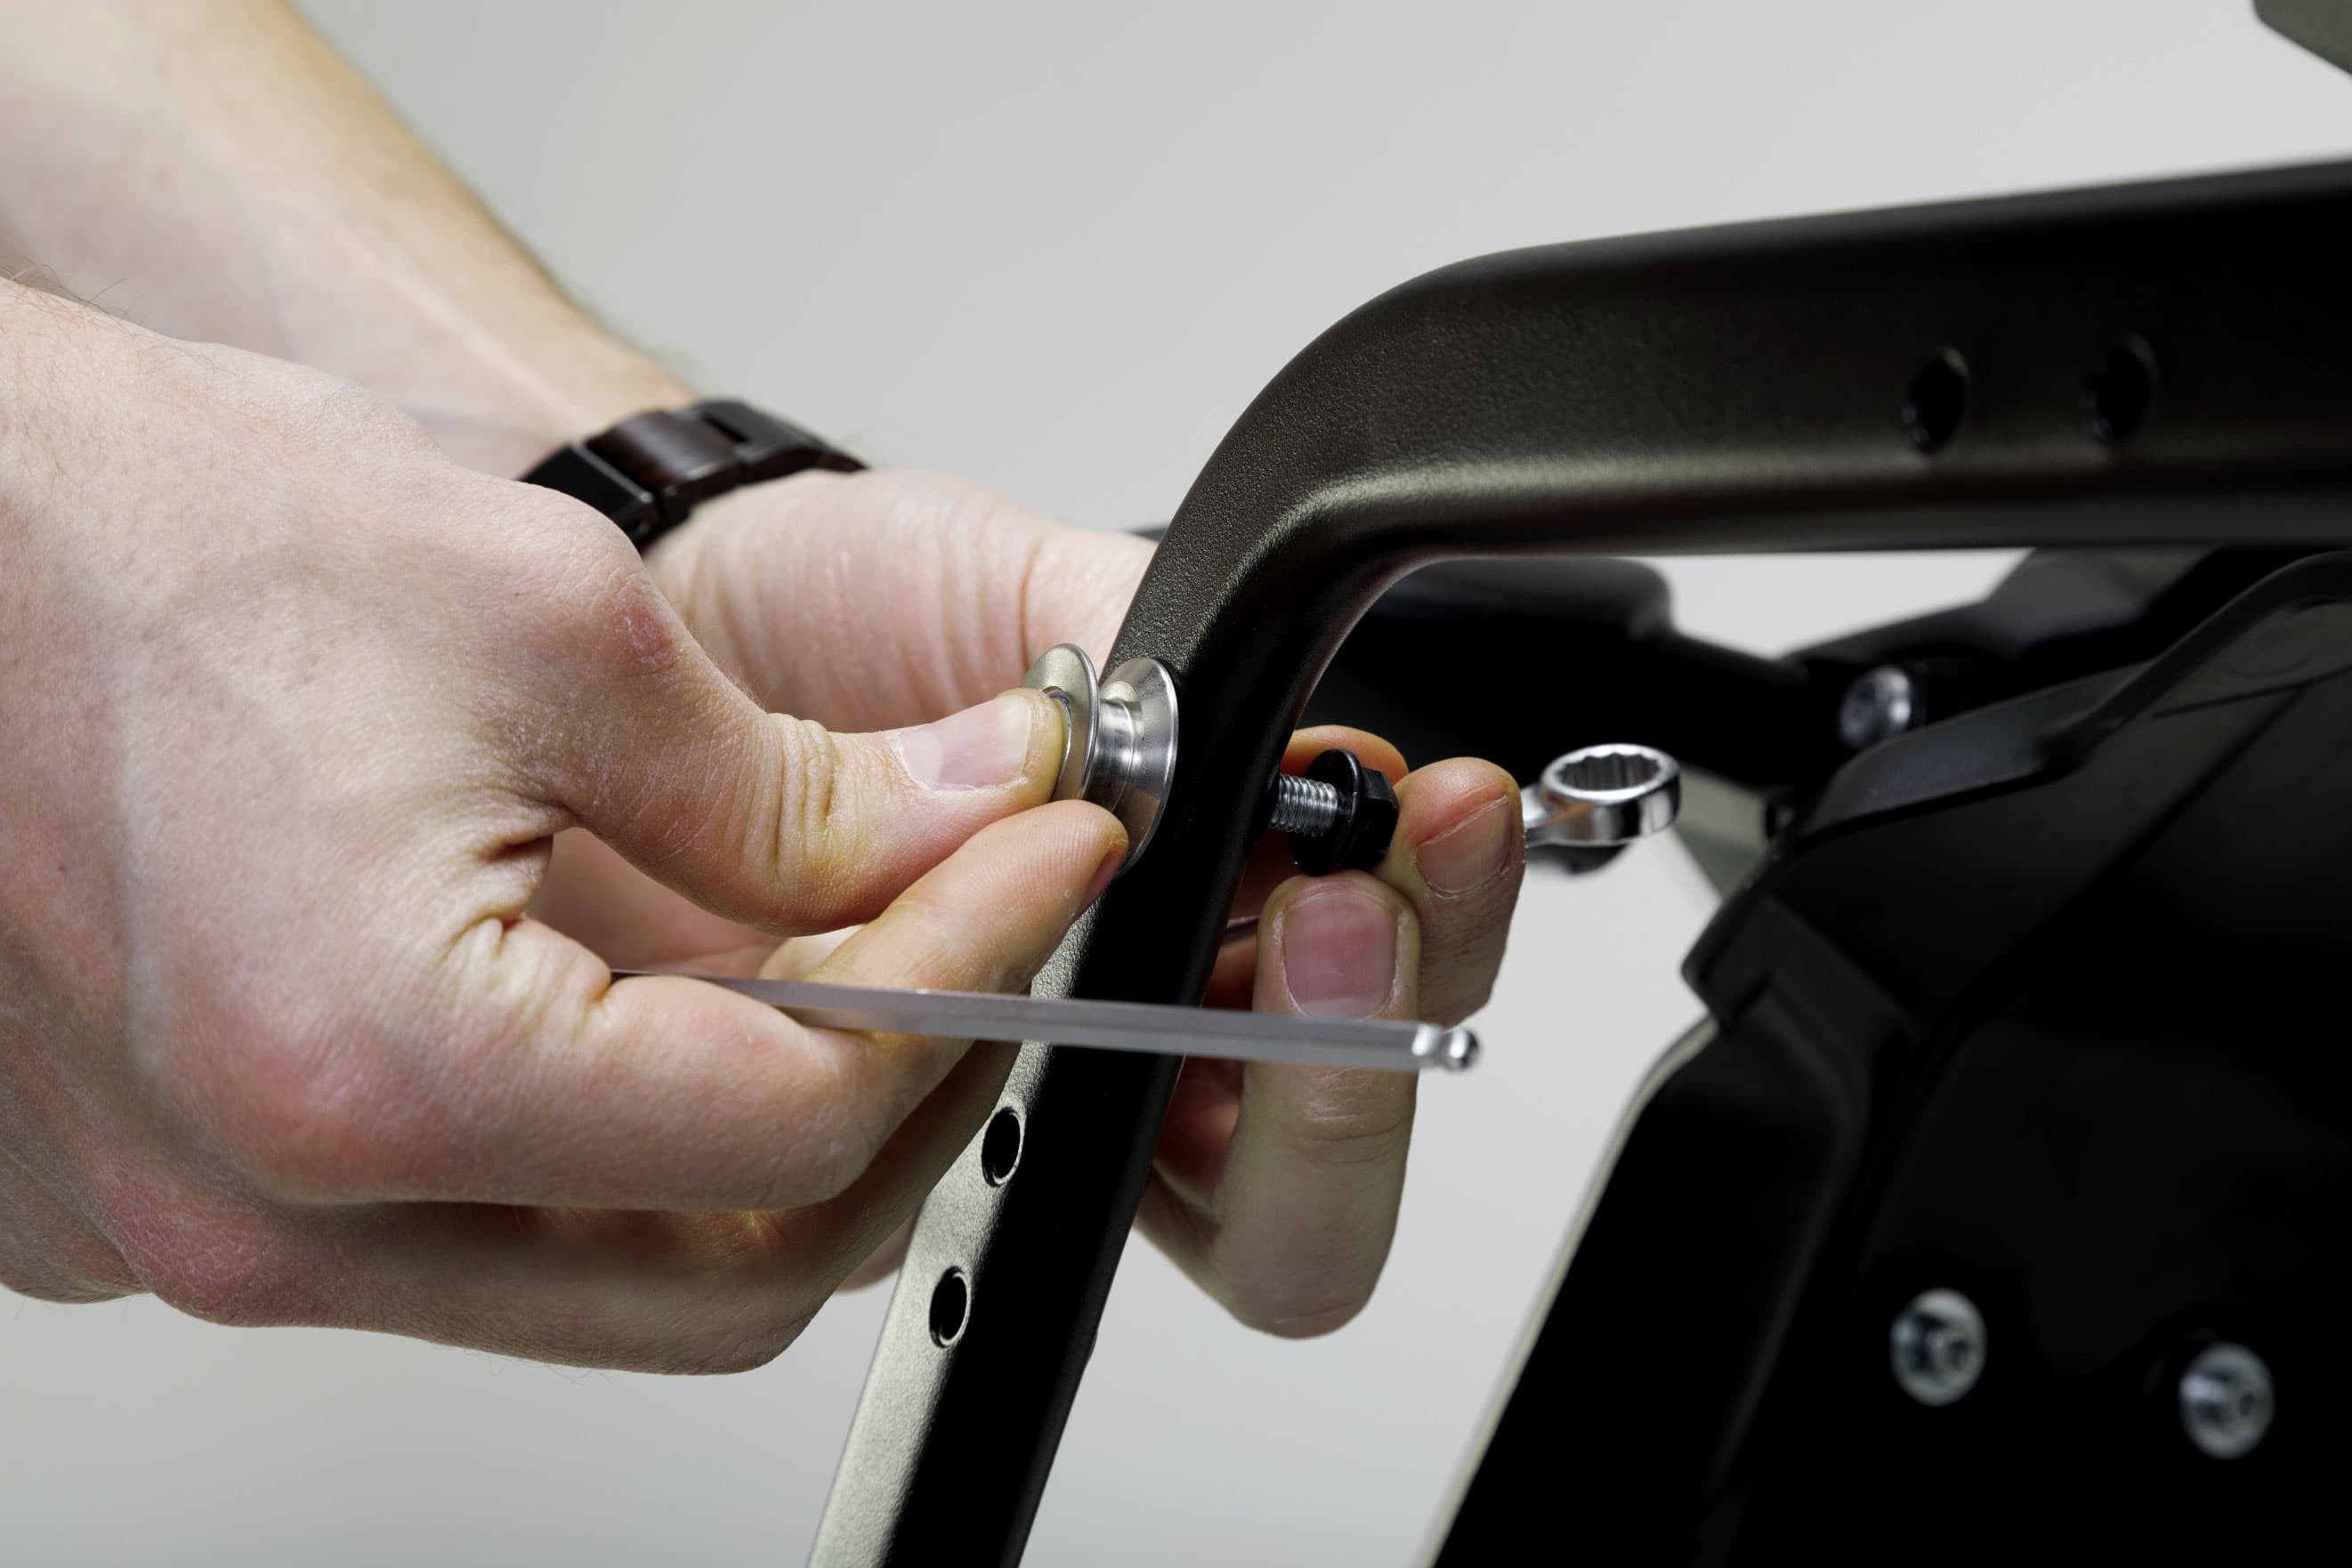
Step 7: Screw on adapter for the TRAX case
07 – Screw on adapter for the TRAX case
You can now tighten the remaining screws fully. The correct torque is given in the installation instructions. Finally, you now need to attach the respective TRAX case adapters to the side carriers.
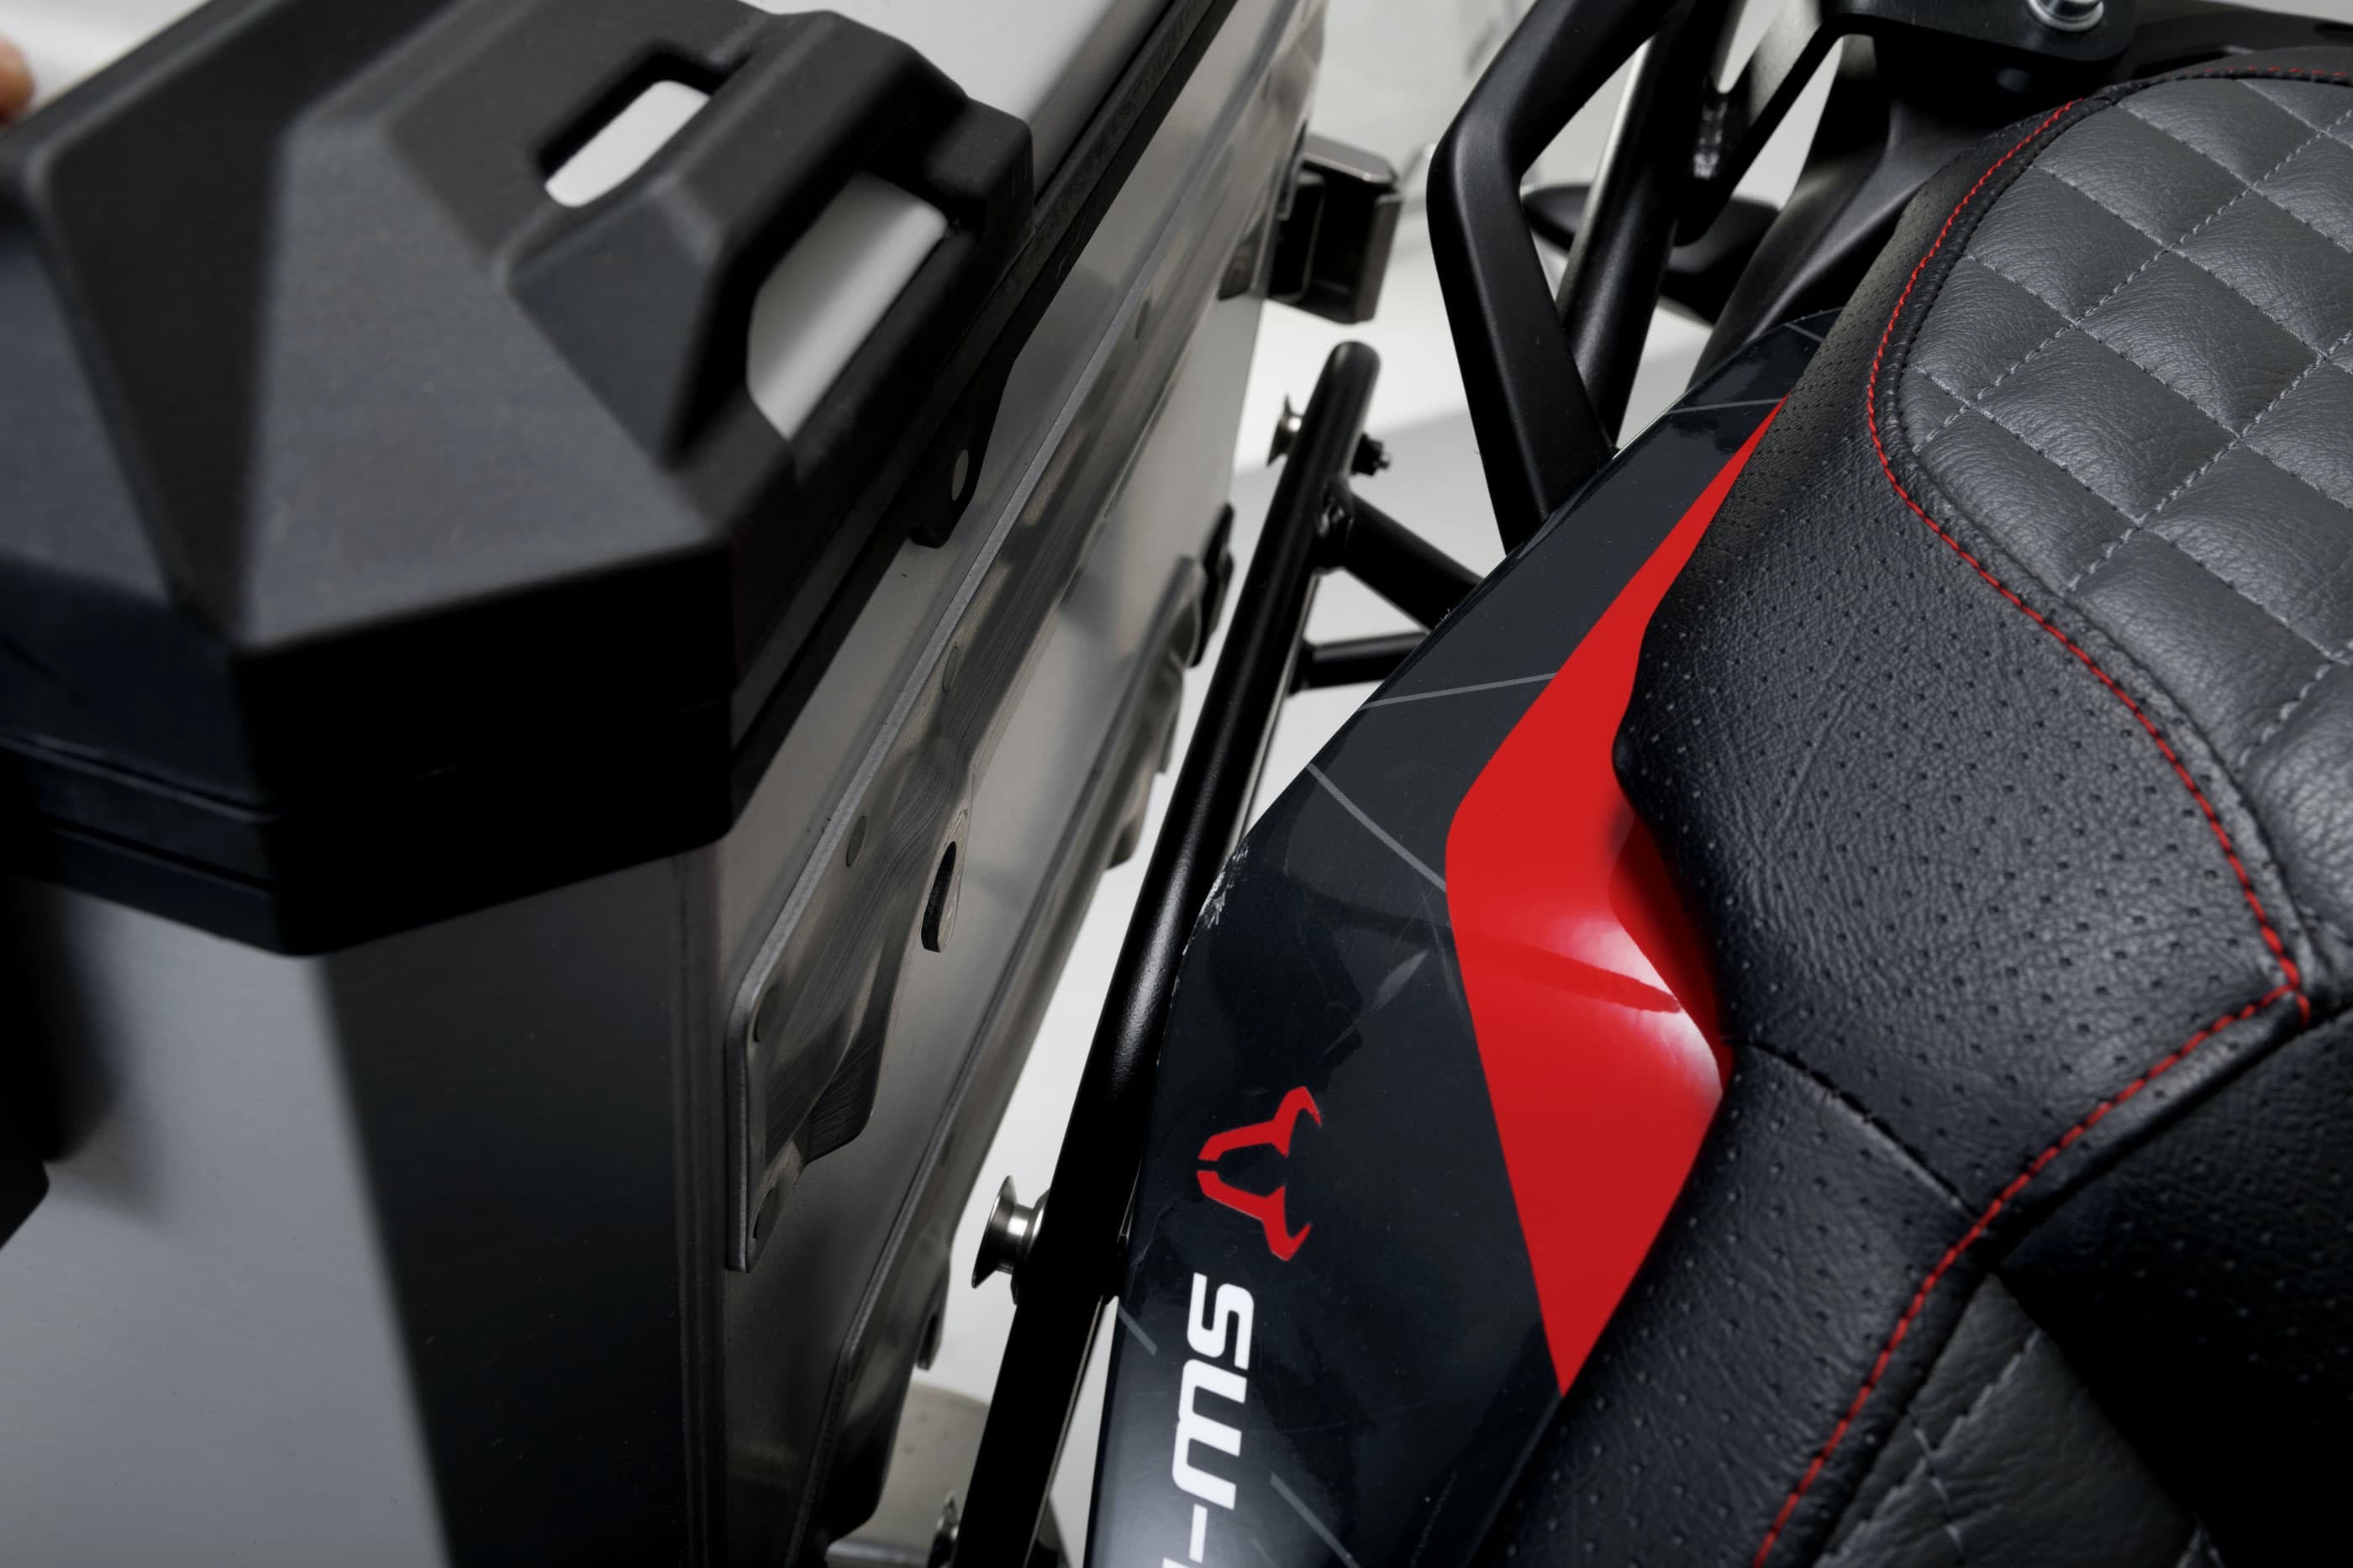
Step 8: Attach the side cases
08 – Attach the side cases
Once you have installed all the components, attach the cases to the side carriers to make sure everything is fully functional.
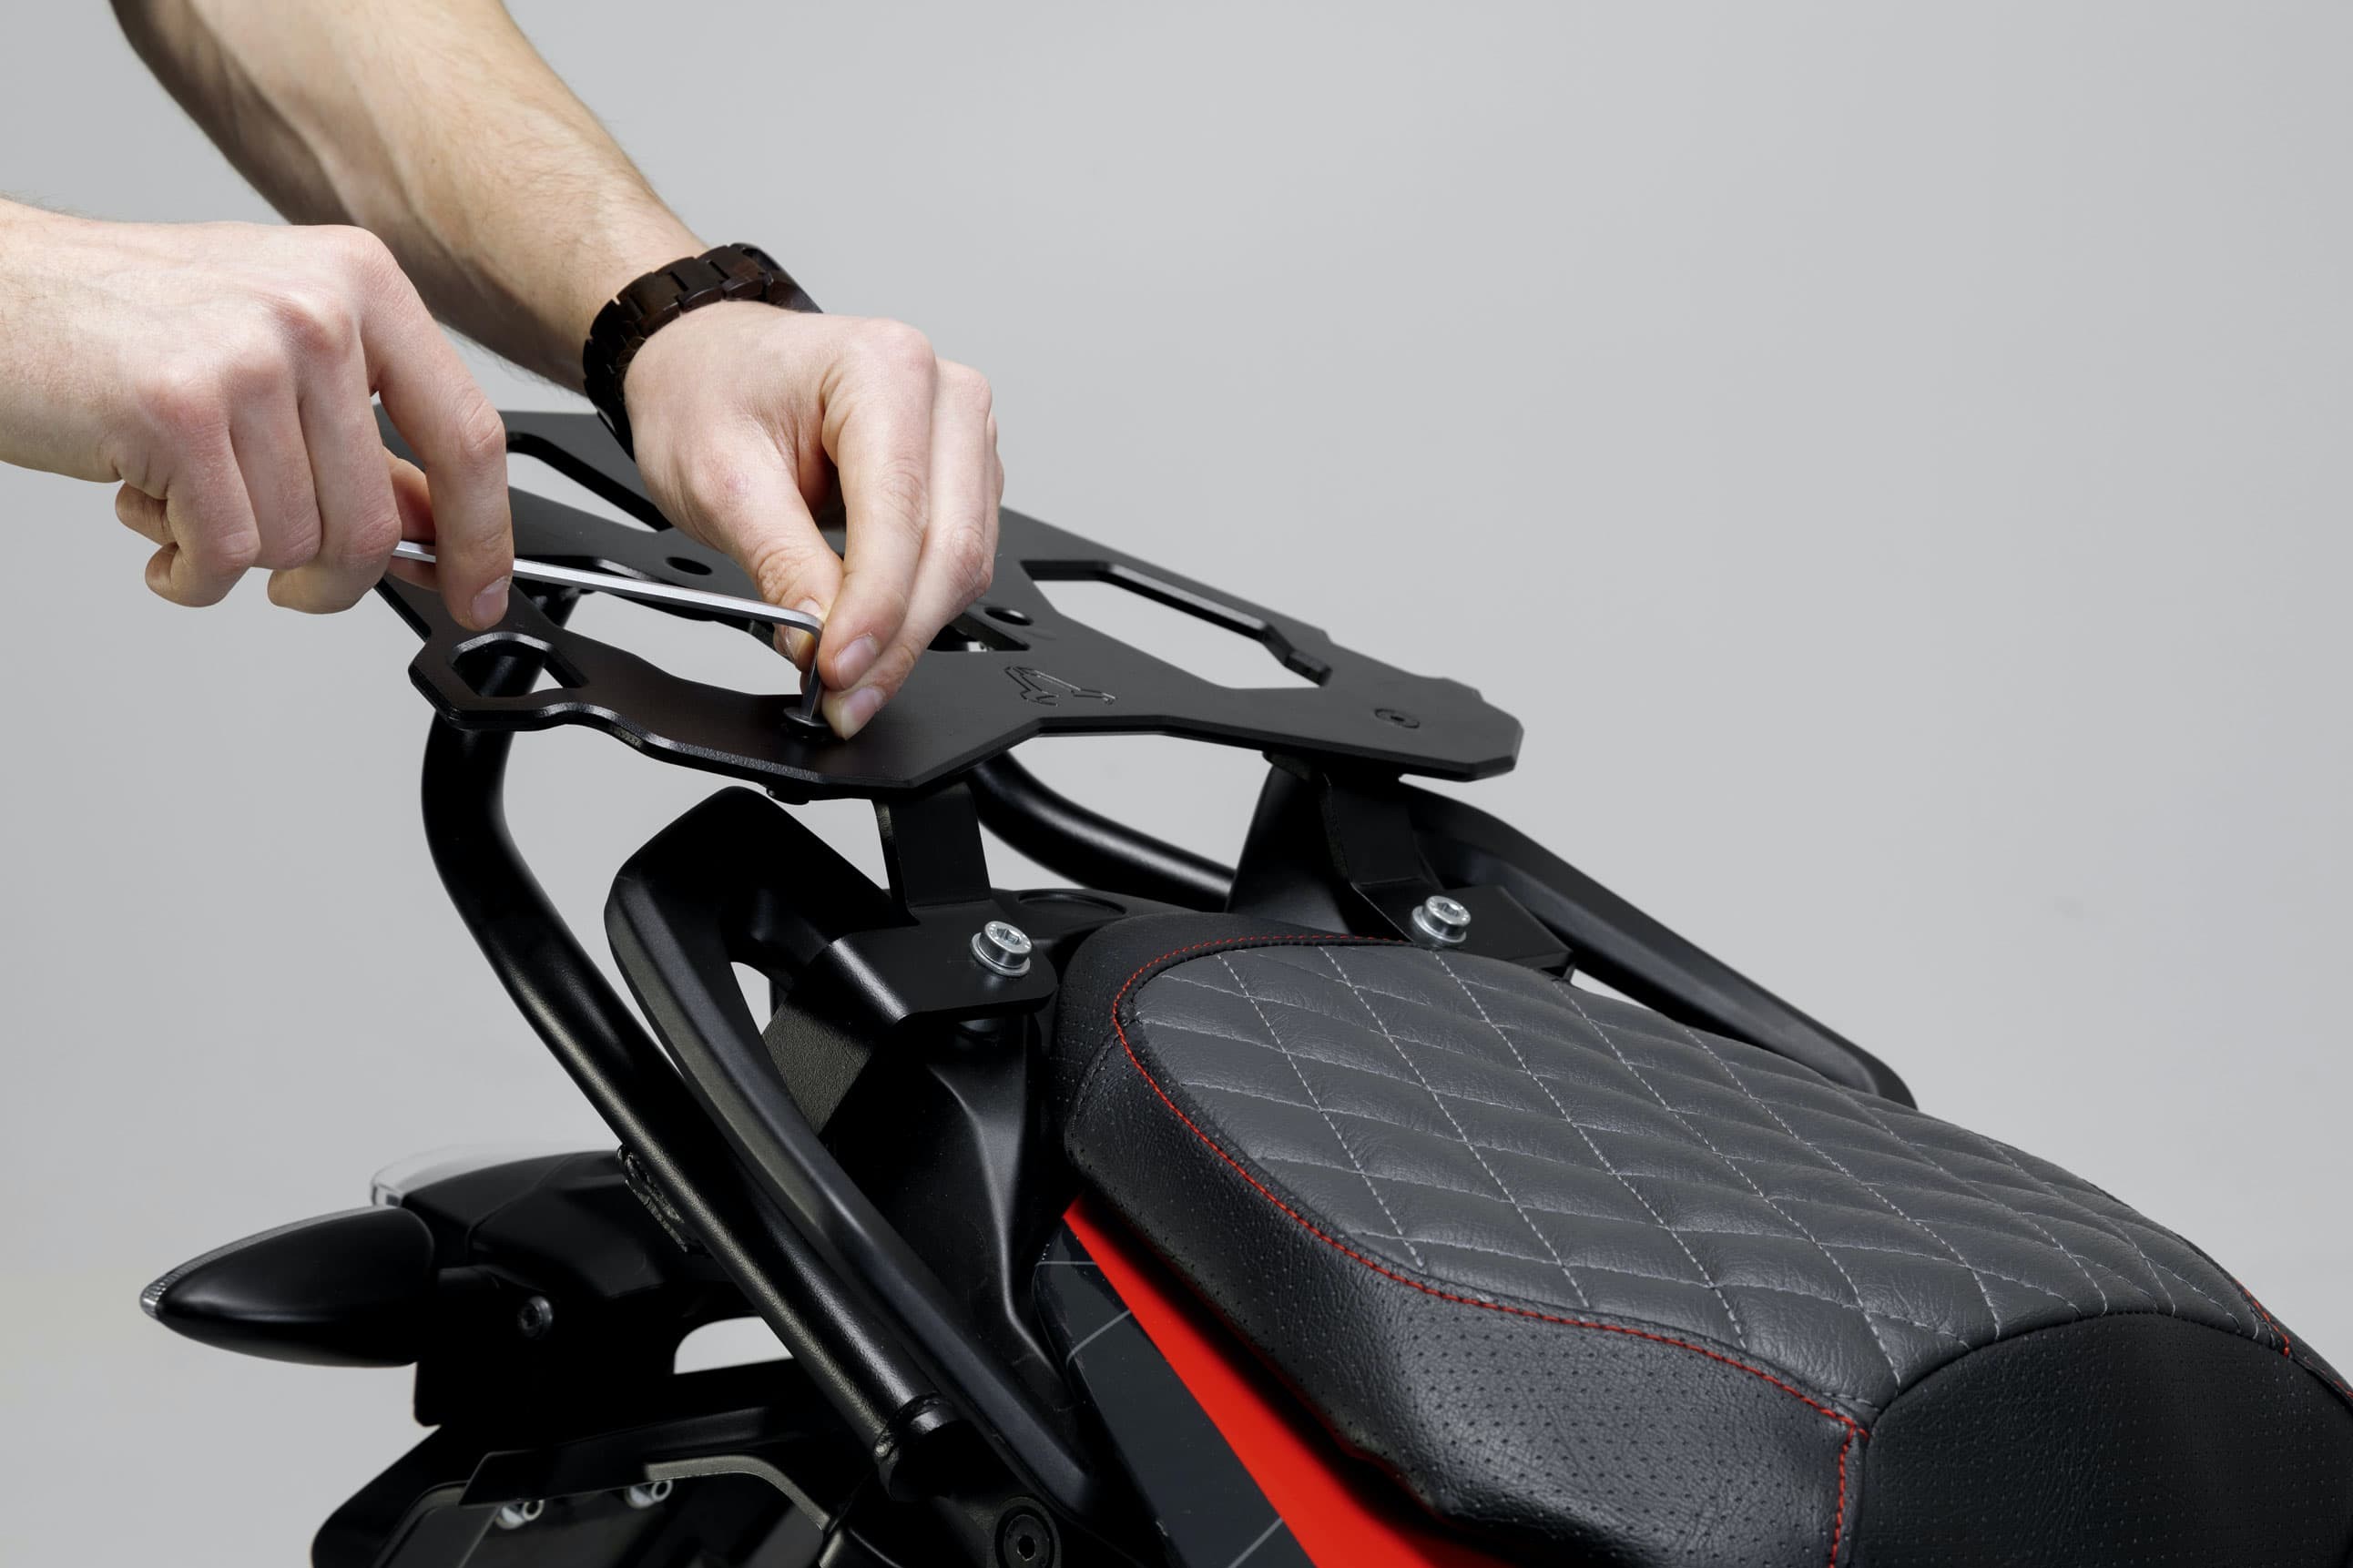
Step 9: Install the ALU-RACK
09 – Install the ALU-RACK
The side carriers can be combined with an ALU-RACK. Check that the carriers are completely stable and there is enough clearance between them and fairings and exhaust system. Installation should take you around 45 to 60 minutes. Then you can test the amazing flexibility you have gained with the EVO Luggage Rack. Just click cases and carriers on and off – and hey presto, in seconds you have a touring bike! If required, you can replace one of the quick-lock fasteners with a lockable anti-theft device. A screw kit for installing the luggage rack permanently is also available.
Quick-lock system
Quick-lock system
The EVO Luggage Rack is equipped with a quick-lock system. When the locking bolt is turned, the disc springs are tensioned (bayonet fitting).
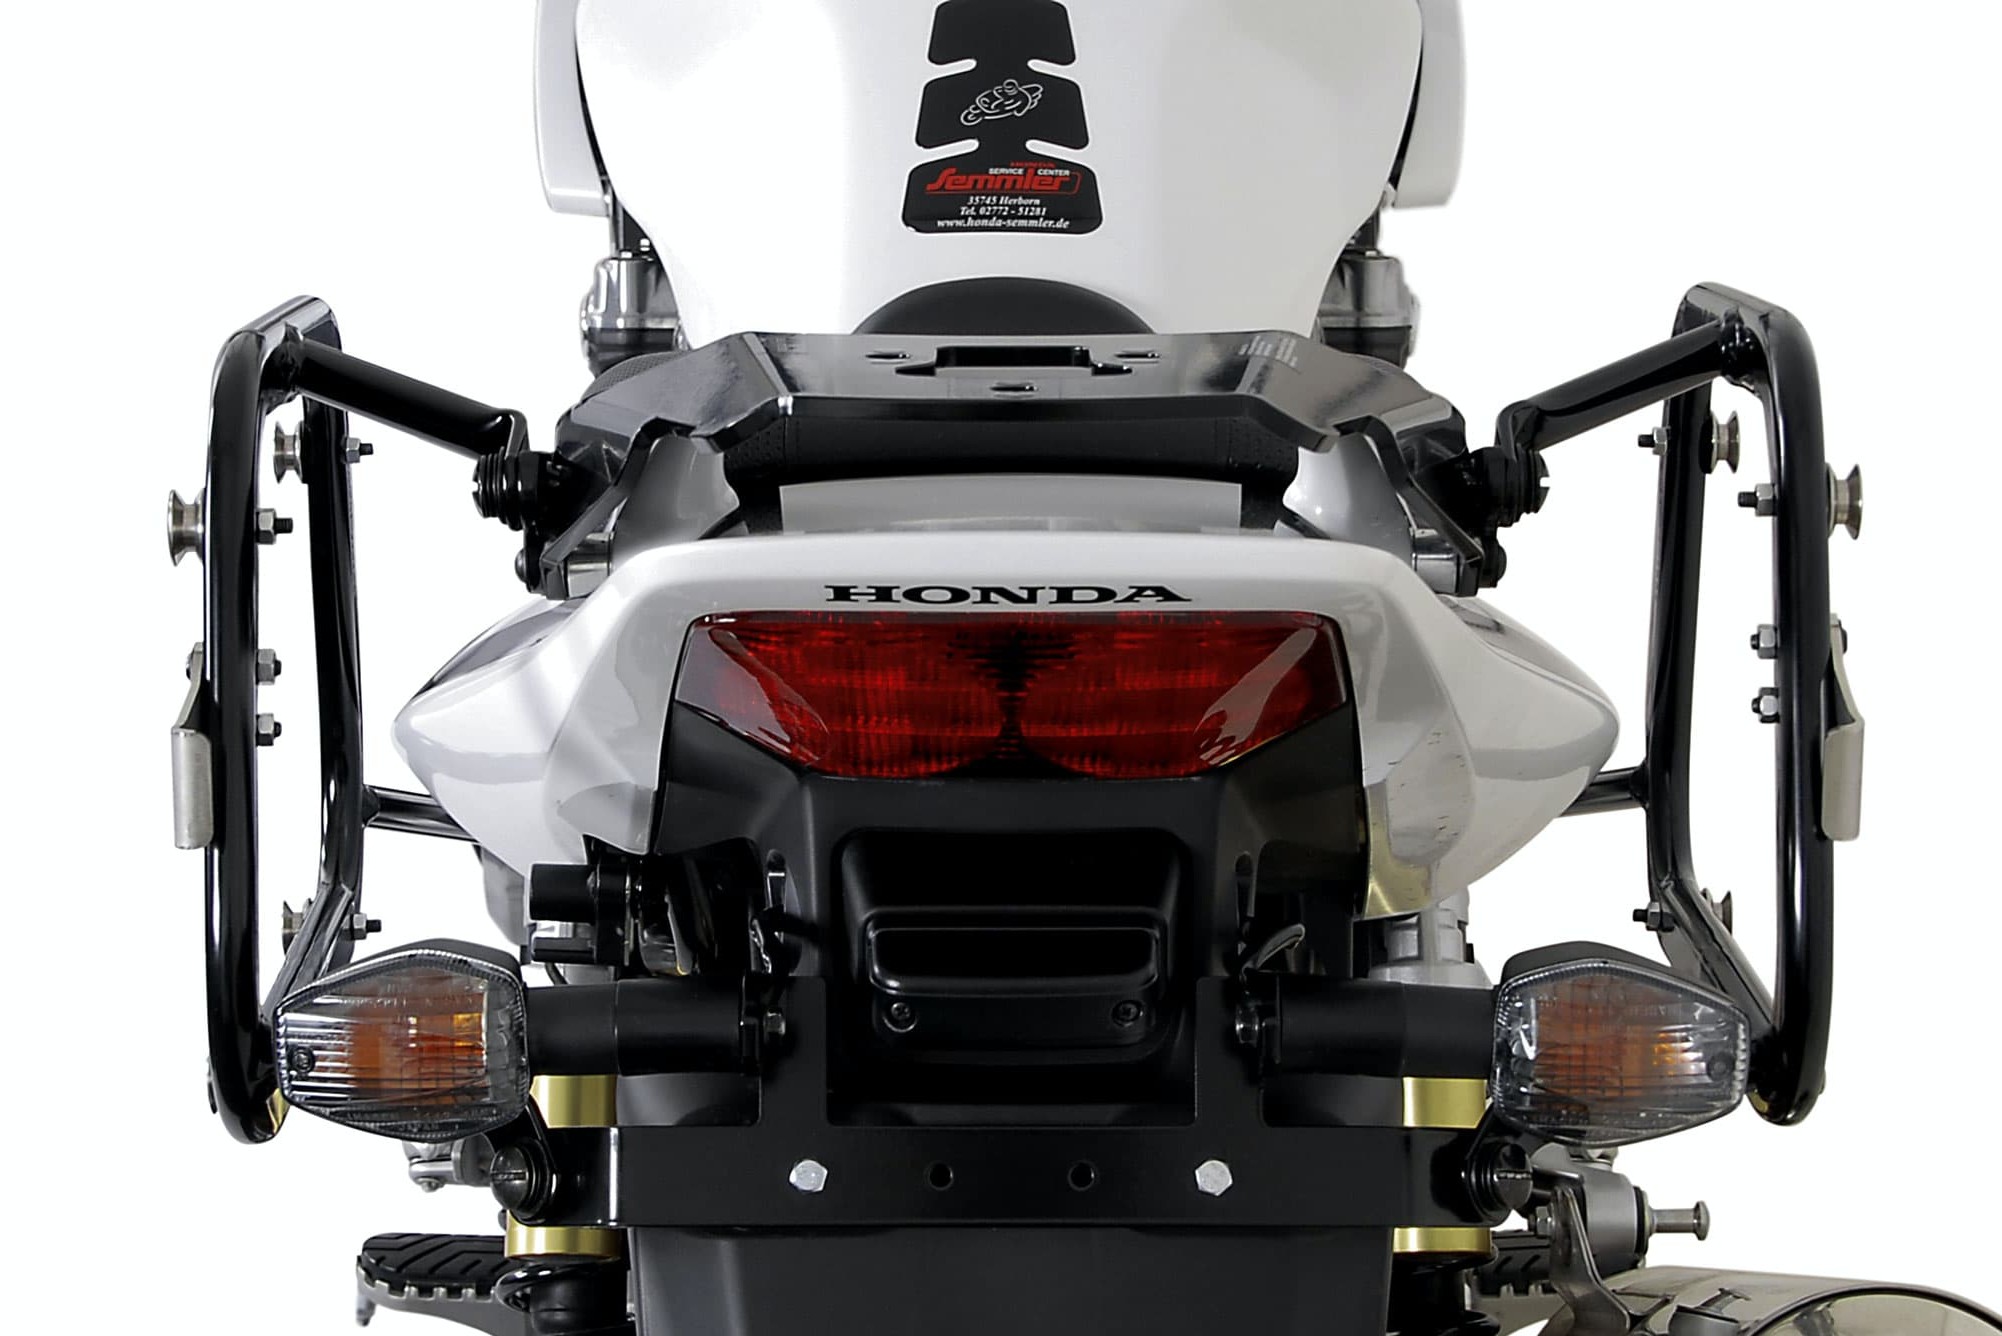
Cross-connector and relocating turn signals
Cross-connector and relocating turn signals
The cross-connector should always be installed last. Click the cross-connector into position to determine the exact securing point on the mudguard. On many older bike models, there is no specific position on the mudguard for the license plate, in which case you will need to drill two holes in the mudguard, as for securing the license plate. The cross-connector serves to brace the left and the right side carriers against each other, thus giving the complete system the necessary rigidity. This is why the manufacturer does not permit attaching only one side carrier to the retaining brackets. You might think that a plastic mudguard is not strong enough for this purpose, but in actual fact the mudguard only serves as an additional attachment point. And in the event that you need to relocate your turn signals, the cross-connector often acts as the new securing point. However, this is not the case with the model shown on the left (CB 1300). Likewise, the BMW S 1000 XR does not require the turn signals to be relocated.
Load capacities
Follow the case manufacturer's specifications for load capacities. The luggage rack specialist SW-Motech states the permitted load on the product itself and/or in the installation instructions. Generally speaking, the permitted load is higher for side carriers than for top boxes. This is because a side carrier distributes the load more efficiently to the motorcycle frame. Top boxes should normally be used for stowing away clothing and helmets, while the side cases are suitable for heavier items and additional luggage.
The Louis Technical Centre
If you have a technical question about your motorbike, please contact our Technical Centre, where they have endless experience, reference books and contacts.
Please note!
These tips for DIY mechanics contain general recommendations that may not apply to all vehicles or all individual components. As local conditions may vary considerably, we are unable to guarantee the correctness of information in these tips for DIY mechanics.
Thank you for your understanding.


