Steel-braided brake hoses for motorcycles
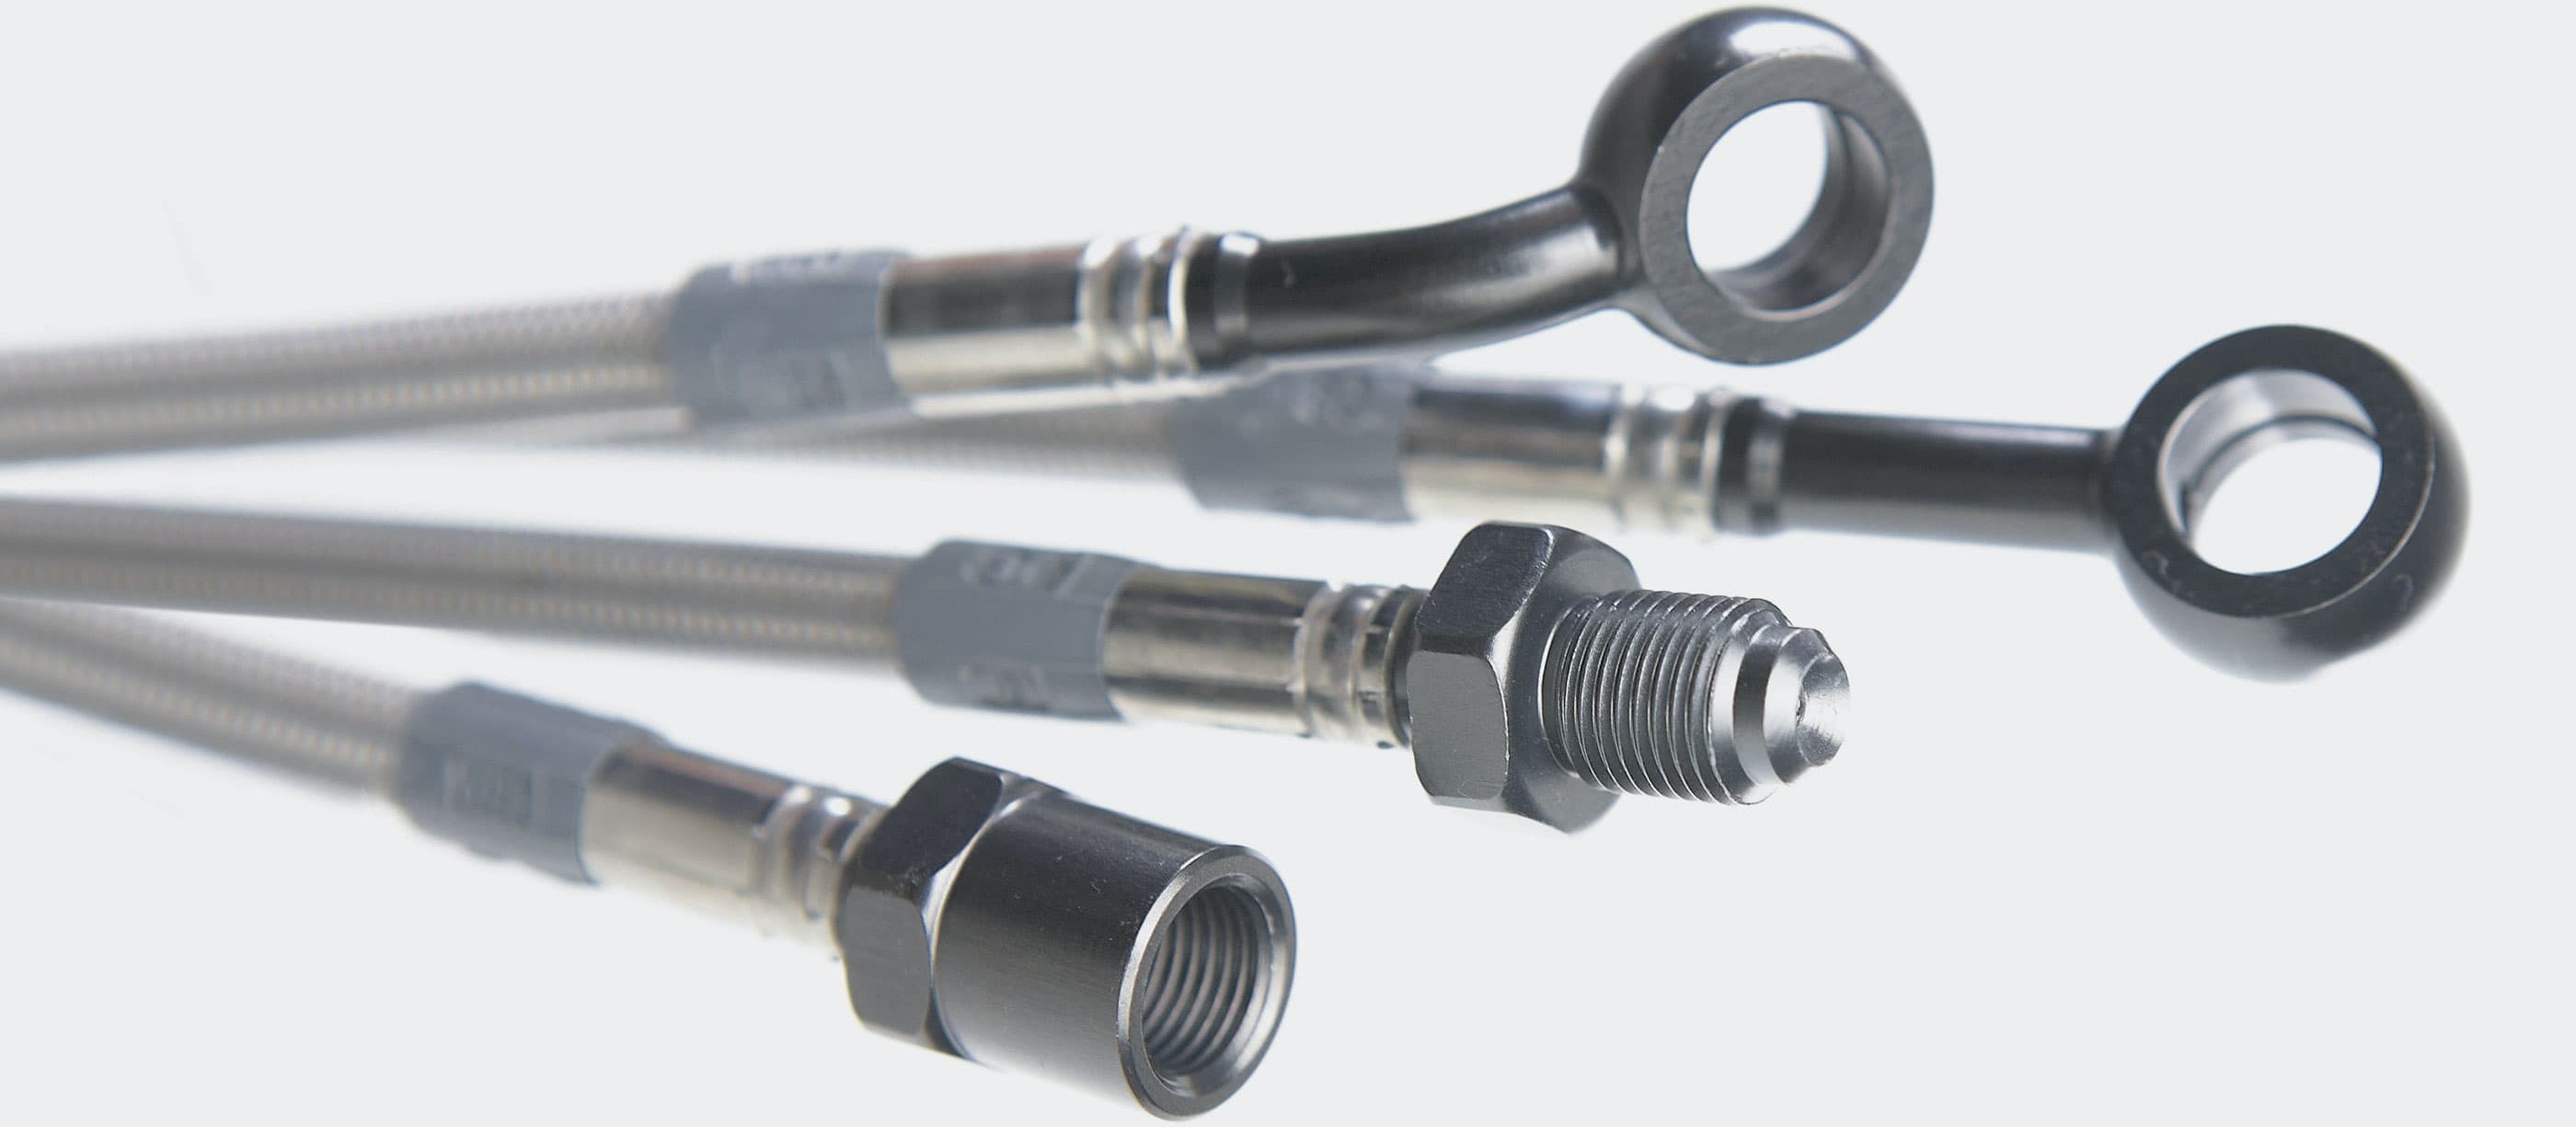
Improved braking performance, better braking control: steel-braided brake hoses are one of the most useful improvements you can possibly make to your motorbike – irrespective of whether your aim is to shave a few seconds off your lap times on the race track, or to be safer riding on the open road.
Note: The videos are in German.
- Installing steel-braided brake hoses – now let's get started
- 01 – Siphon off brake fluid
- 02 – Drain brake fluid
- 03 – Compare brake hoses
- 04 – Tighten banjo bolt with torque wrench
- 05 – Prime and bleed
- Our recommendation
Important: Key essentials for any work on your braking system are a good degree of experience, absolute safety awareness and a clean workplace. So if this is your first time, it's really important to get the help of a professional.
Installing steel-braided brake hoses
Some bikers are always eager to get lots of extra horsepower by spending a fortune on tuning parts – and all to show their friends that they can burn rubber faster than them. But they forget one thing: at the end of every straight stretch of road there's always a bend – and all that horsepower is no use if your bike is about as responsive as a freight train when you need to slow down. So here's a bit of genuine tuning that won't make a hole in your pocket: steel-braided brake lines.
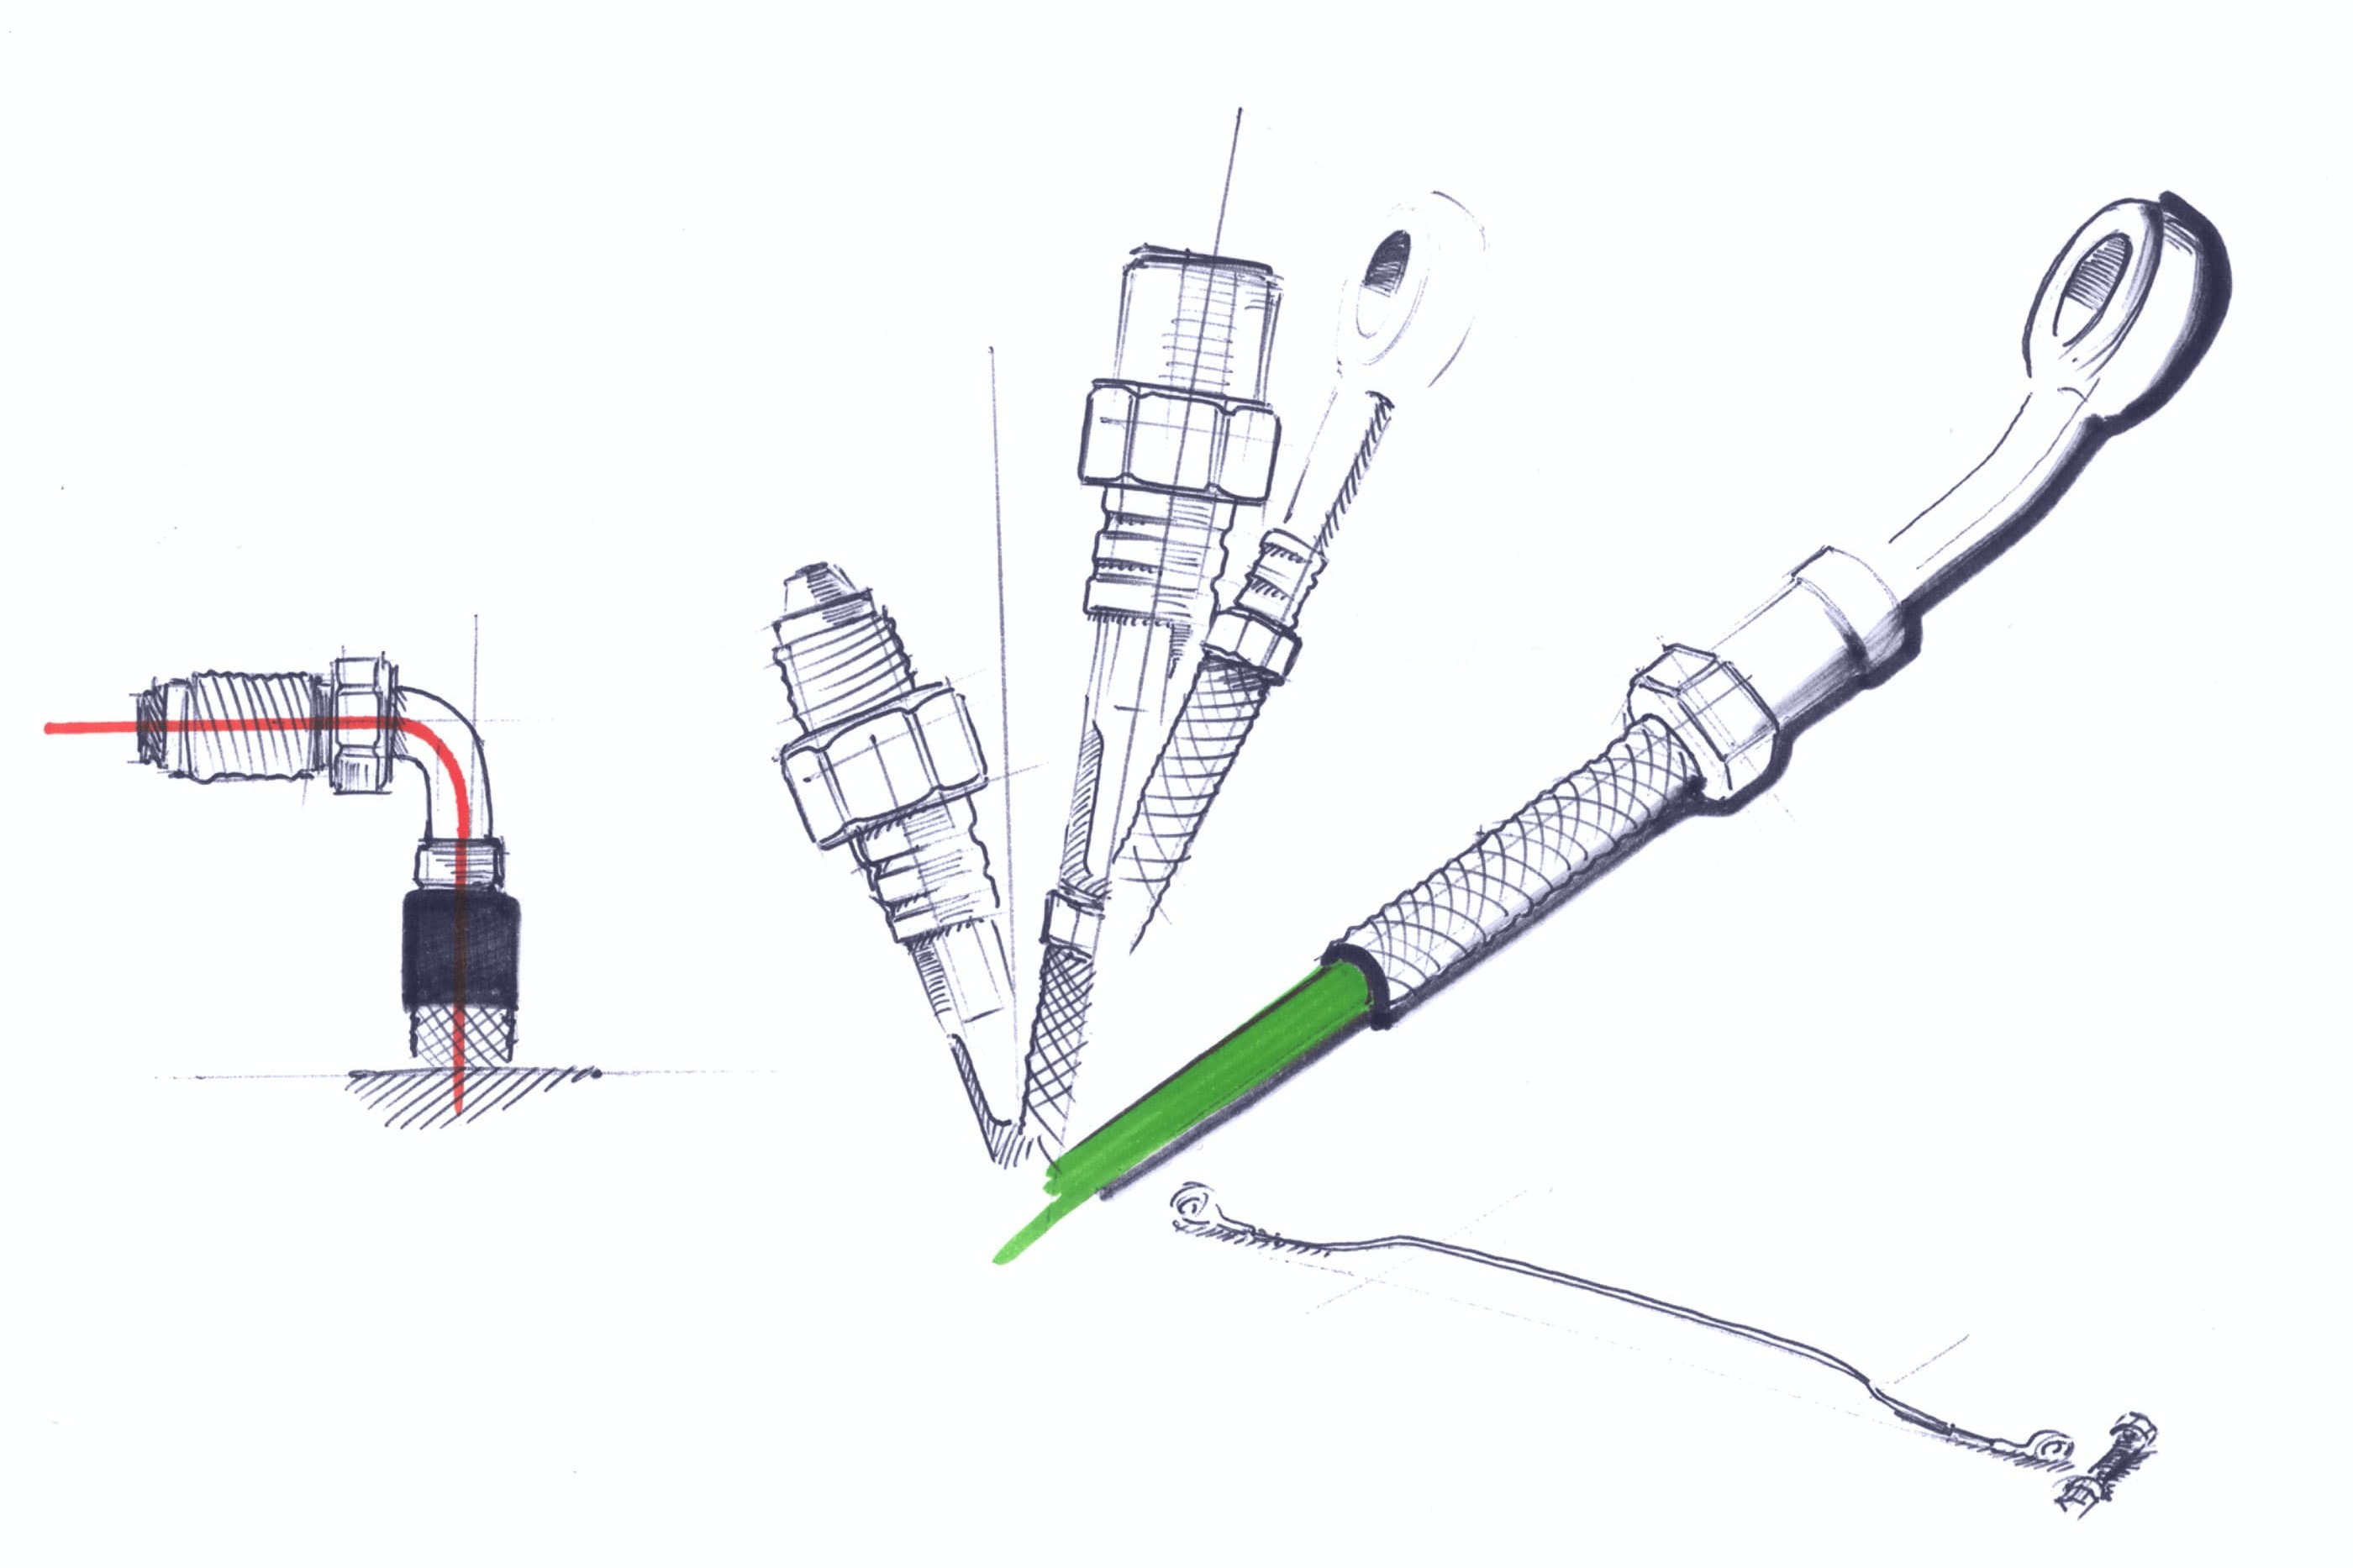
At first glance, they may look like a thinner version of a shower hose, but they're actually steel-braided Teflon brake lines, which – unlike many stock rubber hoses – will not expand under the pressure created when you apply the brakes. This gives you improved brake response and a precise pressure point that you can feel through the brake lever. Steel-braided lines are also resistant to ageing, unlike their rubber counterparts, which tend to become porous after around 5 years and need replacing. Then, if not before, it's time to switch to steel-braid – for enhanced safety, and also because they look a whole lot better!
When changing your brake hoses, you will be working with brake fluid, so you should be aware that brake fluids DOT 3, 4 and 5.1 are corrosive and damage paintwork. Any splashes must be immediately washed off with plenty of water. DOT 5 is silicone-based and not corrosive. Always check the vehicle manufacturer's specifications before buying brake fluid (owner's manual/inscription on brake master cylinder). Also carefully read the safety instructions on the packaging prior to use. Old brake fluid and any rags used must be disposed of correctly at a collection point for hazardous waste!
Installing steel-braided brake hoses – now let's get started
Step 1: Siphon off brake fluid
01 – Siphon off brake fluid
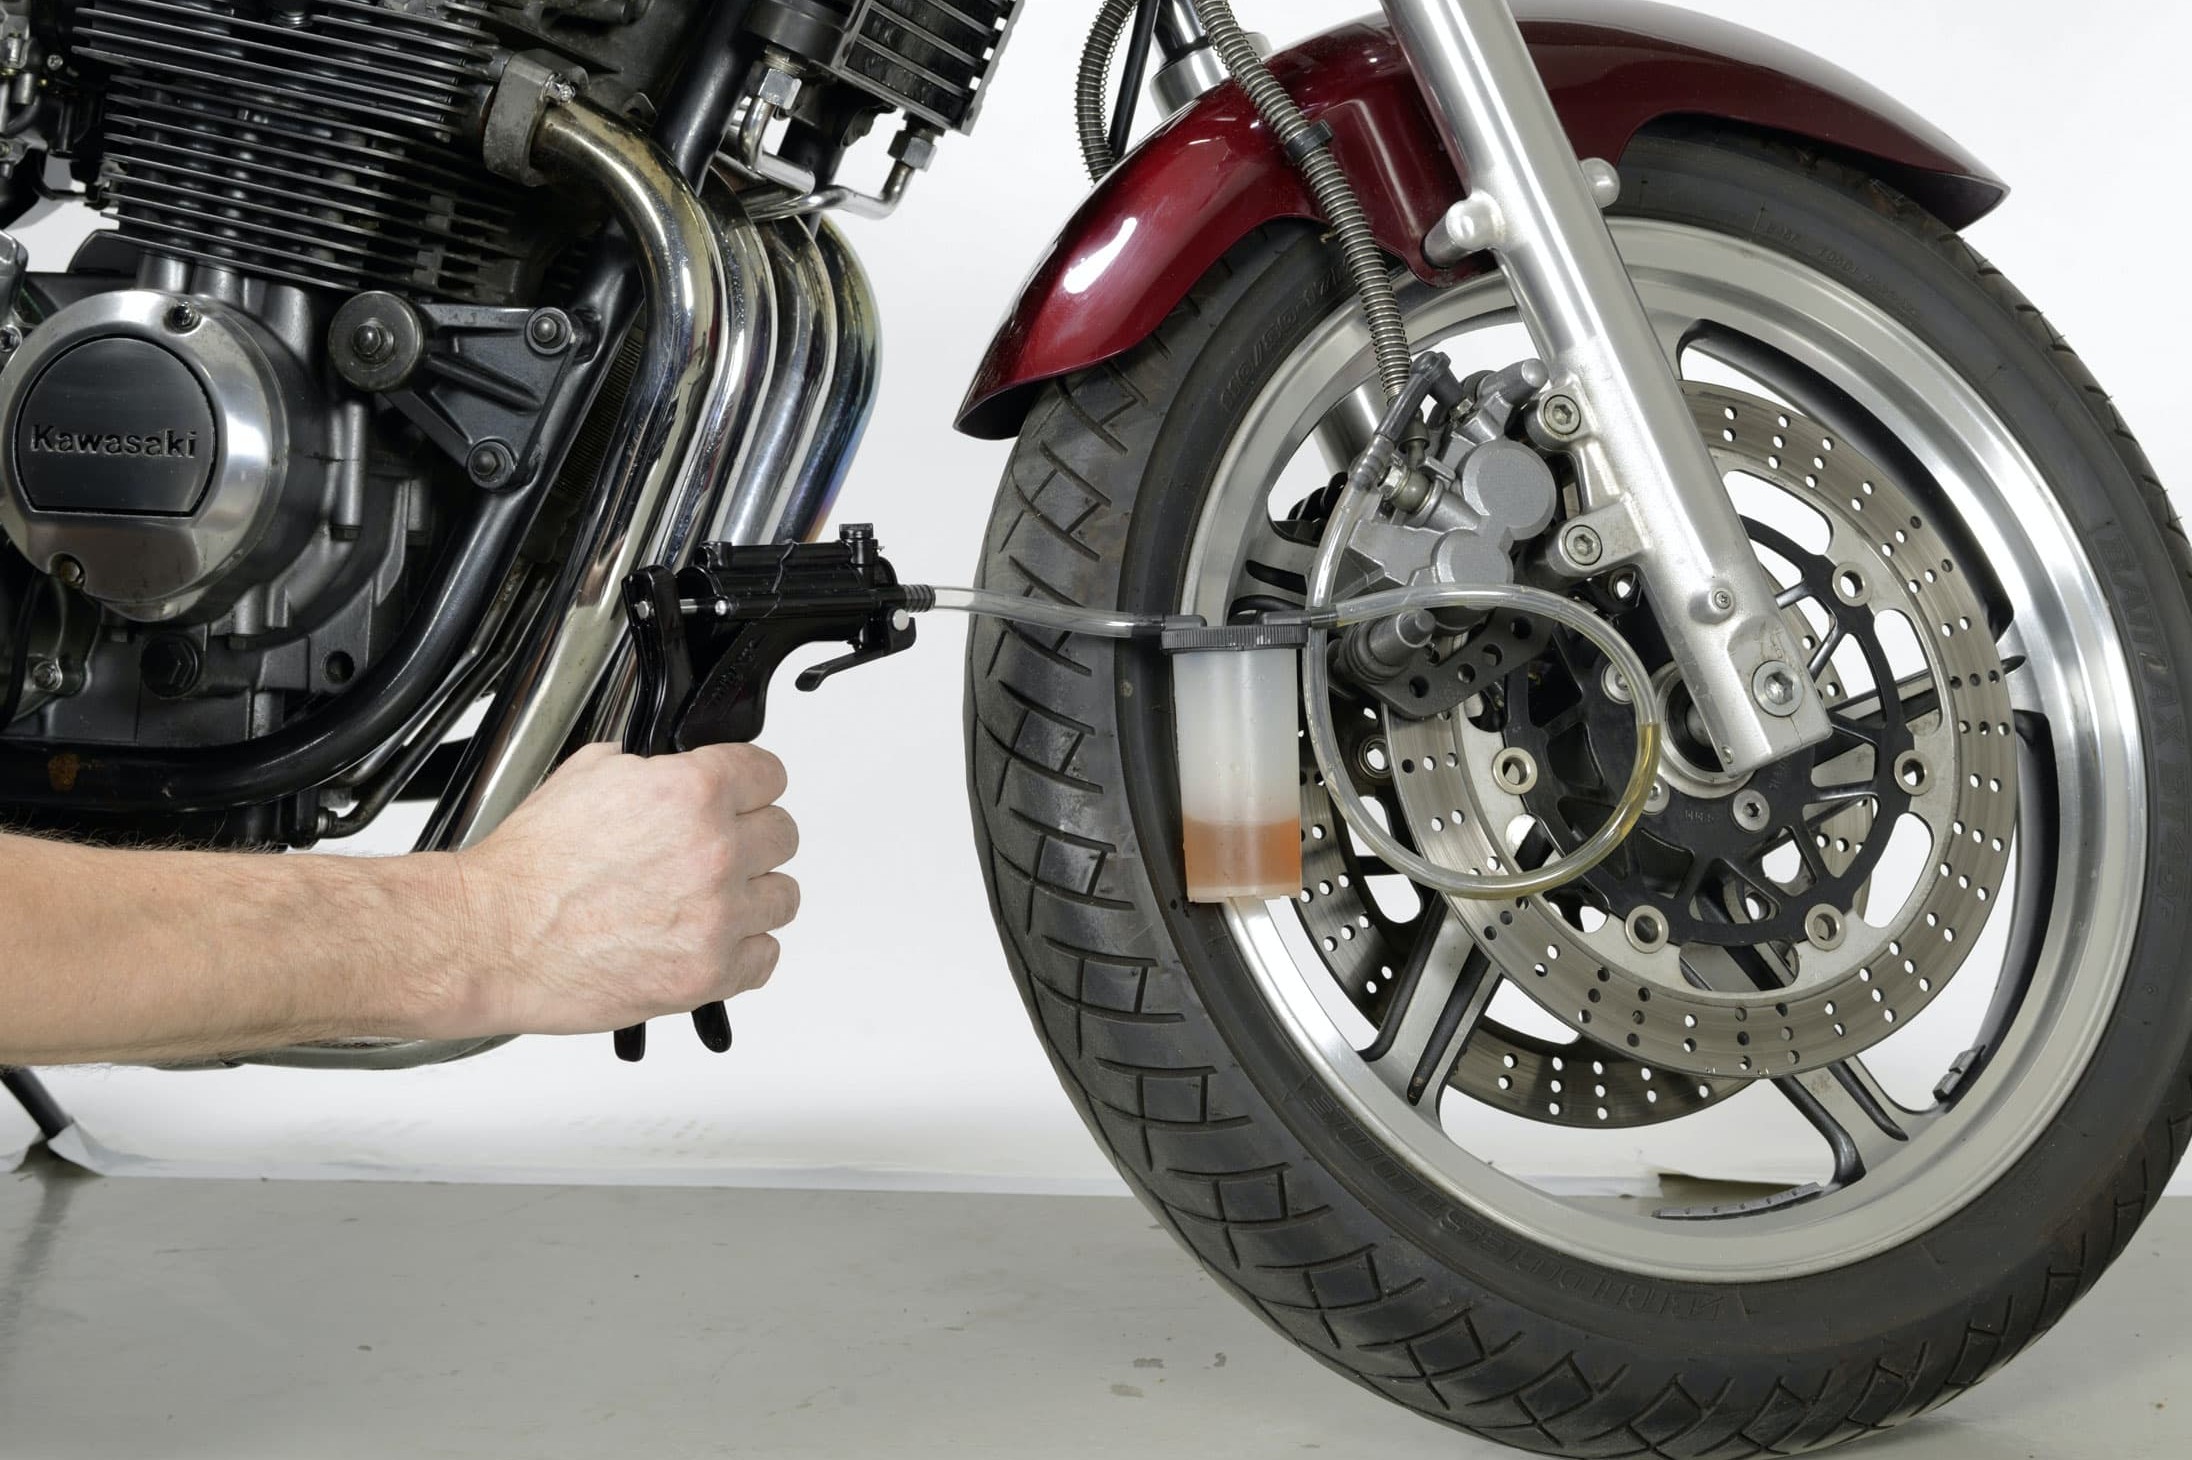
Before siphoning off the brake fluid, place rags over any parts of your motorbike at risk of damage, like the mudguard and fairing. Wear safety goggles to protect your eyes. It's also a good idea to wrap a rag around the reservoir to soak up any splashes. Use exactly the correct size of screwdriver to undo the screws in the cap of the reservoir (they are generally made of very soft metal) and place the cap on a lint-free cloth. You can now siphon off the brake fluid from the reservoir. If you don't have a suction device, you will have to wait a little longer during the next step, or pump with the brake lever.
Step 2: Drain brake fluid
02 – Drain brake fluid
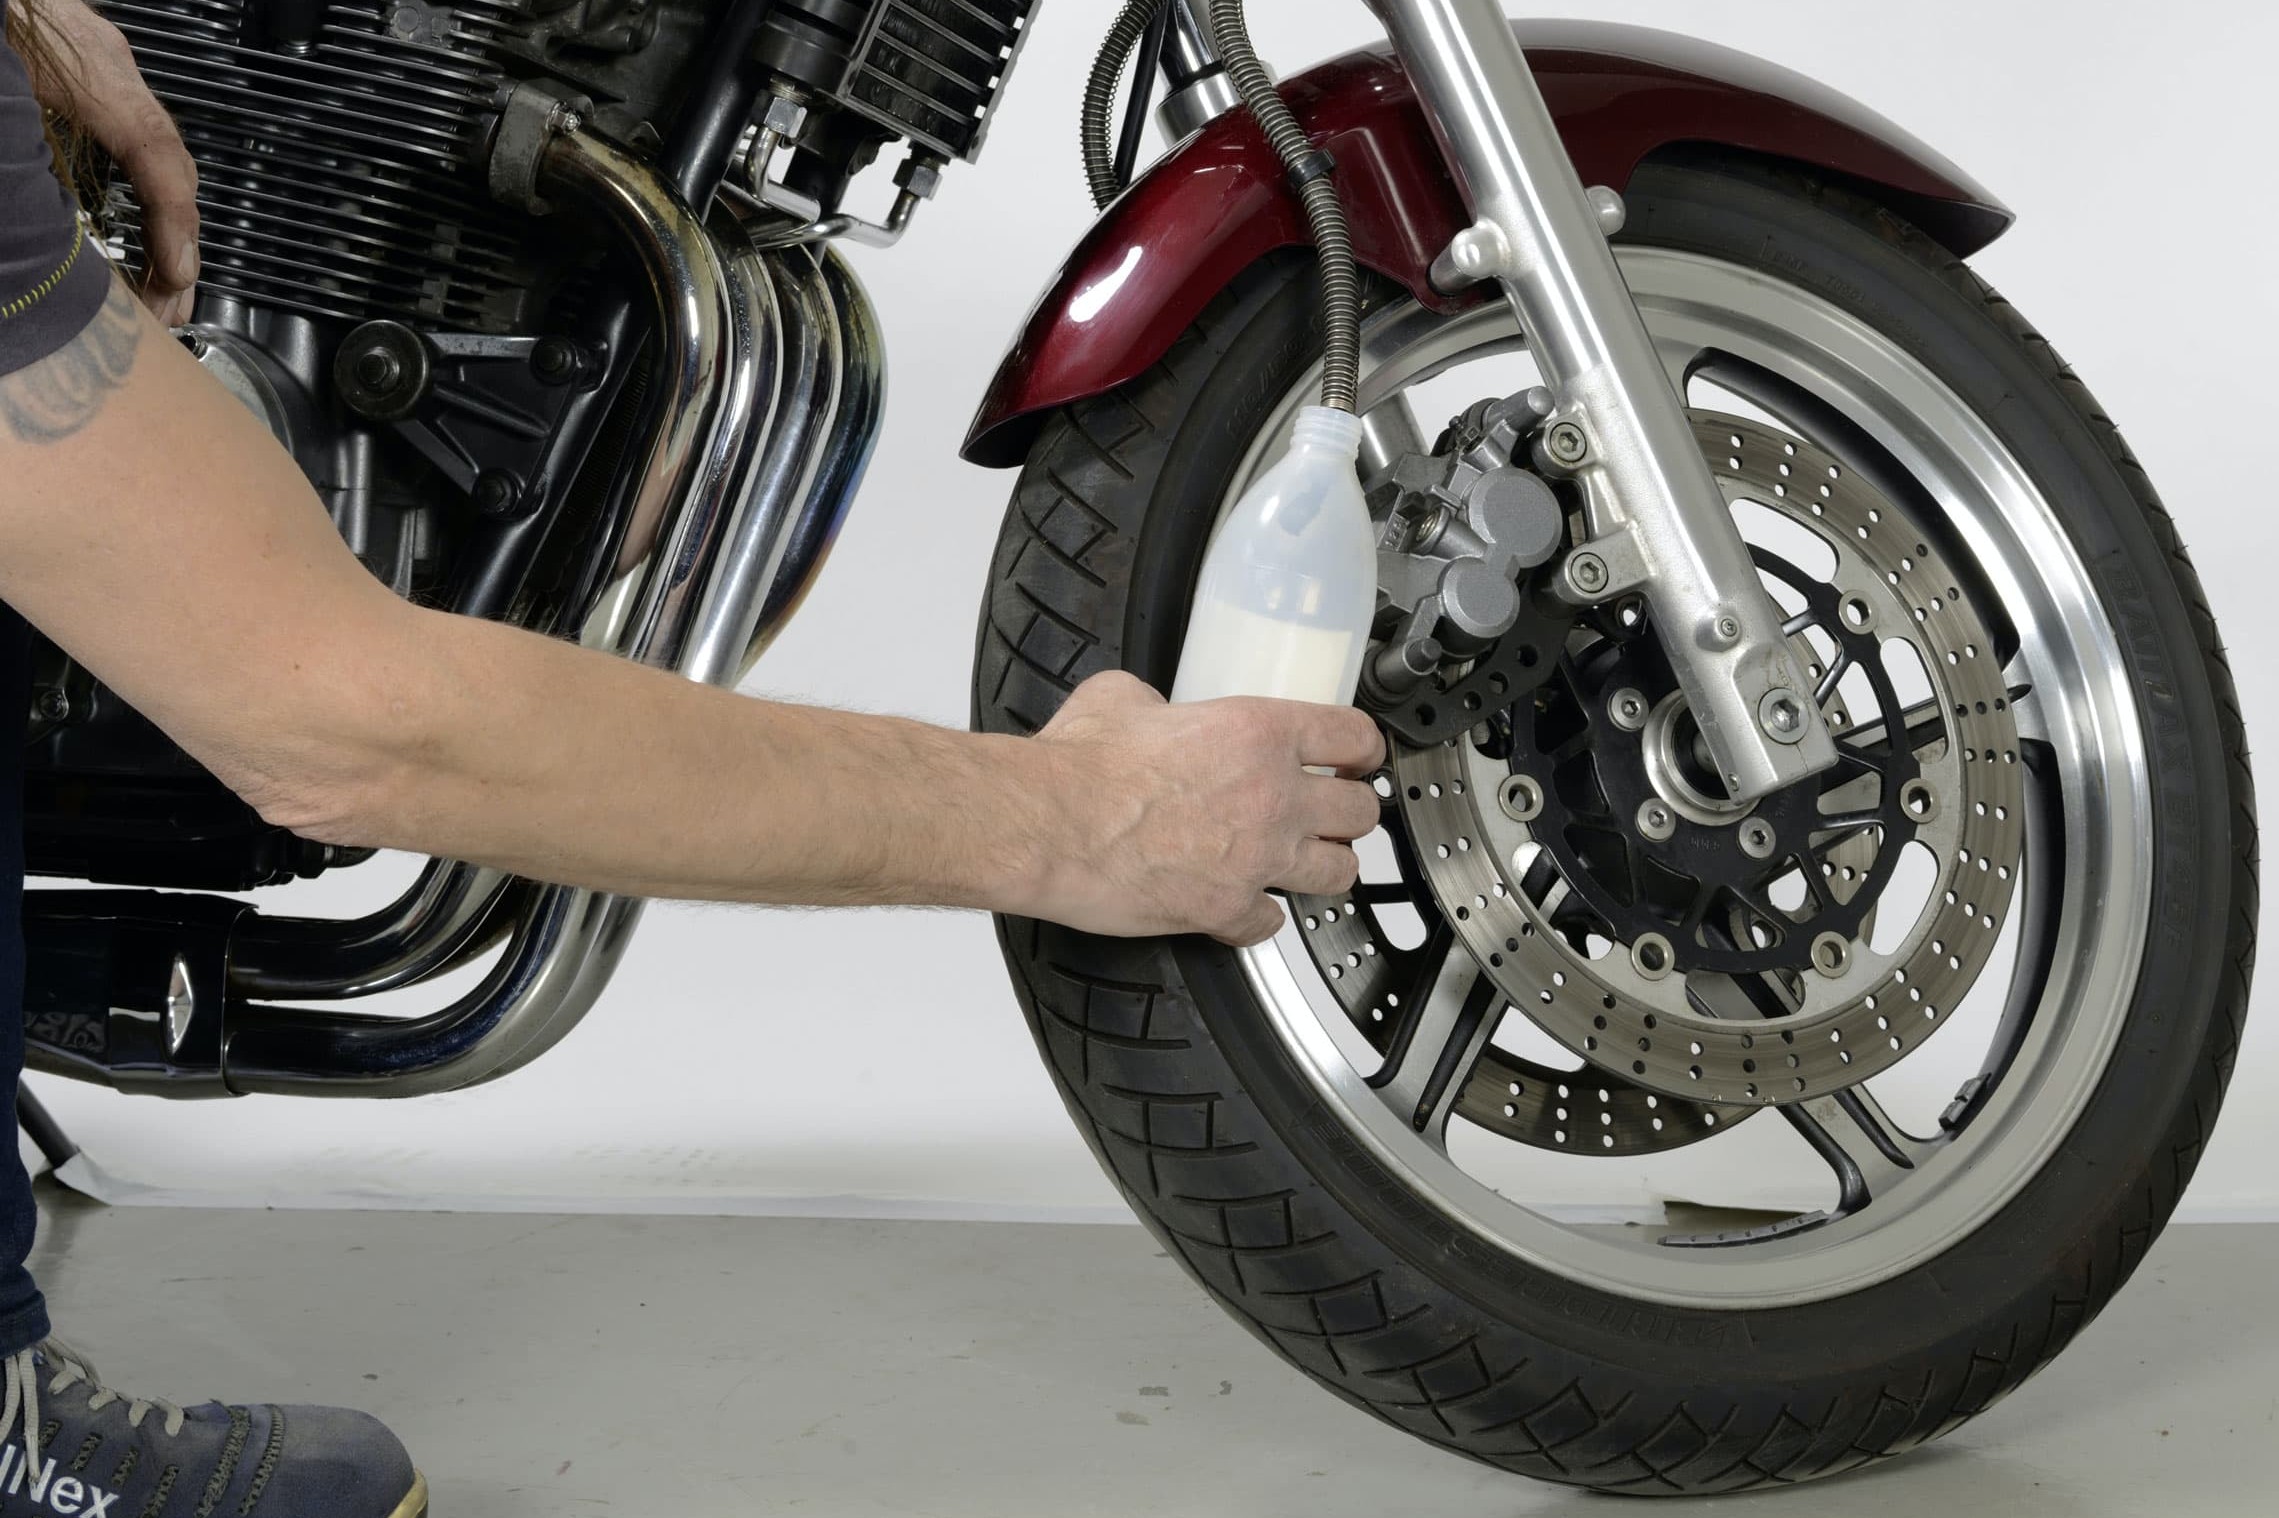
Now detach the first brake line at its lowest point (brake caliper) and place it in an acid-resistant container in order to drain the system. You can speed up this process by pumping the brake lever. If your bike is fitted with two brake calipers (dual disc brakes), you will need to repeat this step on the second brake hose.
Step 3: Compare brake hoses
03 – Compare brake hoses
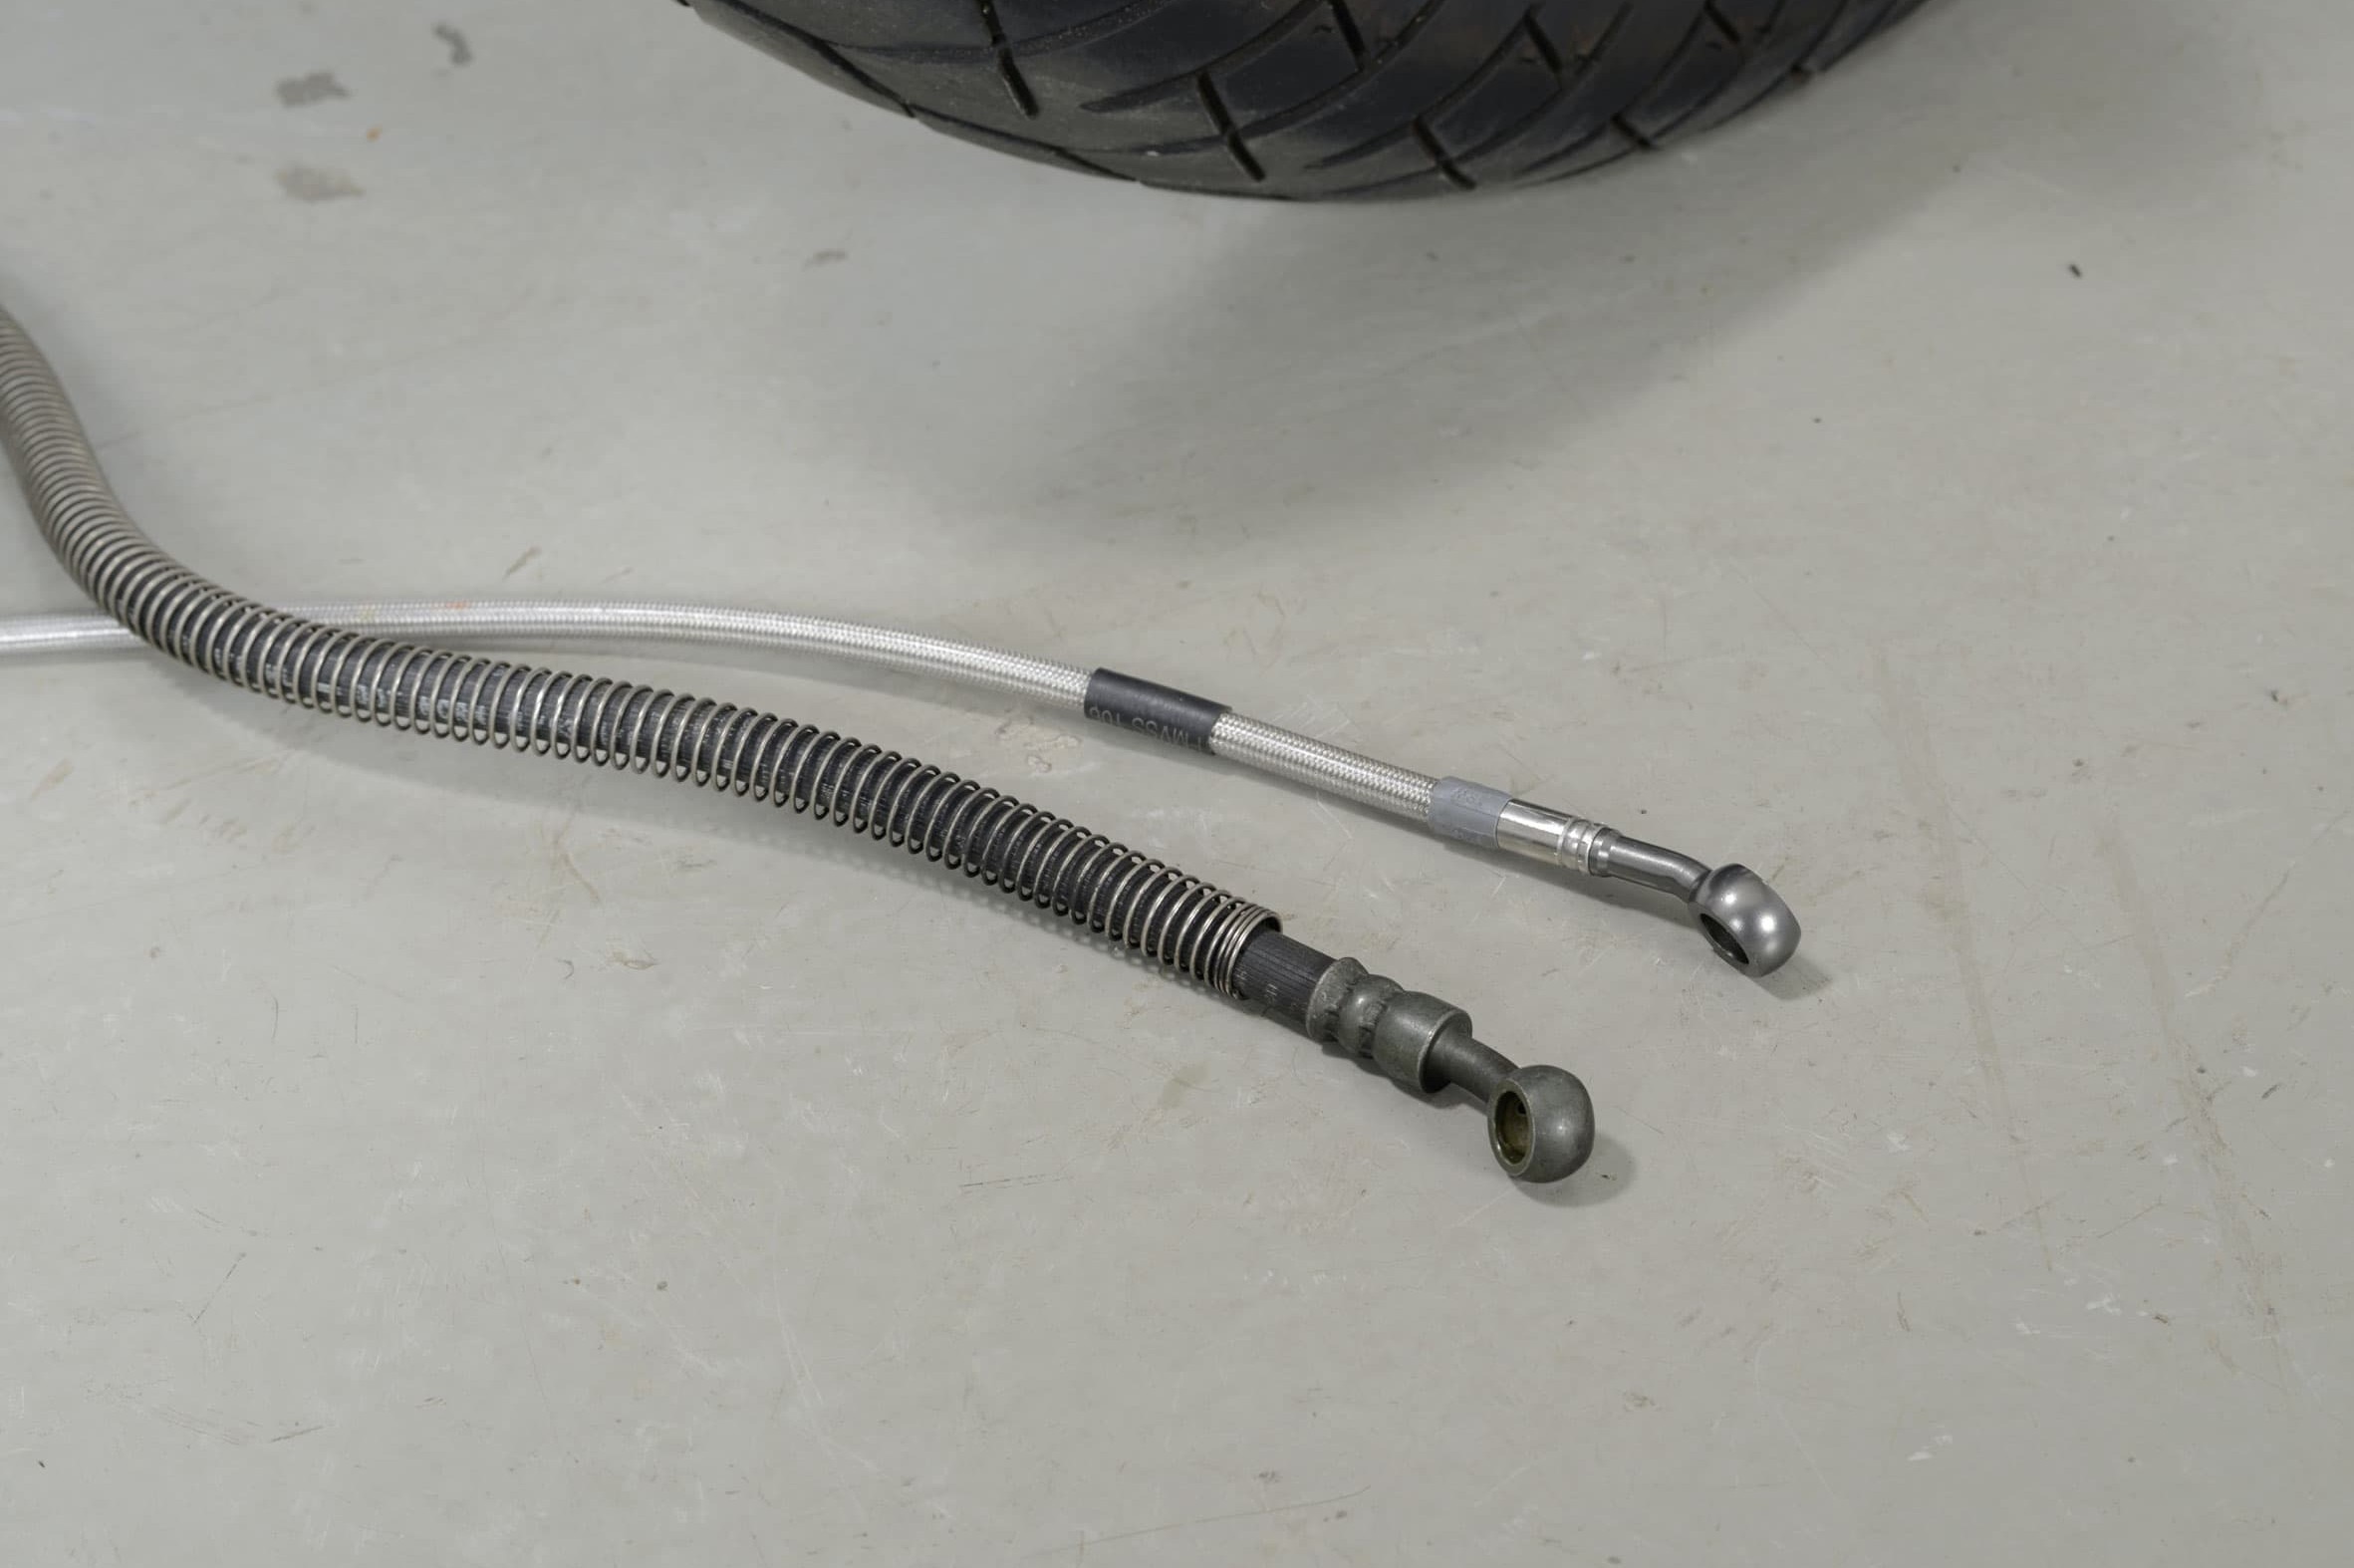
When you're quite sure that the system is empty, unscrew the first hose at the top end and compare it to the new brake hose. Be careful with the old hose because you can guarantee that if it contains a single drop of brake fluid, it will fly out and burn a nice hole in your favourite poster on the garage wall.
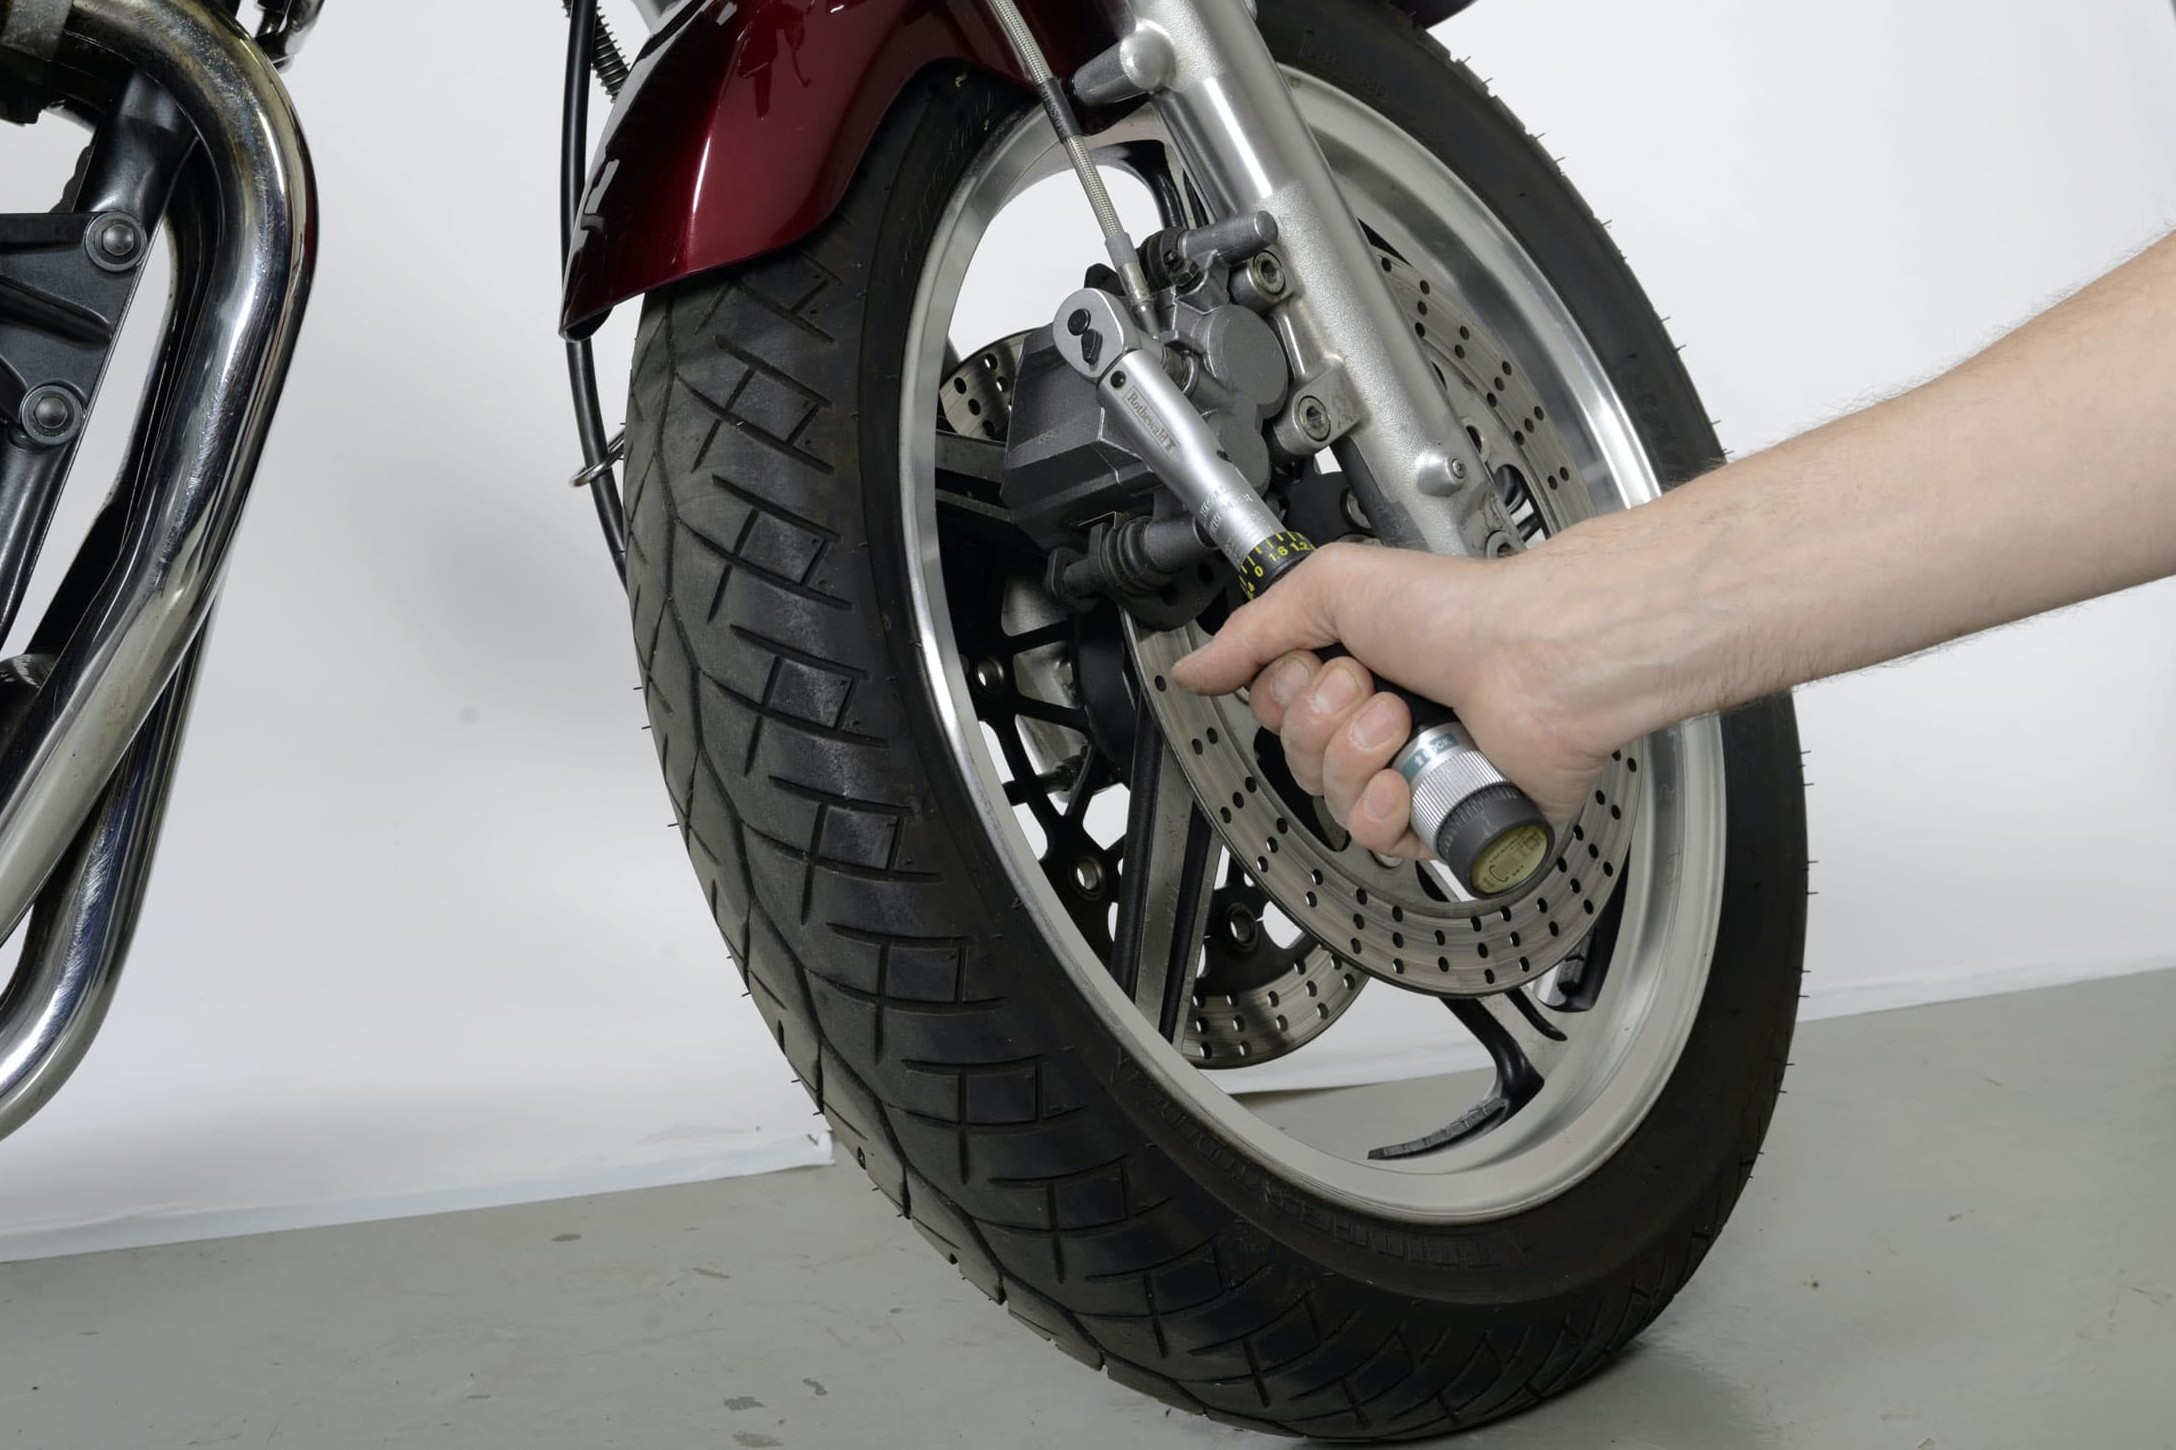
Step 4: Tighten banjo bolt with torque wrench
04 – Tighten banjo bolt with torque wrench
Once you have cleaned the mating surfaces, you can fit the new brake hose and new seals. Always make sure the hose is not twisted or kinked. Route the brake hose in exactly the same way as the old one so that it does not rub or kink when the forks compress. Always tighten and torque all connections to the specifications of the motorcycle or brake hose manufacturer. Anyone who thinks a torque wrench is just for amateurs should think again! Brake calipers and brake master cylinder casings are very delicate parts, so overtightening can cause fractures and hairline cracking. And they're not exactly the cheapest parts to replace. If you're the lucky owner of a bike with dual disc brakes, you can now repeat this last step with the second brake hose, and possibly the shorter, upper line running from the brake master cylinder to the distributor pipe.
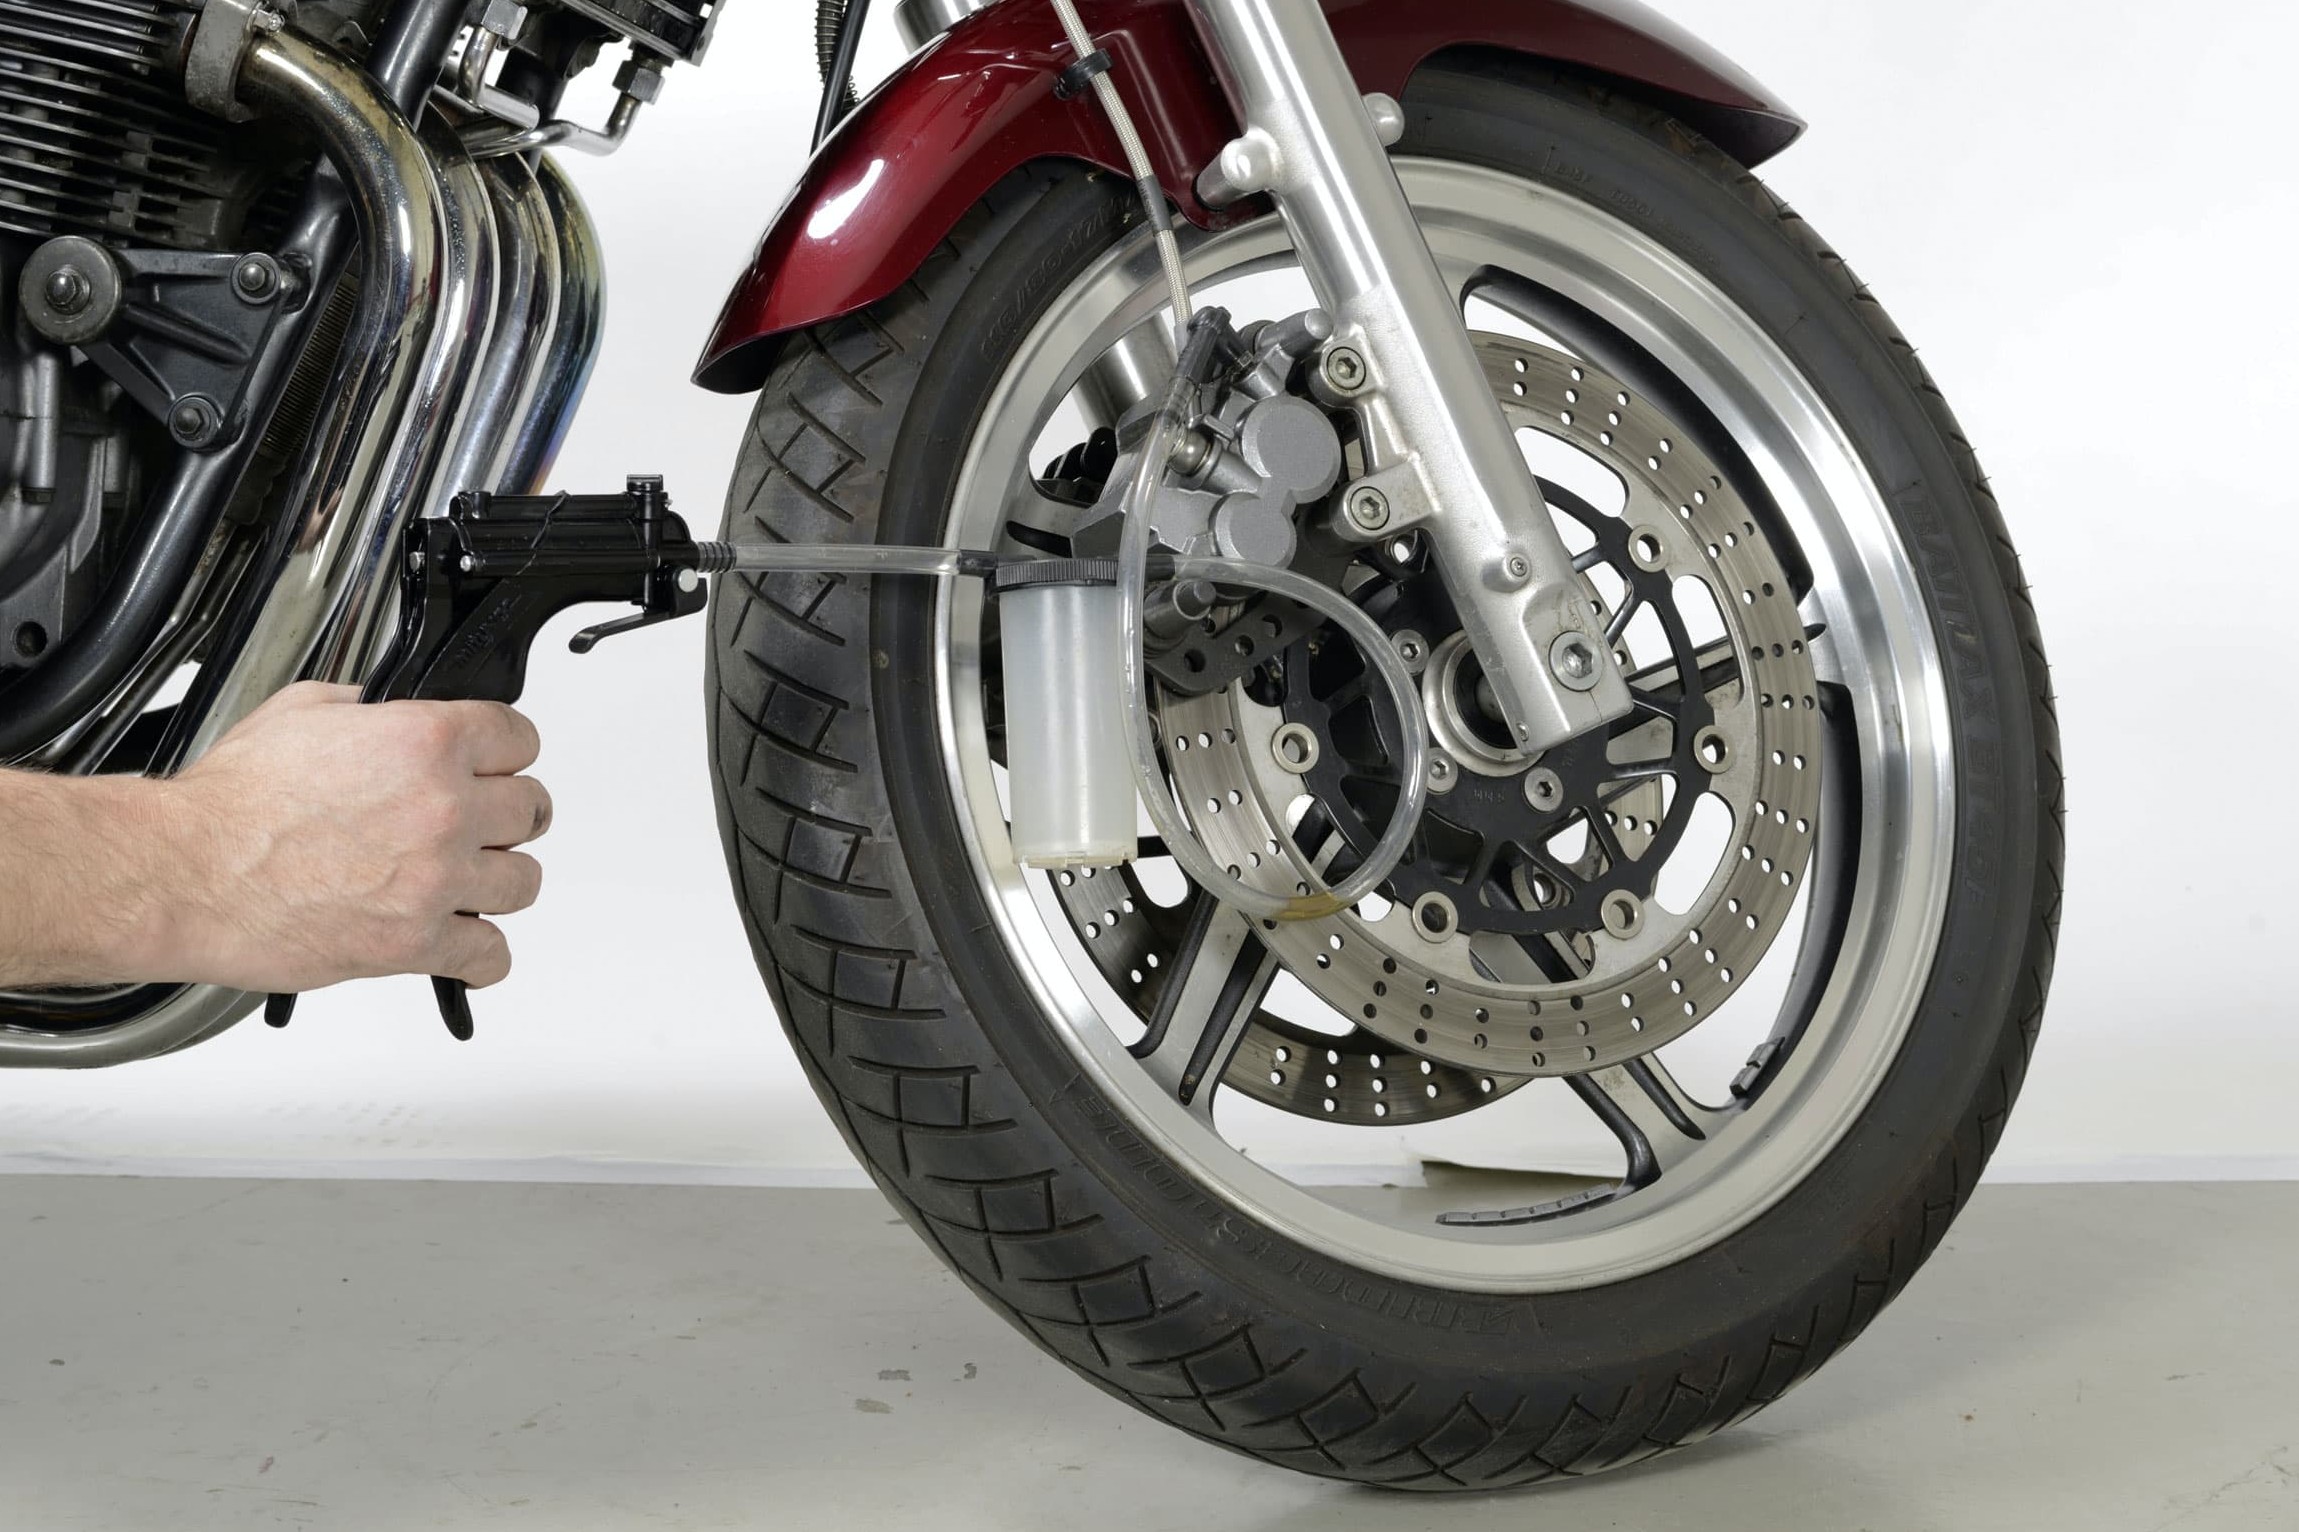
Step 5: Prime and bleed
05 – Prime and bleed
You're now ready to prime (refill) and bleed the braking system. Steel-braided brake lines have a smaller inside diameter, which means that bleeding them isn't always very easy. In fact, without a brake bleeder, it may take you quite a long time, or you may not succeed at all. We therefore strongly recommend using a proper bleeding device like the Mityvac brake bleeder. But if you're reluctant to spend the extra cash – Good luck!
Important: The following is a general step-by-step guide, as each bleeding device comes with its own specific set of operating instructions.
Fill the reservoir with new brake fluid up to the Max. marking, as specified by the manufacturer. Grip the bleed screw with a box-end wrench, attach a transparent hose to the valve and place an acid-resistant container under the hose. Undo the bleed screw by a half-turn. Pump the brake lever/pedal three times. Keep the lever pulled in and close the bleed screw again. Then release the lever. Keeping an eye on the "MAX/ MIN" levels in the reservoir, repeat this procedure until you can no longer see any air bubbles in the transparent hose. Lightly tapping the hose and the distributor with the handle of a screwdriver can help to expel any air in the system.
Do not at any point allow the brake fluid to fall below the "MIN" level in the reservoir – keep it topped up! Once again, if your bike has dual disc brakes, repeat this last step on the second brake caliper. If a brake caliper has two bleed screws, you will need to carry out the bleeding process twice. If, despite numerous attempts, the brake lever/pedal still feels spongy after you close the bleed screw, this may mean there is a leak in the system, or you opened the bleed screw too far, or you need to use a special bleeding device because air is trapped in the system and will not shift. If bleeding was successful, you can now top up the brake fluid reservoir to the "MAX" level and replace the rubber sleeve and cap.
If the brake pads are already slightly worn, do not fill the reservoir right up to the Max. mark, as otherwise there would be too much brake fluid in the system when the pads are replaced. Example: if the pads are 50% worn, fill to halfway between the Min. and Max. marks.
For more on this topic, see Brake Fluid in our DIY tips. ALWAYS carry out a final stationary check to ensure the brakes are functioning properly before riding your bike. The brake lever should have a small amount of travel and then a good solid feel. And now – happy braking ...
Our recommendation
The Louis Technical Centre
If you have a technical question about your motorbike, please contact our Technical Centre, where they have endless experience, reference books and contacts.
Please note!
These tips for DIY mechanics contain general recommendations that may not apply to all vehicles or all individual components. As local conditions may vary considerably, we are unable to guarantee the correctness of information in these tips for DIY mechanics.
Thank you for your understanding.


