Clutch maintenance
The clutch connects the motorcycle engine to the gearbox and ensures that power is transmitted controllably, and without any loss, to the rear wheel. The clutch is therefore a wearing part that requires occasional maintenance.
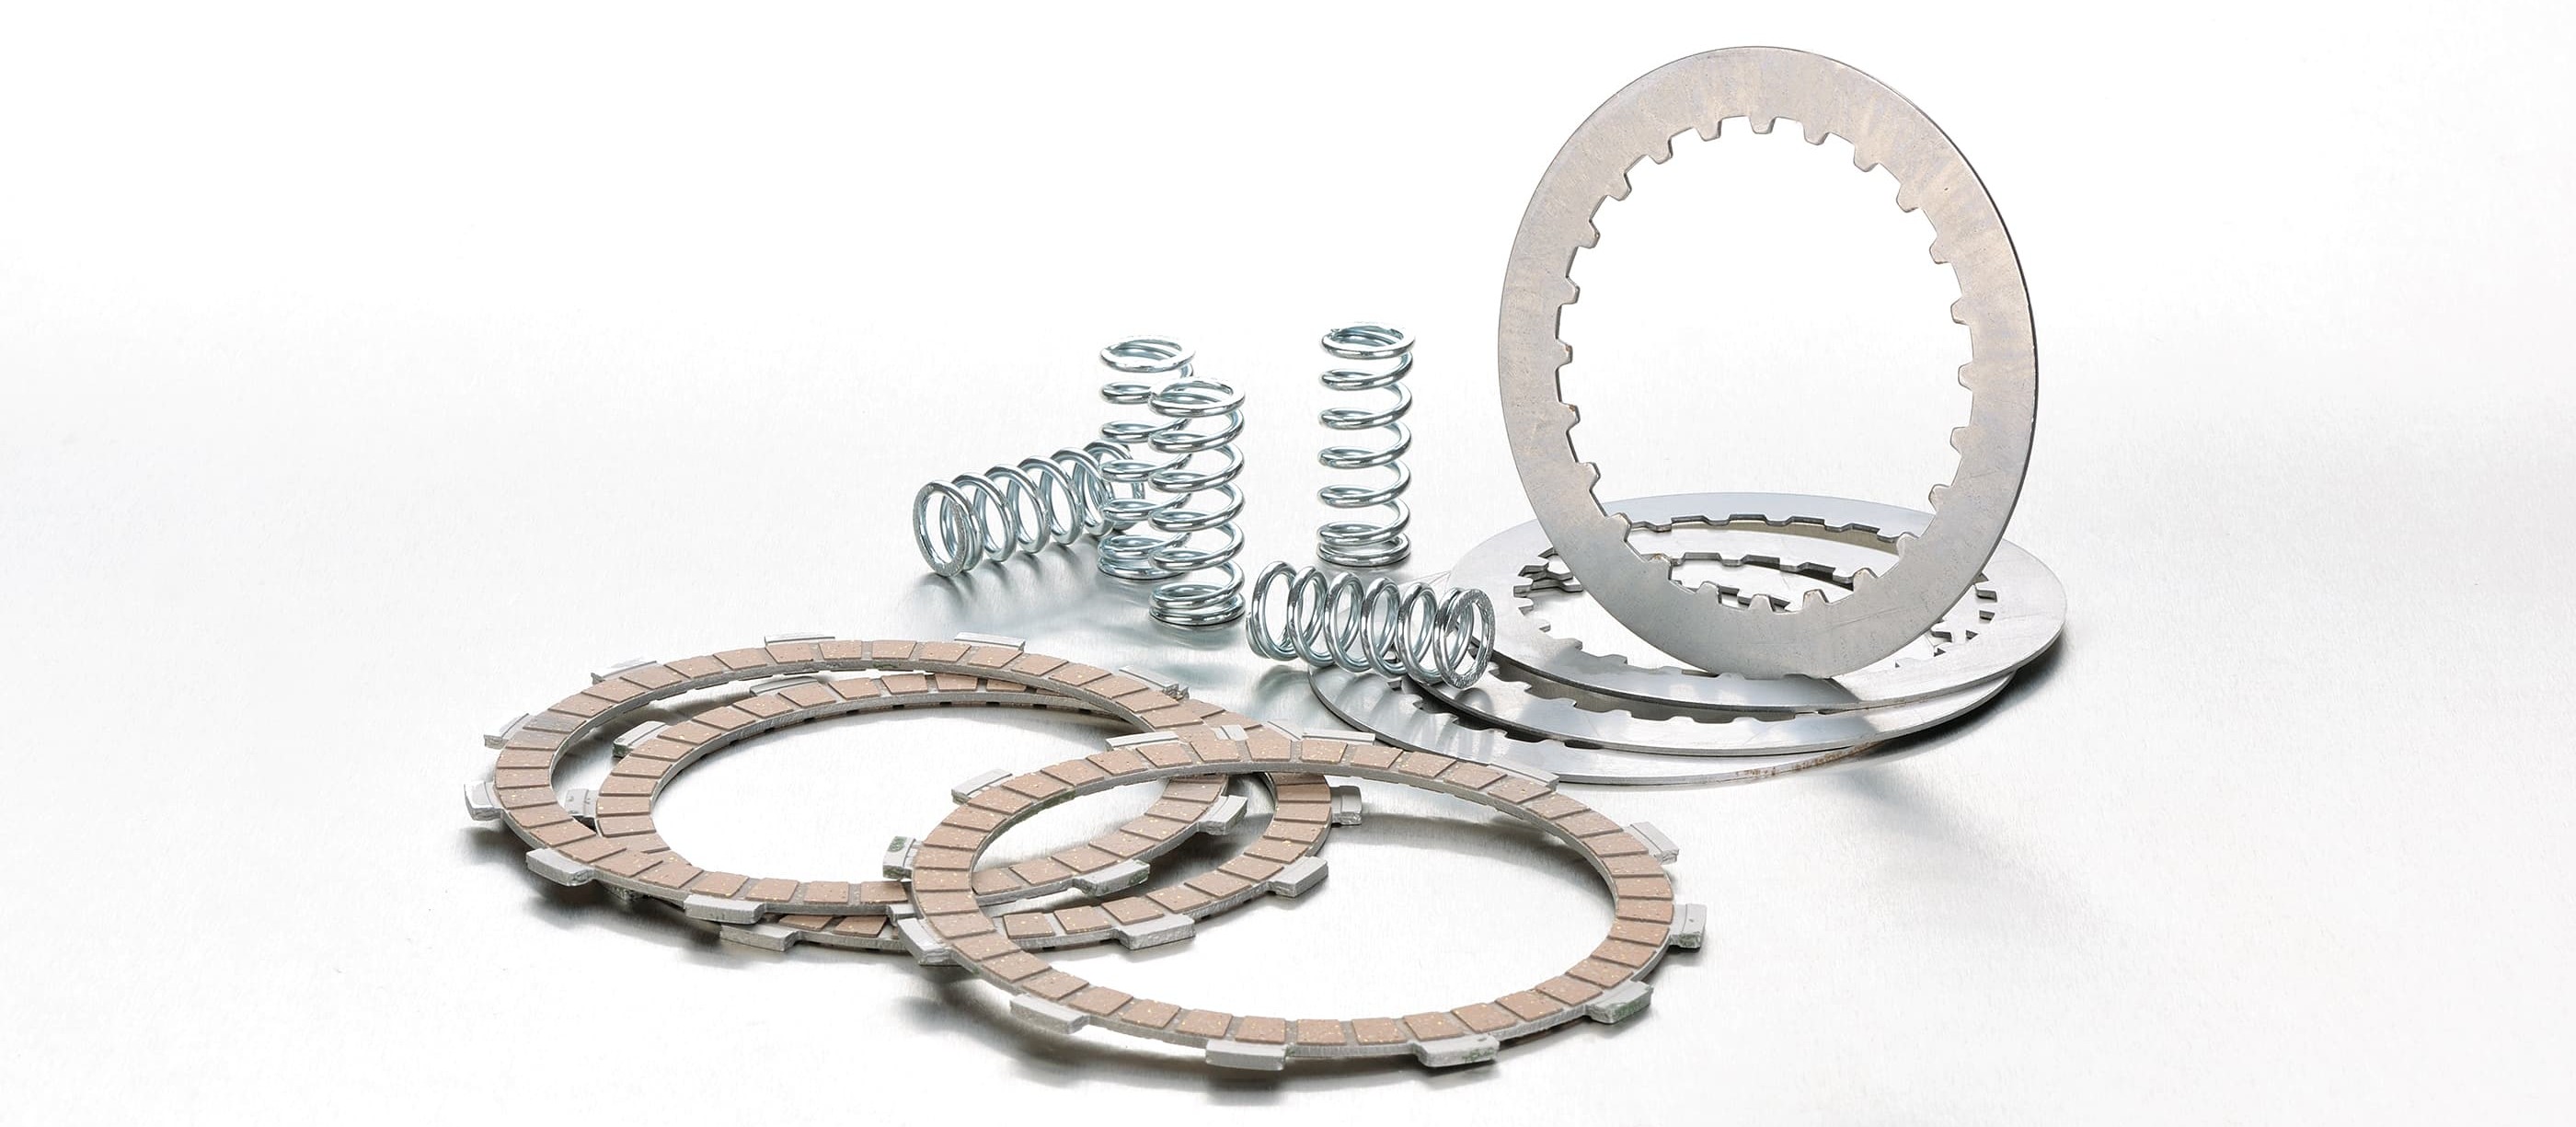
- Maintaining your motorbike's clutch
- Clutch maintenance – now let's get started
- 01 – Have tools ready
- 02 – Undo cover
- 03 – Remove clutch
- 04 – Check parts
- 05 – Reinstall clutch
- 06 – Adjust play
- 07 – Put on cover – tighten screws in stages
- 08 – Readjust cable
- 09 – Fill in oil
- Bonus tips for real DIY mechanics
- Our recommendation
Important: A bad job can cause damage or even an accident! So care and the right tools are indispensable!
Important: Before you begin, first check in a workshop manual whether you need any special tools. Thankfully, motorcycles like the '94 model CB 500, where the clutch pressure plate is retained by a special nut, are the exception rather than the rule. Find out about tightening torques and particular installation and setting procedures that are unique to your bike. Also protect your garage floor from oil spills and leaks before you drain the engine oil into a suitable container. Of course, the best time to do this is when the engine is warm. While it cools, start making the clutch cover accessible, and clean any dirt from the area around it. A footrest will usually have to be removed, and sometimes a kickstarter. Also remove any covers from the clutch release mechanism with its adjusting device.
Maintaining your motorbike's clutch
What's the use of 150 hp if your bike can't put all that power to the road? This is a problem that dragster racers know only too well. And it's the same for any normal street bike. Every time you take off and accelerate, the clutch has to perform optimally to transmit the power from the crankshaft to the gears without loss yet in a controlled manner.
Your clutch functions on the principle of friction, and is therefore a wearing part. The more demands you place on it, the sooner you will have to replace it. An example of very high clutch load is when taking off from traffic lights with high revs. Of course, you get a nice roar when you push the tachometer needle into the red and then fly off with the clutch lever halfway in. But when you do that, only half the power actually gets to the drivetrain, while the rest is converted into heat and clutch disc wear.
At some point the discs will give up the ghost, and when you really need the power, you'll have the decibels alright but it'll take a while for the power to reach the rear wheel. And your hard-earned holiday fund will once again have to be raided for chain and sprocket kit, tyres and clutch friction discs…
It's not a problem that our grandfathers had to worry about because the first motorcycles had no clutch. To stop, you had to switch off the engine, and setting off was like something from a rodeo show. Of course, in today's traffic this would be too dangerous. And that's why a fully functional clutch is essential.
Multiplate wet clutches have become the norm in modern motorcycles – with a few exceptions. The best way to describe this type of clutch is as a large, round, multi-decker sandwich, The friction discs are the ham and the steel plates are the bread. These are pressed together by a pressure plate with the aid of multiple springs. Pressed together they form a closed connection between the engine and the gears, which opens when you pull the clutch lever and the spring pressure on the discs is released.
The size, number and area of the discs and plates is, of course, precisely matched to the particular engine output. The upshot is that the rider can move off smoothly and without jerks, and engine torque transmission is reliable. Torsion springs in the clutch basket dampen the load-change reactions and ensure a comfortable ride.
In addition, the clutch has a protective function if the engine stalls. The slip that arises protects the gears from excessive stress. Of course, a good clutch is only effective if actuation is working perfectly. As regards hydraulic actuation, in general the same things need to be borne in mind as for disc brakes: the hydraulic fluid should not be more than 2 years old; there must be no air in the system; all seals must be working perfectly; the pistons must not stick see DIY tip Brake pads. The play does not need to be set, as the hydraulic system is self-adjusting. It's a different story with mechanical actuation via cable. In addition to a teflon-lined or greased cable in perfect working order, setting the play is crucial. Too little play in a warm clutch causes linings to slip, resulting in them quickly becoming worn; plus overheating ruins the steel discs (blue discolouration, distorted discs). Too much play, on the other hand, can cause shifting problems. The stationary bike will tend to take off before the clutch lever is released, and it's hard to put it into neutral. The problem is obvious: the clutch cannot disengage properly. This can also happen if the steel discs have become distorted!
However, jerky engagement and disengagement of the clutch usually indicates that the clutch basket and drive plate have had it. On most motorcycles, it's possible to overhaul the clutch and change the linings without removing the engine. So, if you're not afraid of getting your hands dirty and have a certain degree of DIY ability, you can do this yourself and save a good deal of money.
Clutch maintenance – now let's get started
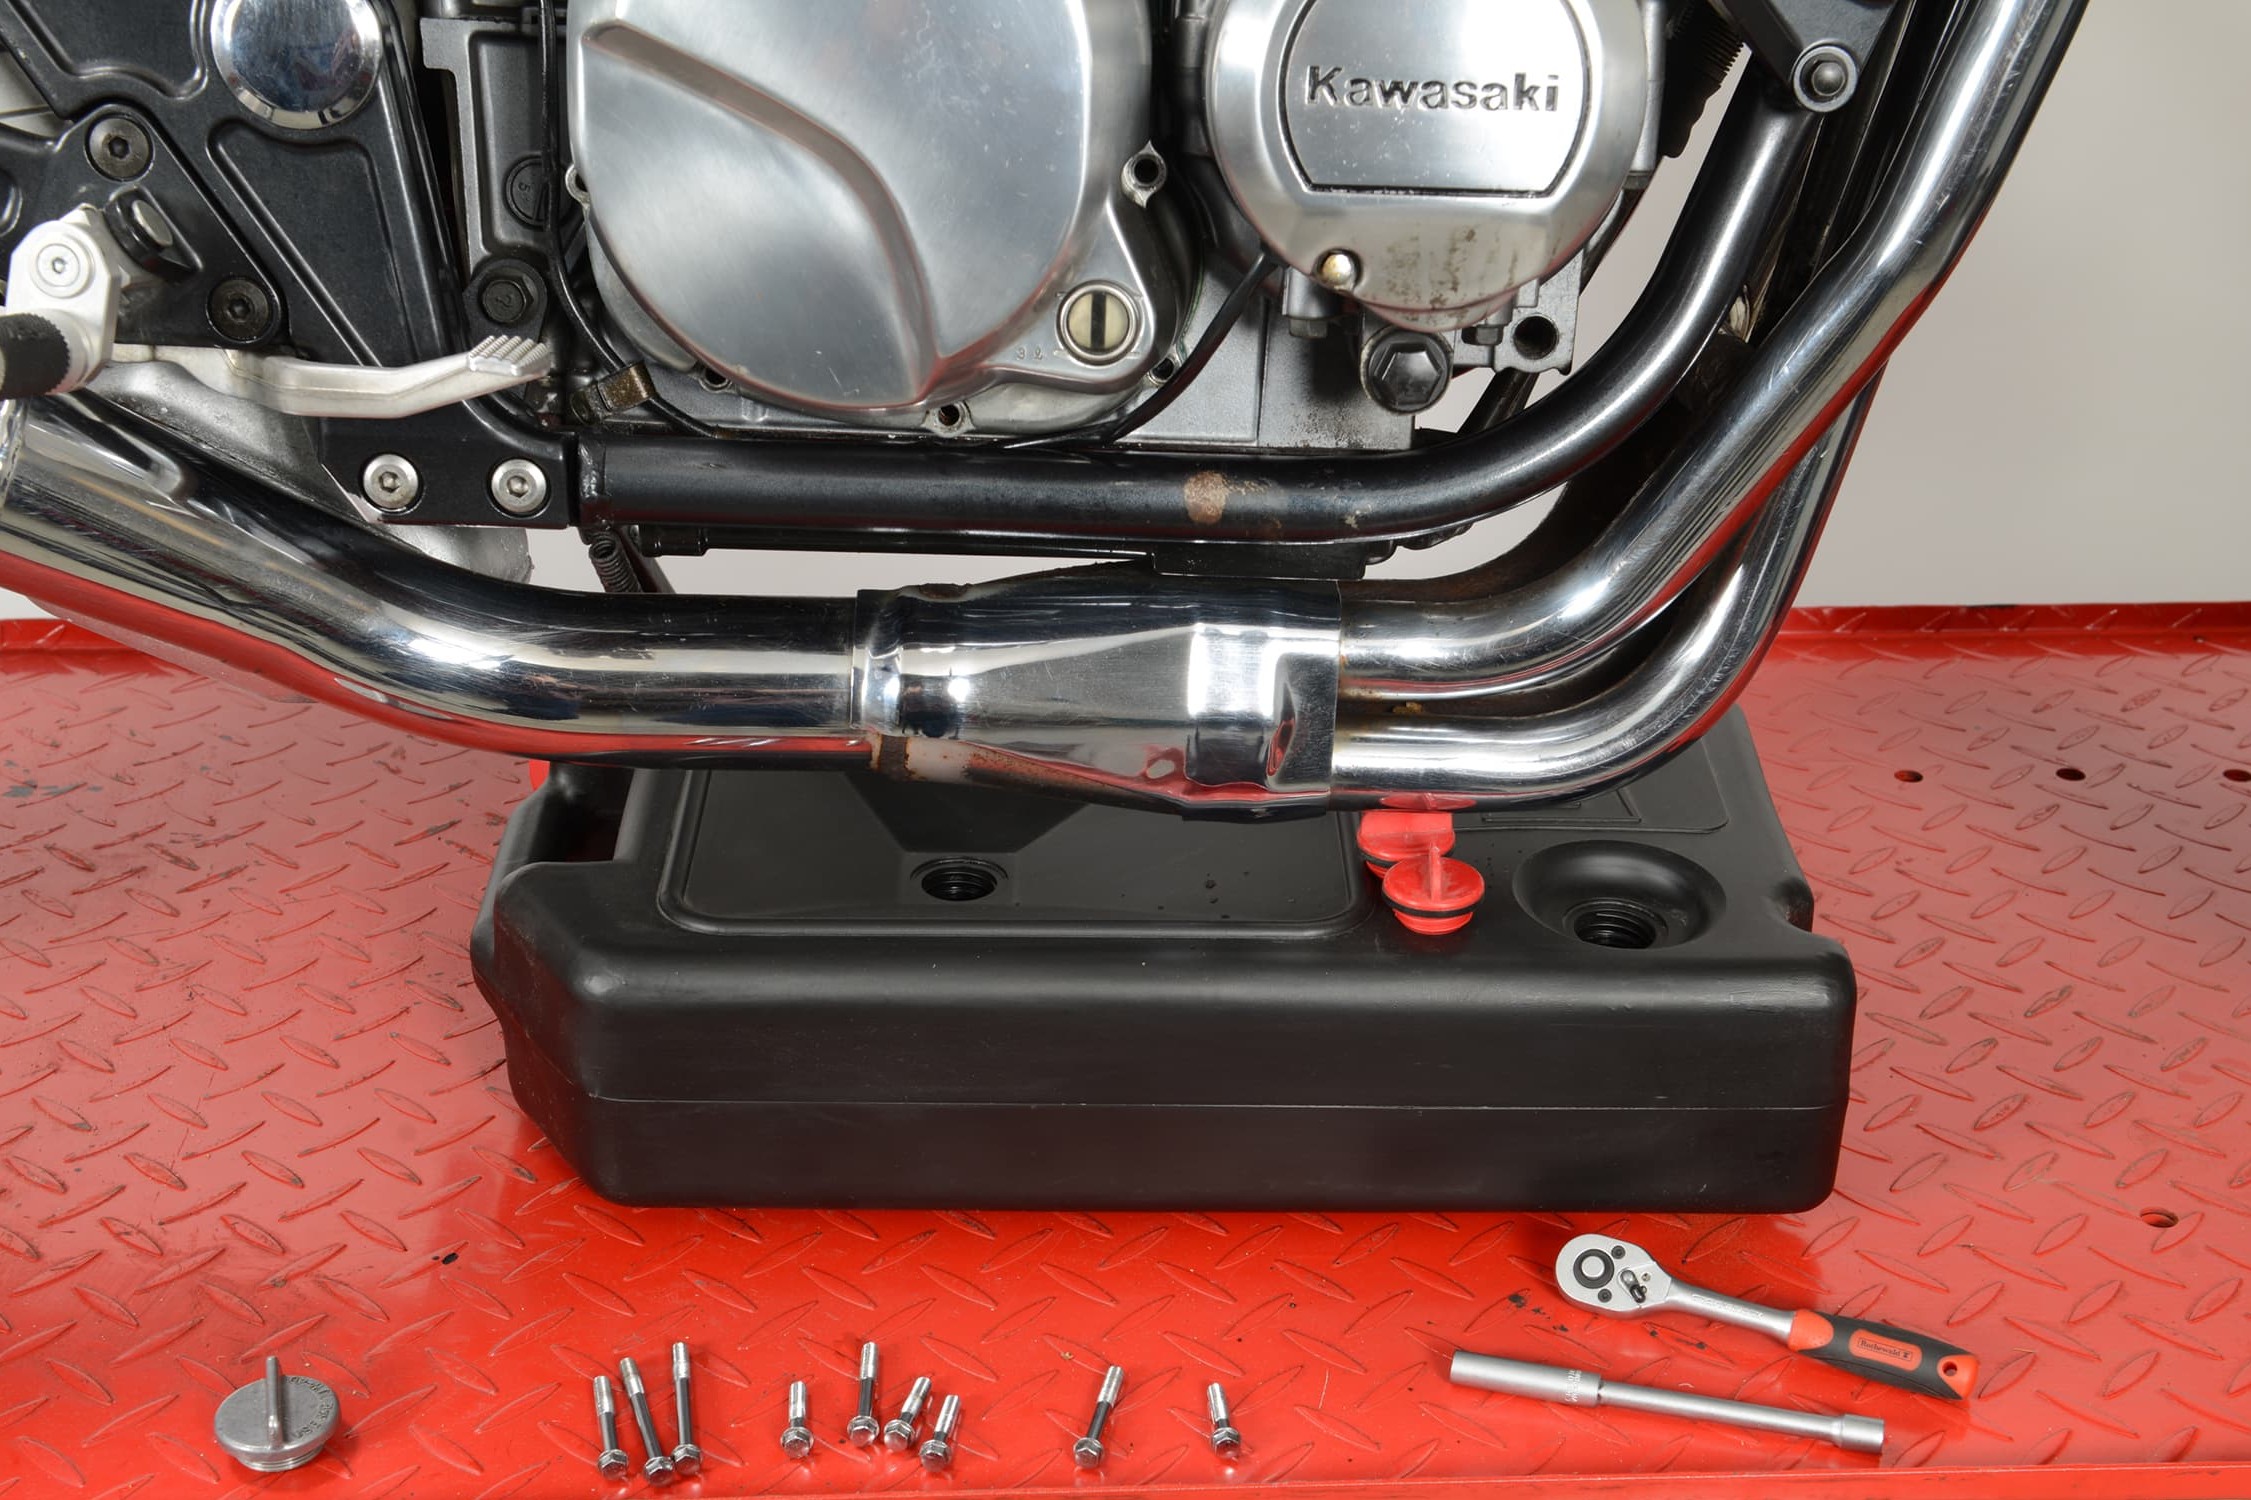
Step 1: Have tools ready – cover floor – drain oil
01 – Have tools ready
Unscrew and remove the cover screws in stages using a suitable tool. Screws that have been machine-tightened or painted over can be very tight. In that case, a tap on the head of the screw usually helps. The best tool for cross-head screws is an impact screwdriver.
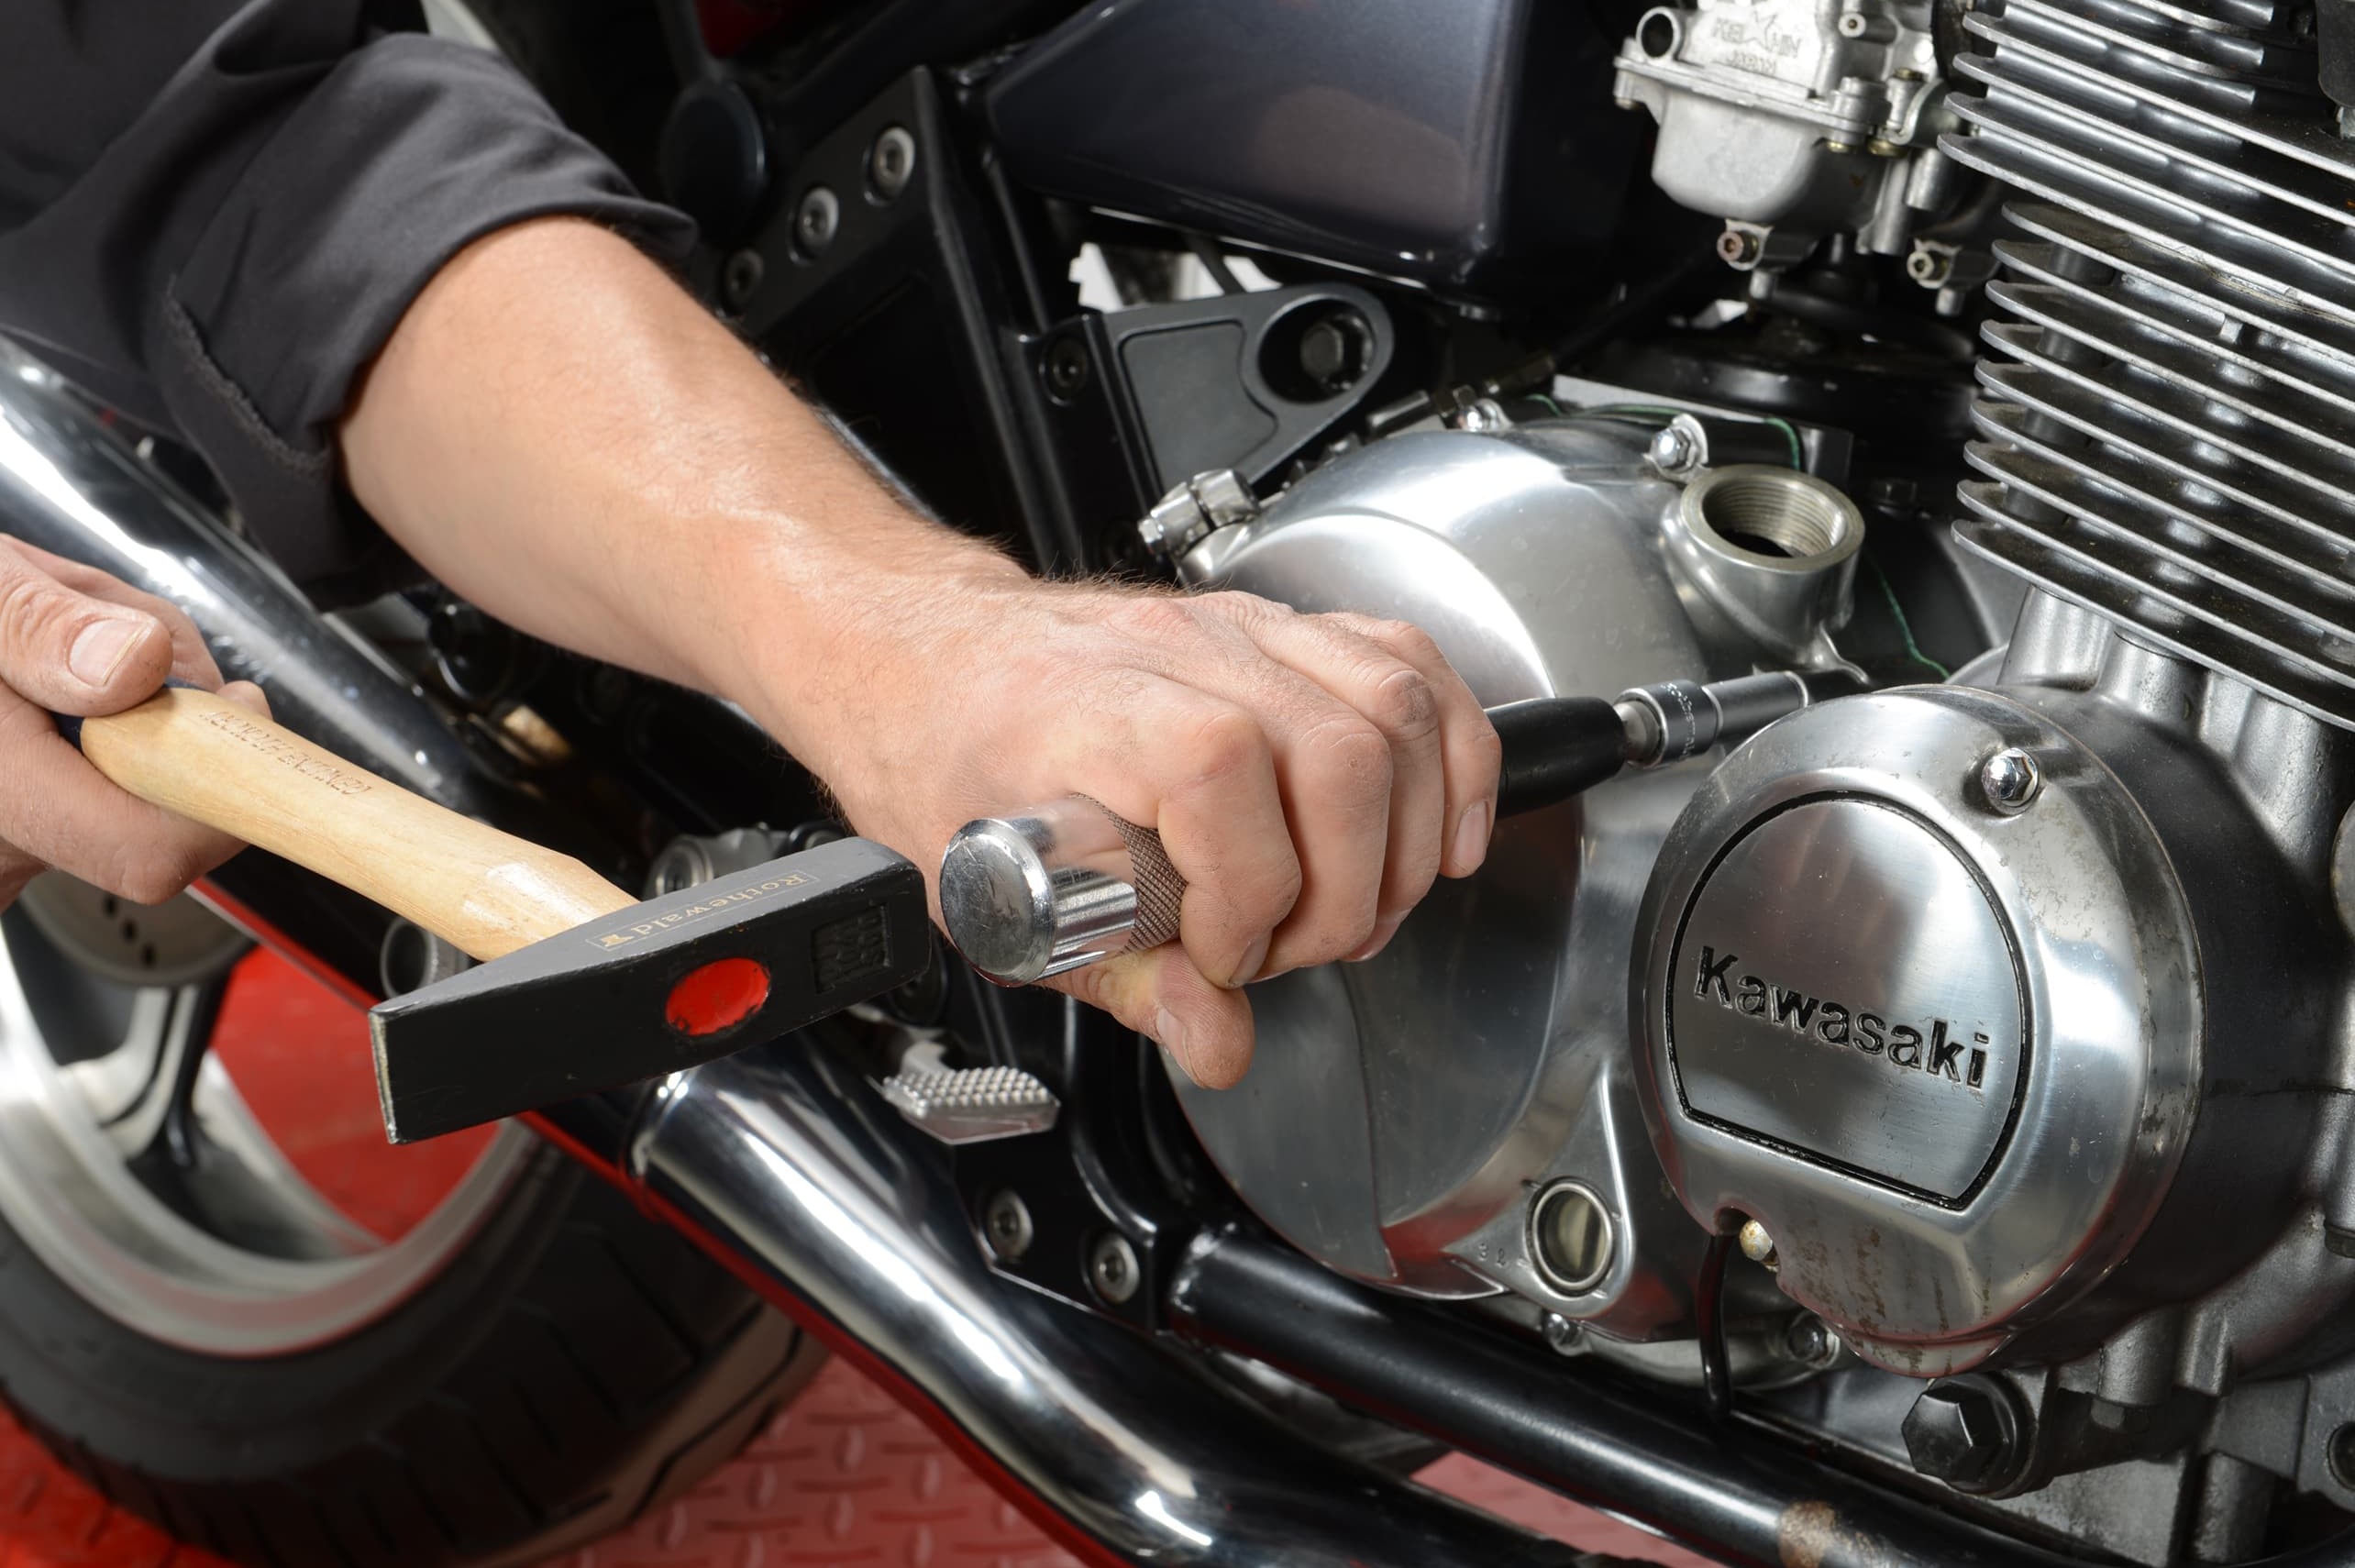
Step 2, Fig. 1: Loosen fitting sleeves
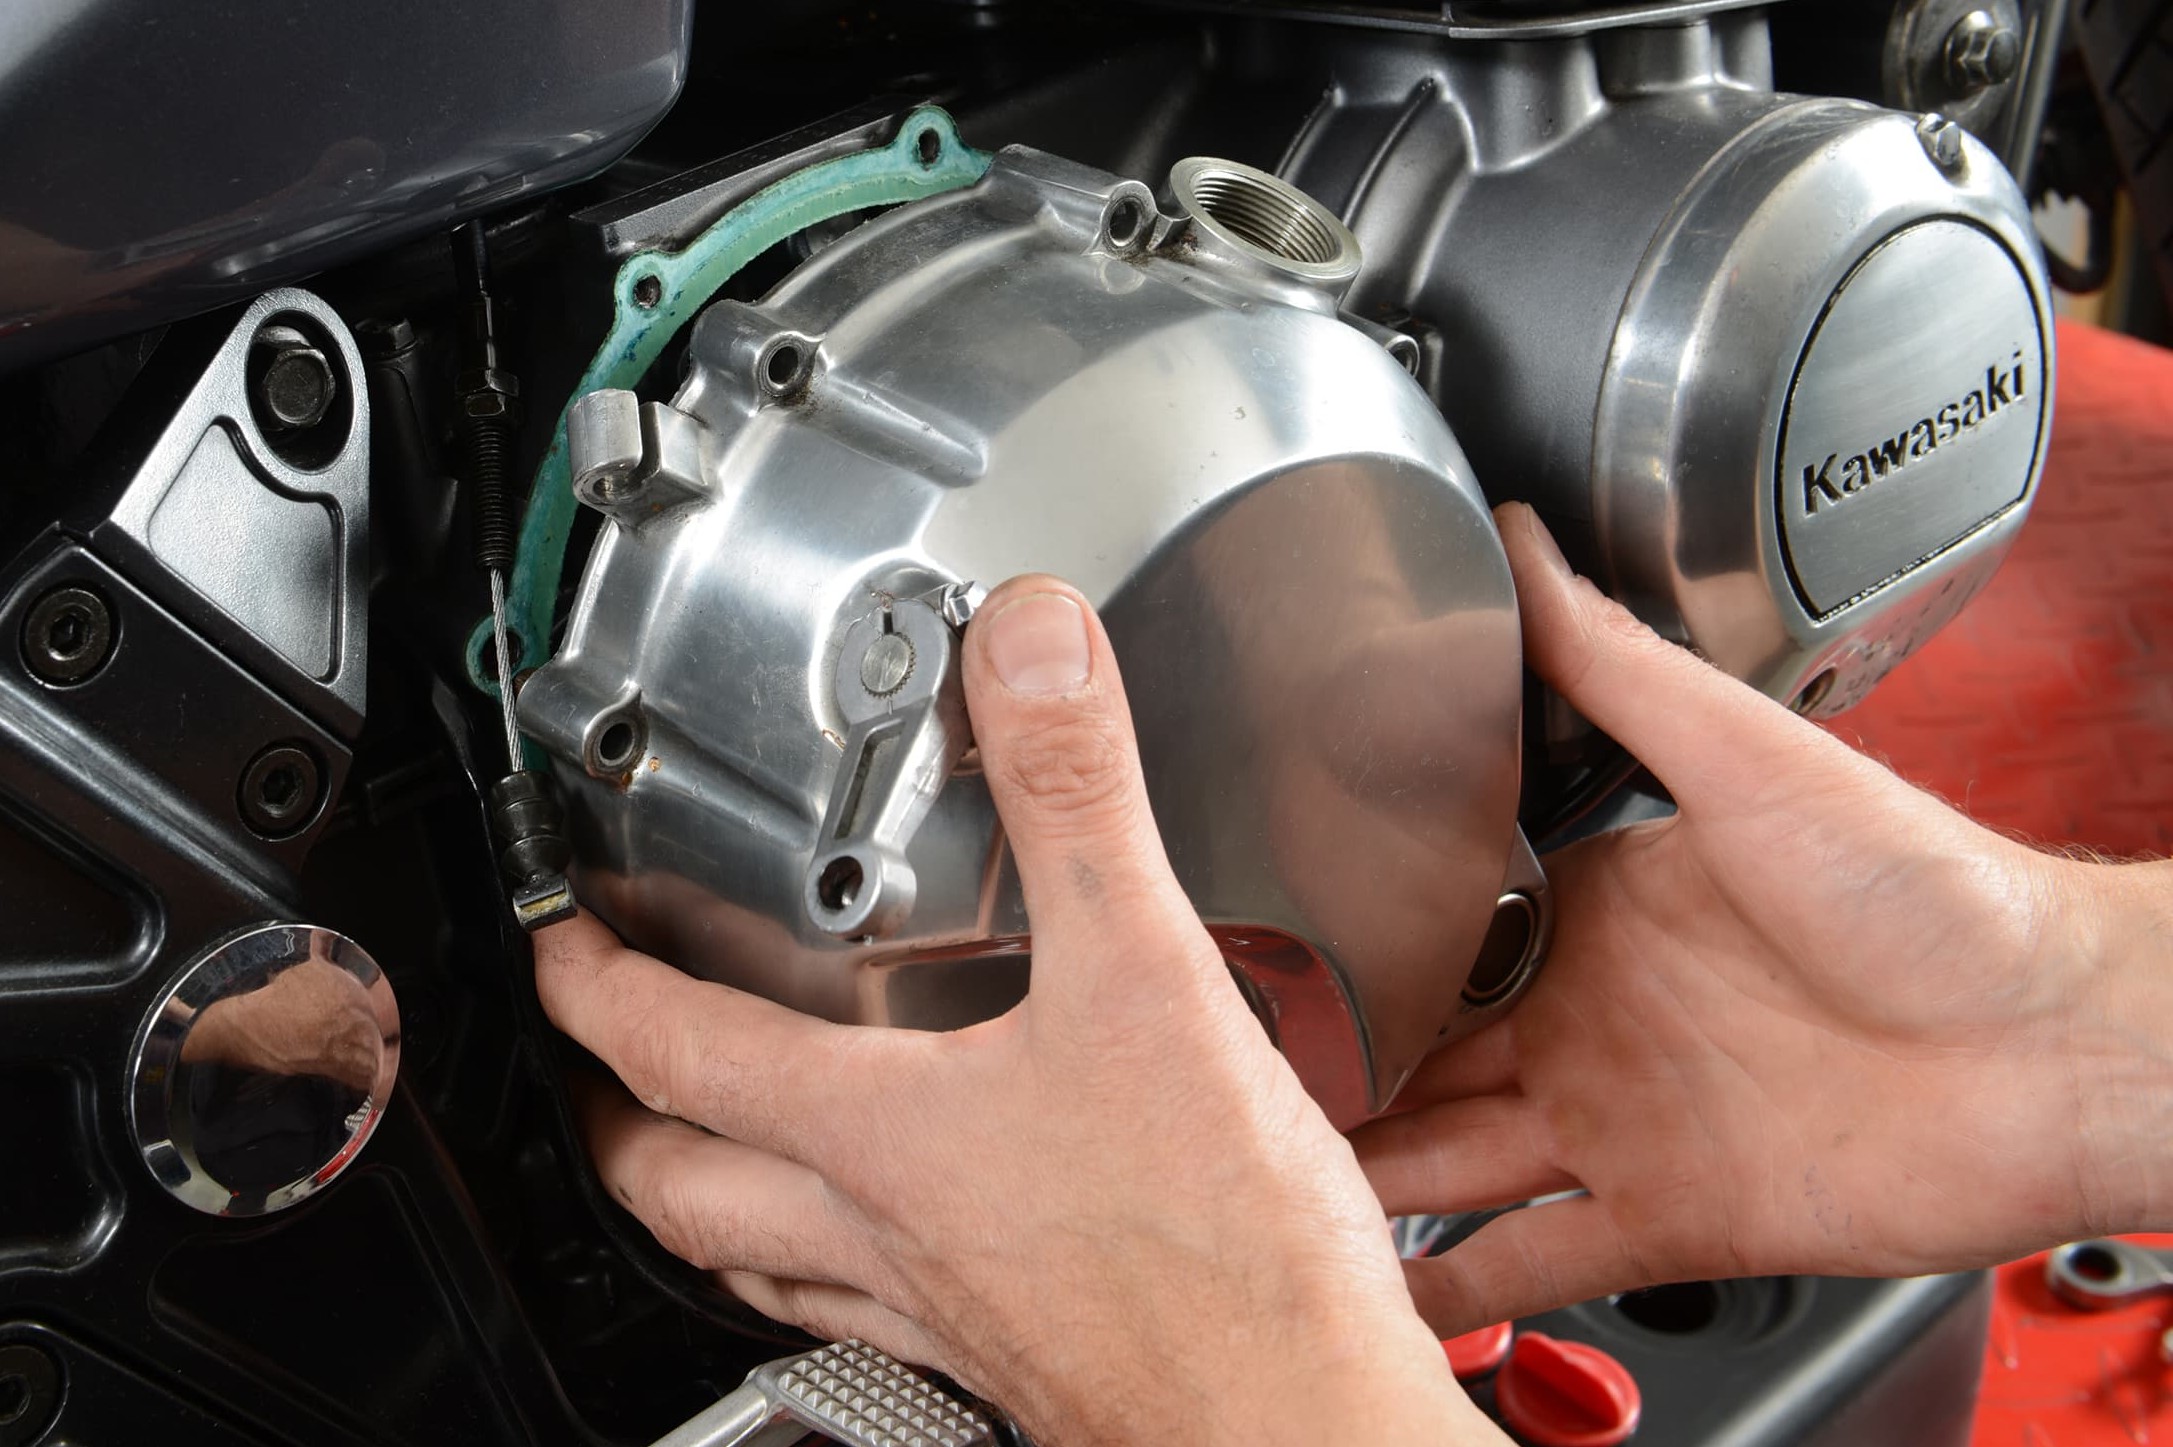
Step 2, Fig. 2: Release cover
02 – Undo cover
To release the cover from its dowel pins, use the plastic end (!) of the Vario hammer and carefully tap around the cover until it comes away.
Important: Only use a screwdriver for leverage if there are suitable gaps or lugs on the cover and housing! Never try to force the screwdriver between the sealing surfaces, as this will cause irreparable damage! If the cover stubbornly refuses to come away, check if you have forgotten a screw! Generally, the gasket sticks to both surfaces and tears. It should then be replaced. Then carefully remove the residue using gasket remover or brake cleaner and a gasket scraper, taking care not to damage the sealing surface. Also put the dowel pins somewhere safe!
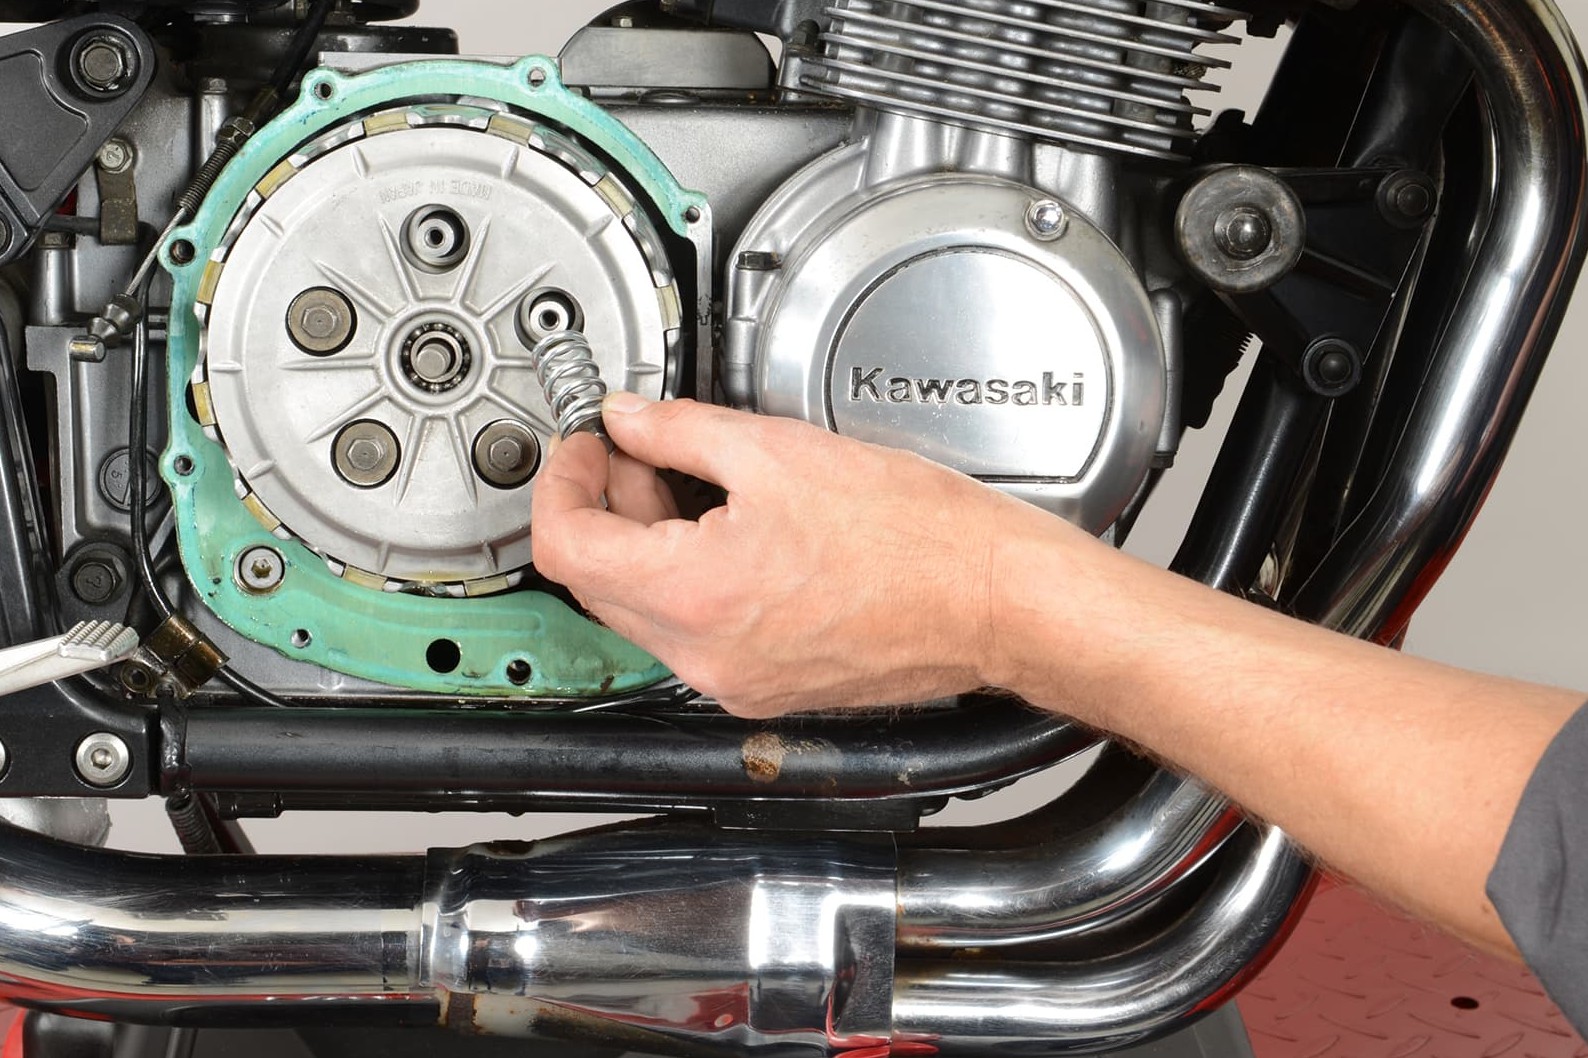
Step 3, Fig. 1: Loosen central nut and screws
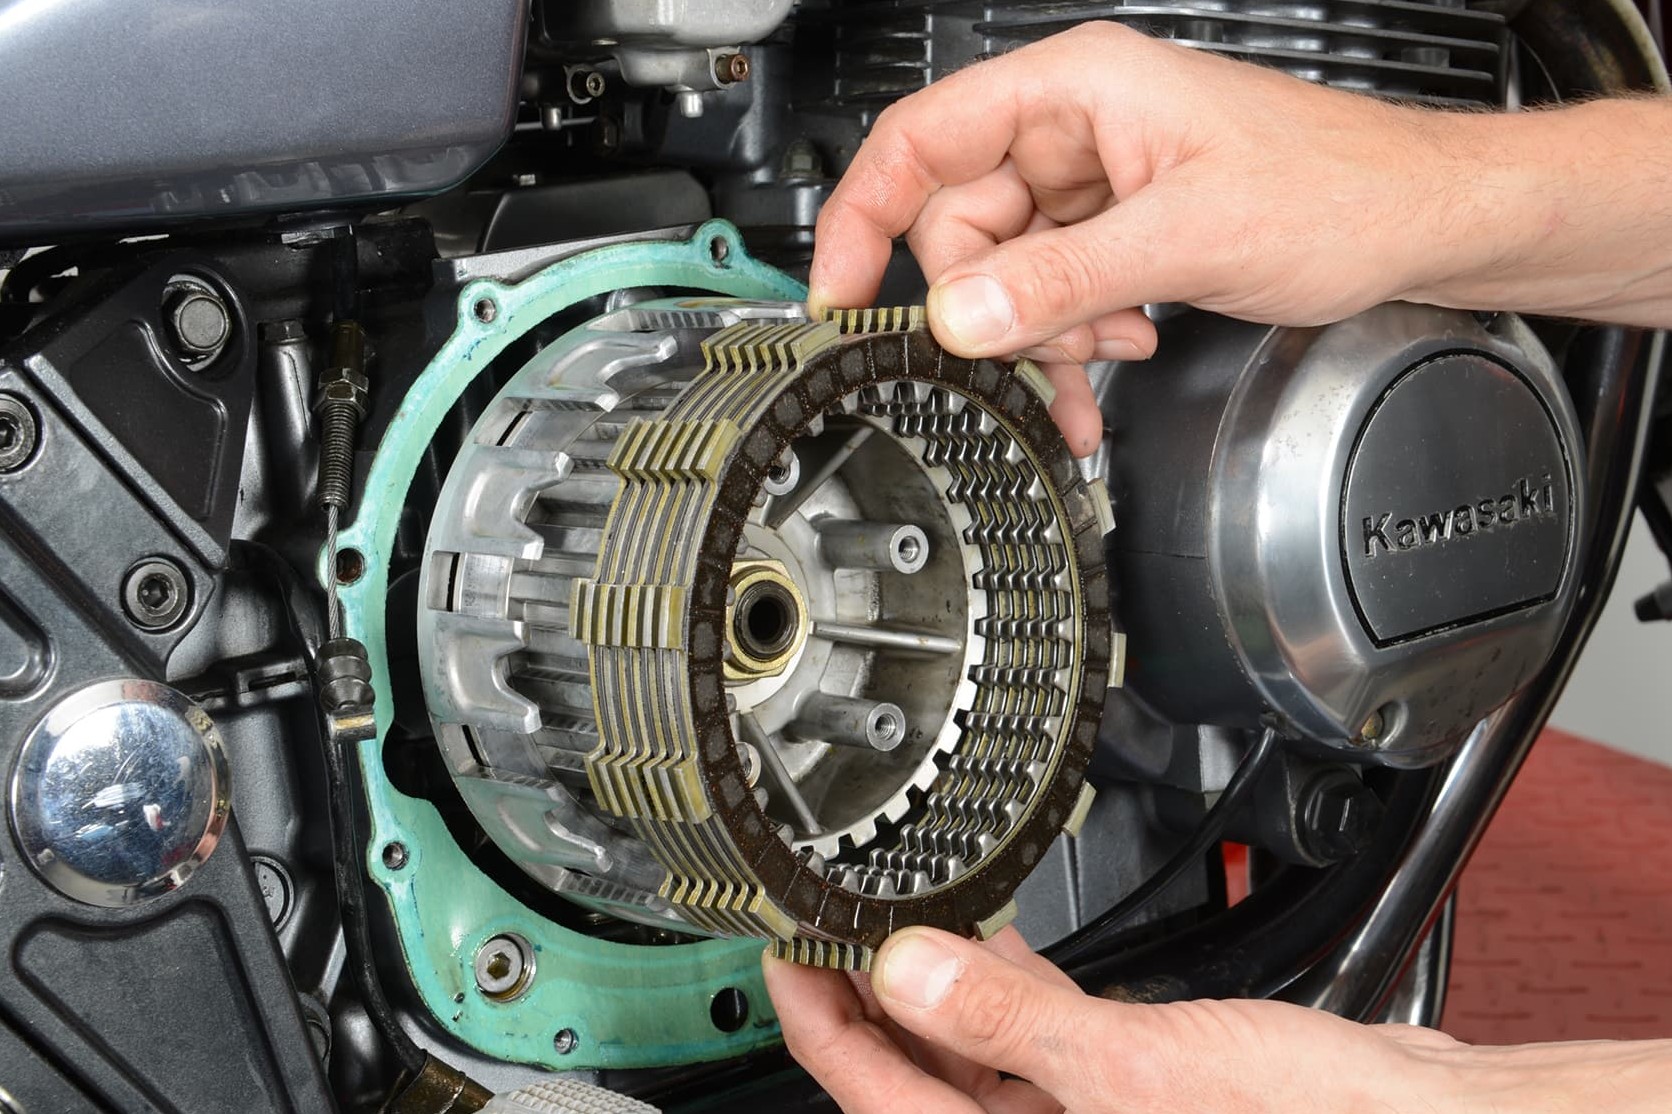
Step 3, Fig. 2: Remove clutch
03 – Remove clutch
You are now looking at the clutch basket. To get at the inner workings, you must first remove the clutch pressure plate. This usually means undoing a certain number of screws or, in rare cases, a central nut. Always loosen the screws in stages (approx. 2 turns each) and in criss-cross sequence! If necessary, you can stop the clutch basket from turning by engaging first gear and locking the foot brake. Once the screws are unscrewed, you can remove the compression springs and the pressure plate. Now the steel plates and friction discs can be removed. Please set down everything on a clean sheet of newspaper or a cloth so that you can remember the order in which to reinstall them.
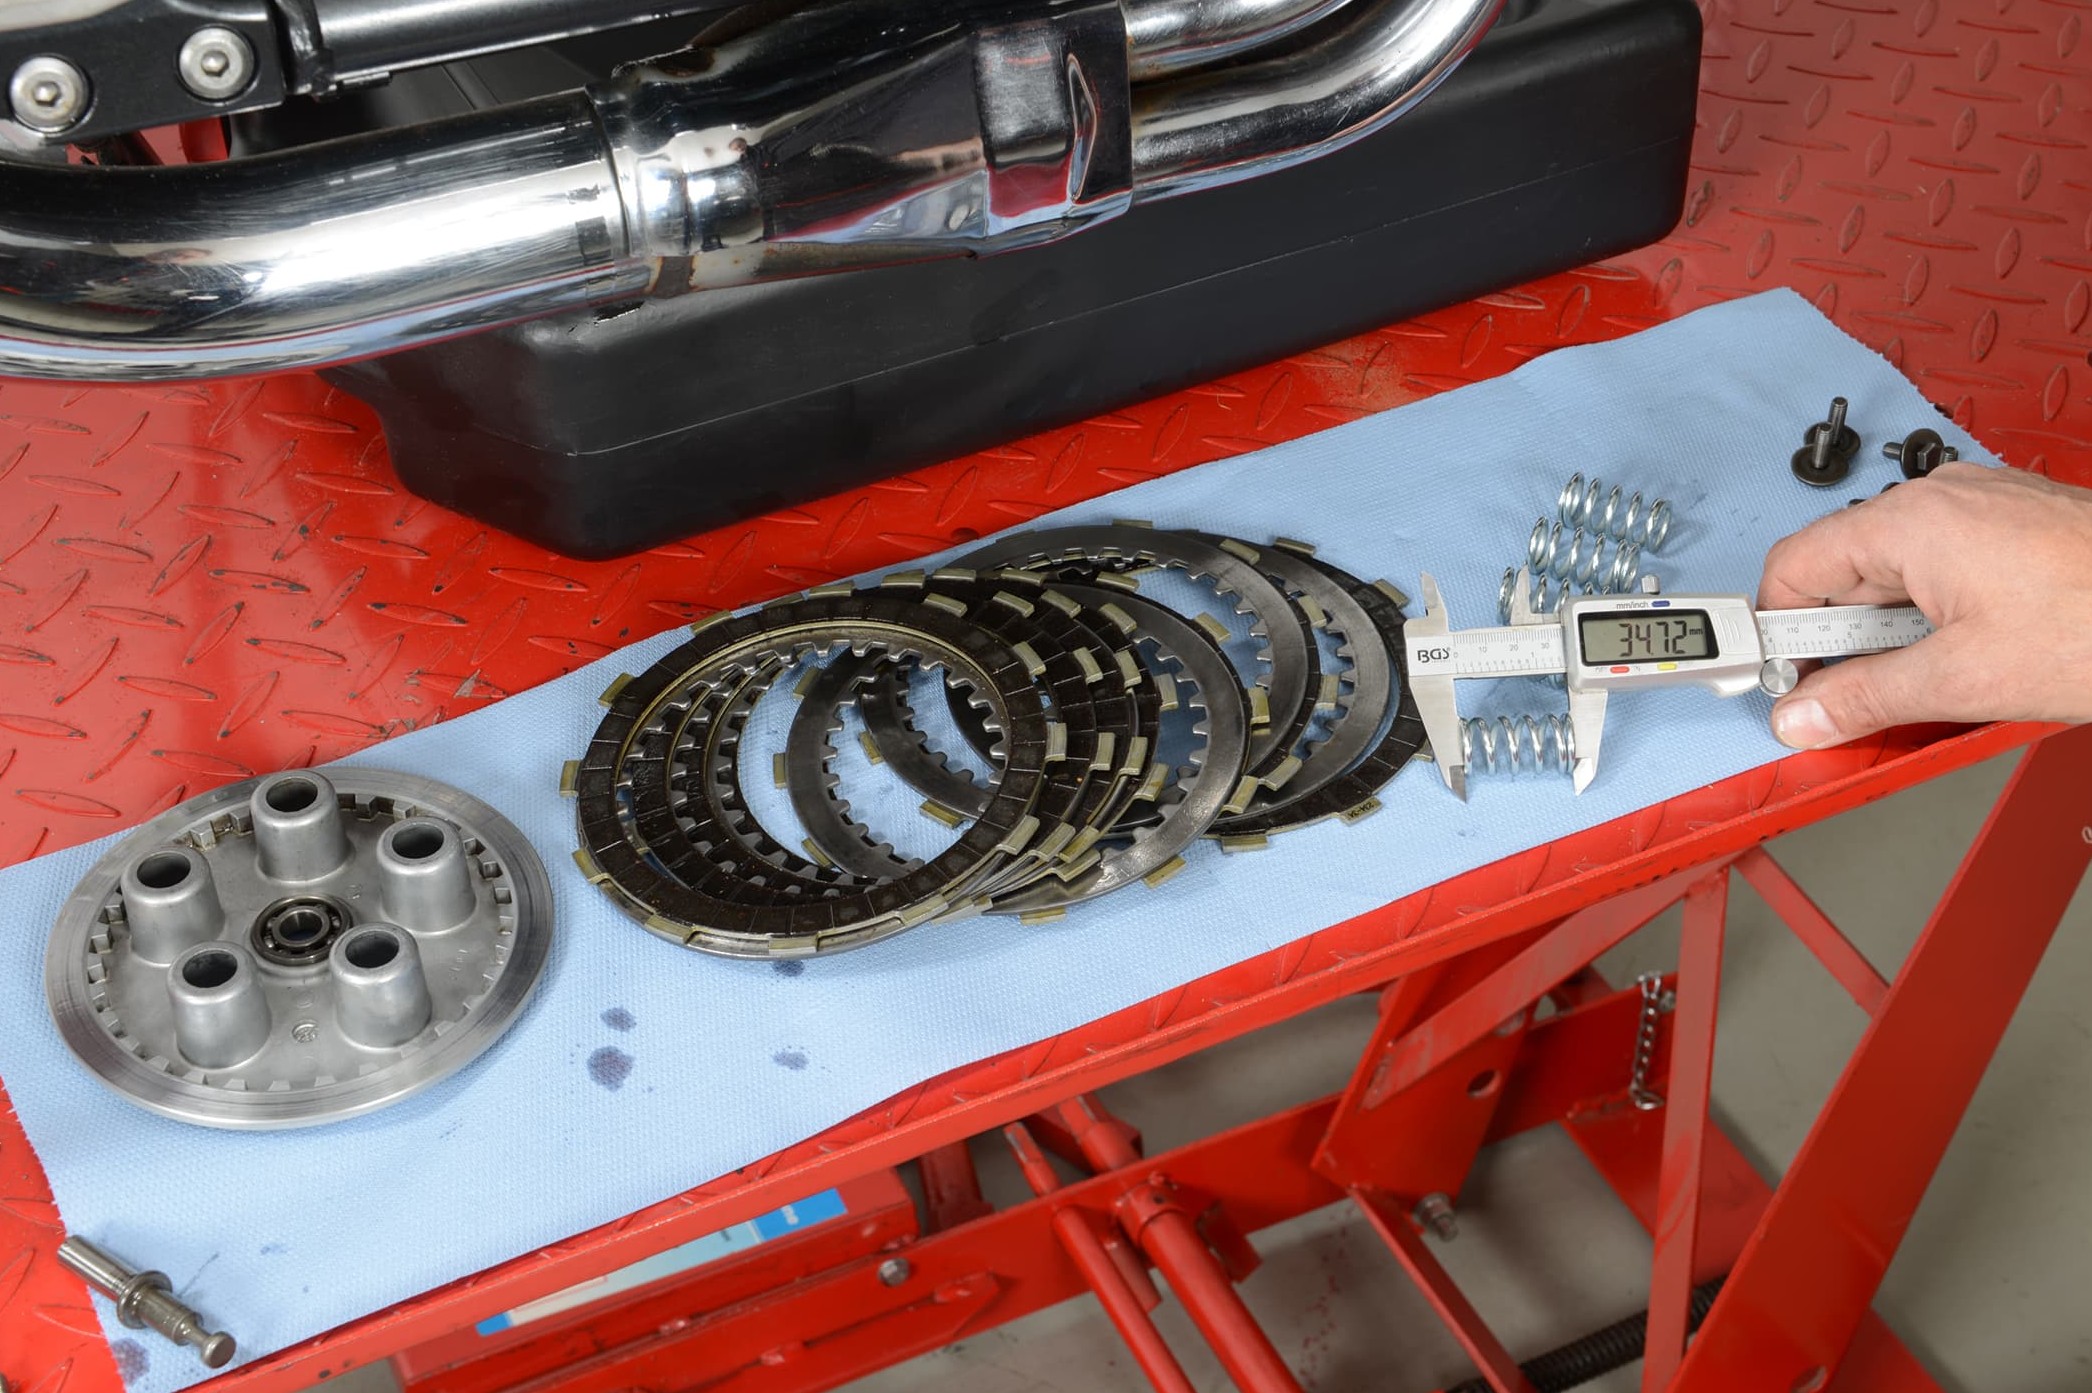
Step 4, Fig. 1: Measure clutch spring
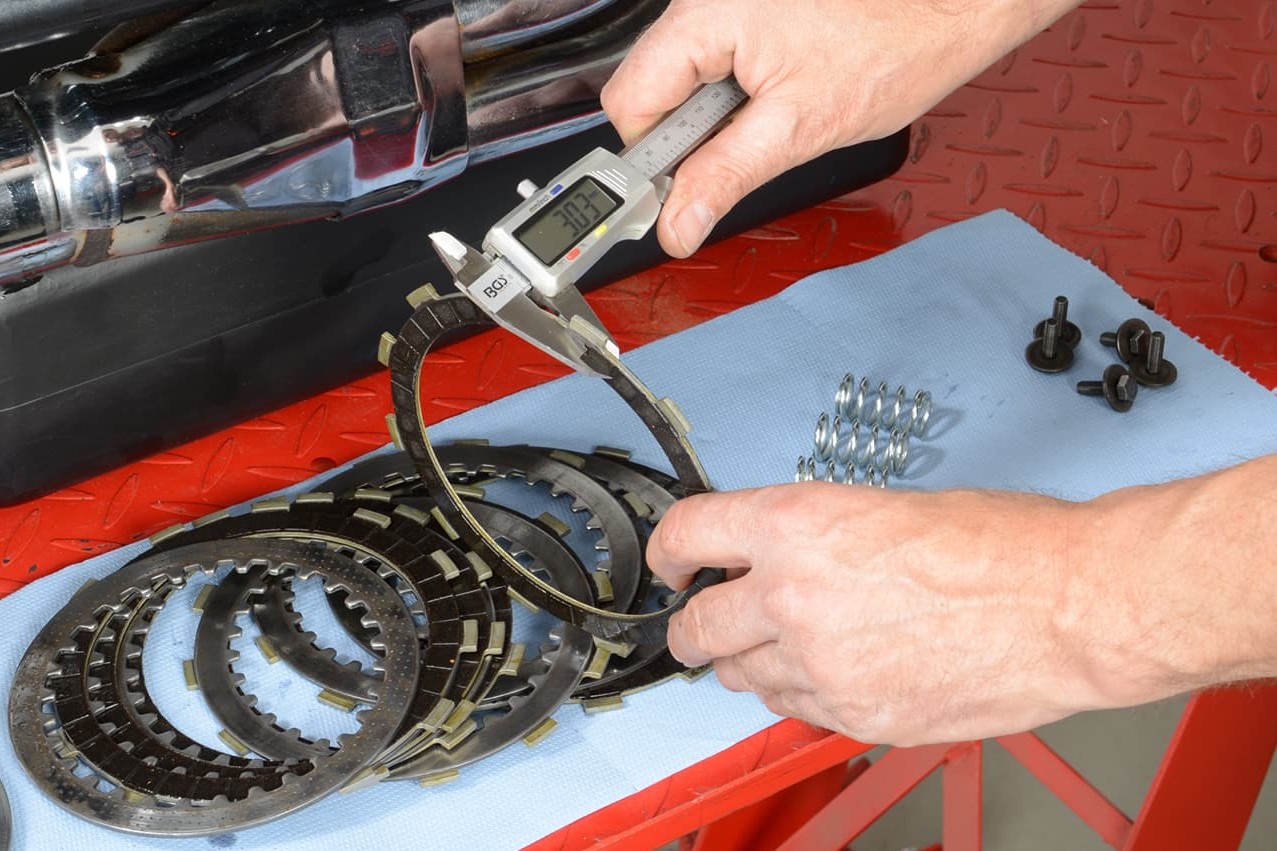
Step 4, Fig. 2: Check parts
04 – Check parts
Now check the components: Clutch springs show signs of fatigue and shrinkage with time. For this reason, measure the length and compare with the wear limit in your workshop manual. Clutch springs are relatively low-cost (approx. €15). Since weak/worn springs cause clutch slippage, we recommend you change them if in any doubt!
The steel plates between the friction discs can warp due to heat, in which case they will usually show a bluish discolouration. You can check with a feeler gauge and surface plate. Or instead of a surface plate, you can use a pane of glass or mirror plate. Gently press the disc against the pane of glass and try to measure the play between disc and glass at various points using the feeler gauge. Slight distortion (up to approx. 0.2 mm) is tolerable. Please see your motorcycle manual for the exact value.
Discoloured and distorted discs must be replaced. The same applies to heavily worn clutch baskets and internal drive plates. Minor nicks on the sides of the lining guides can be smoothed with a file. This is time-consuming but saves money. To ensure that no filings fall into the engine, the parts must be removed. Undo the central nut to remove the clutch basket, while gripping the hub with a special tool. For further details on this, please refer to your manual. Also check the condition of the damper on the clutch basket. Rattling sounds when the engine is running are a sign of damage as a result of wear. While the basket is allowed to have a little play when installed, it should not feel soft and worn overall when you turn it and jiggle it firmly.
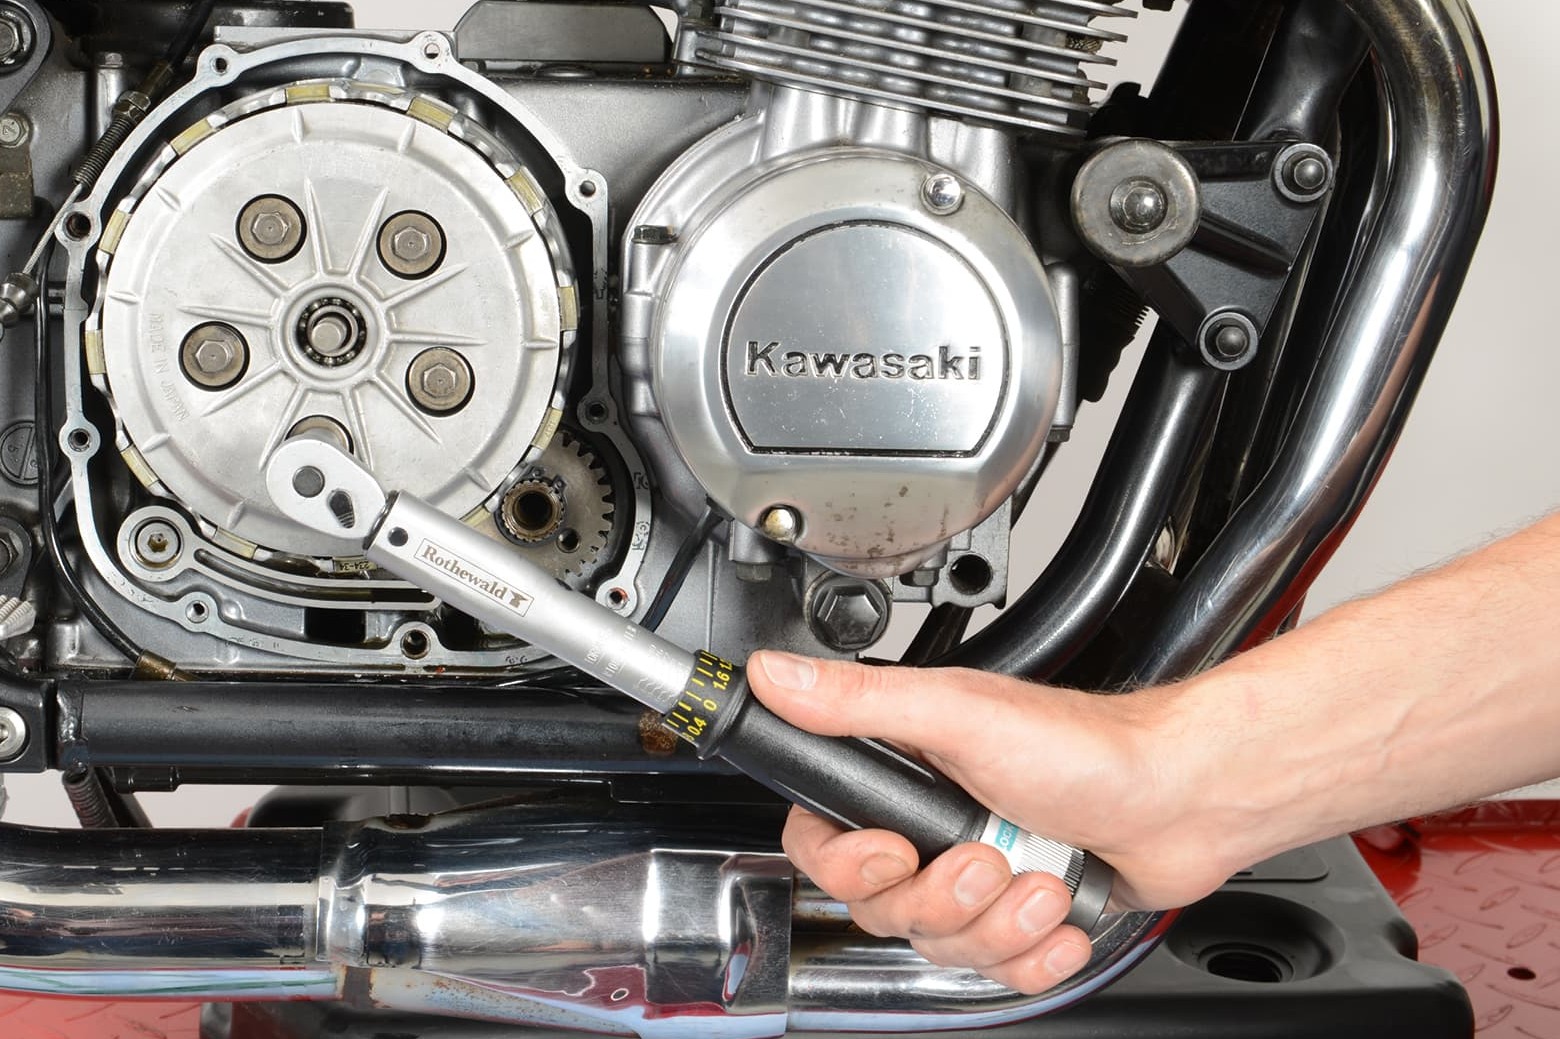
Step 5: Reinstall clutch
05 – Reinstall clutch
Once you have decided which parts need to be replaced you can begin assembly. Remove wear residue and dirt from the used parts with petroleum ether or brake cleaner. Now put back the cleaned and oiled parts in reverse order. Please refer to the workshop manual again to refresh your memory. Pay close attention to any markings on the components that indicate a certain position!
If you have not removed the clutch basket, the job is relatively easy. First insert the clutch discs, starting and ending with a friction disc (never a steel plate). Then put on the pressure plate and fit the springs with the screws (a little pressure is usually required). When positioning the pressure plate, pay attention to any markings!
Finally, tighten the screws in stages and in a criss-cross sequence. If your workshop manual specifies a torque, you should always use a torque wrench. Otherwise tighten with care. Do not use force, as the threads sit in quite delicate lugs on the inner clutch hub.
06 – Adjust play
With a cable-actuated clutch, adjusting the clutch play is key to the outcome. This can be done via an adjustment screw located in the centre of the clutch basket, or on the opposite side of the engine or, in the case of a release mechanism, in the clutch cover. Always follow the manufacturer's instructions.
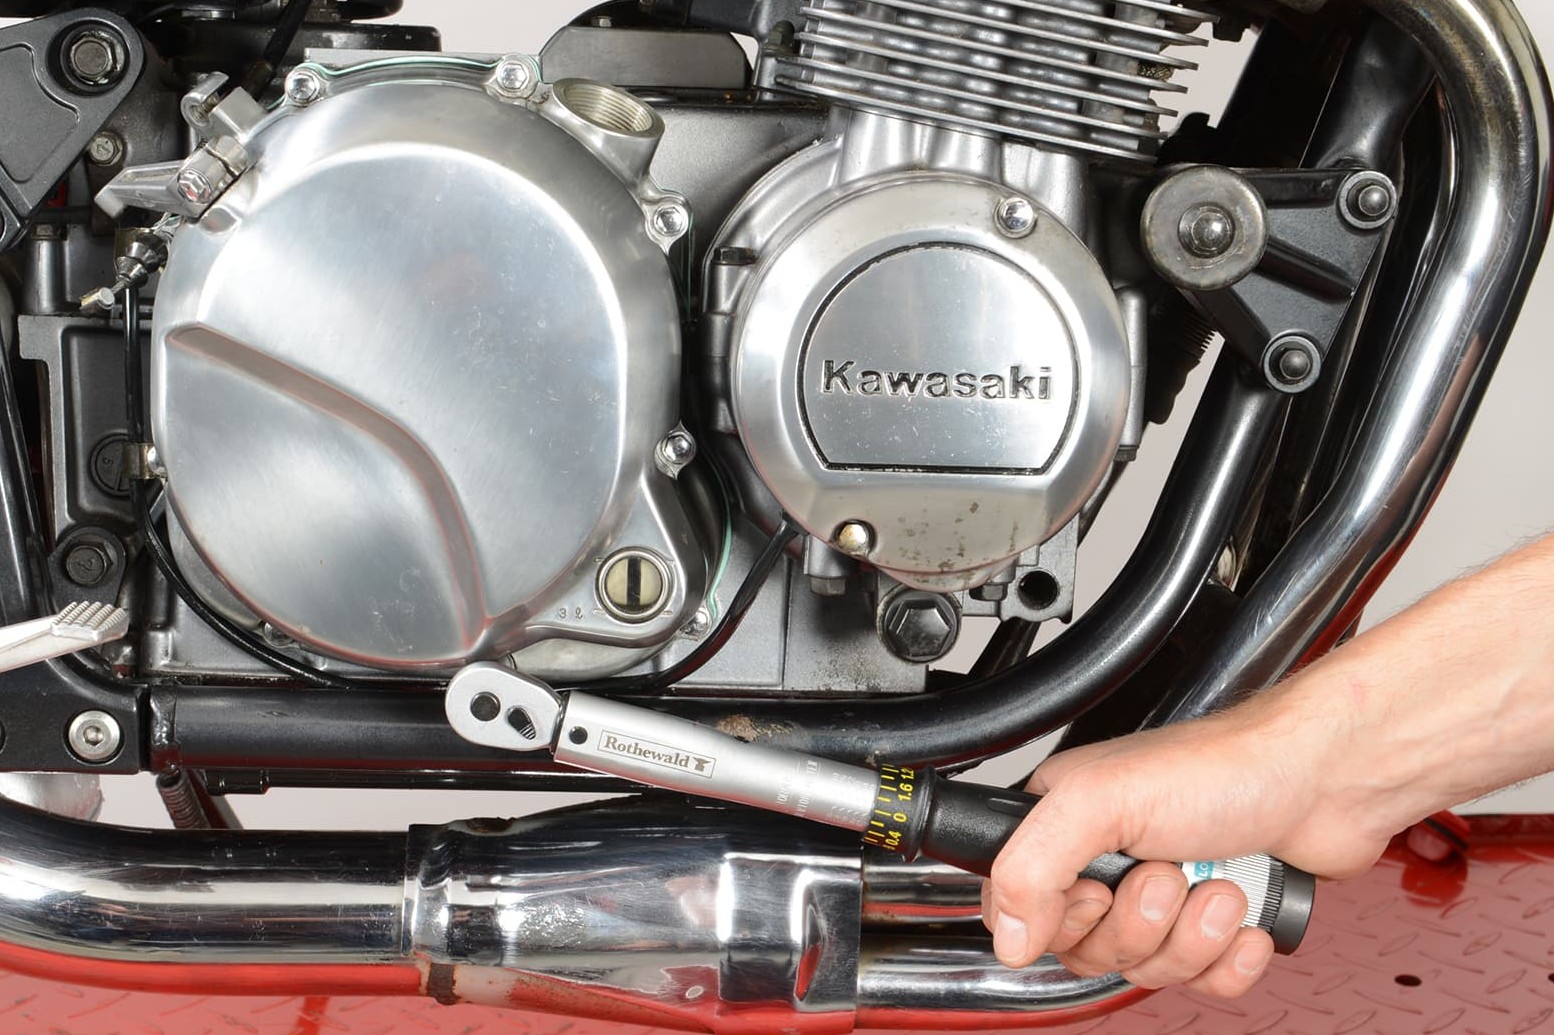
Step 7: Put on cover – tighten screws in stages
07 – Put on cover – tighten screws in stages
After checking that the sealing surfaces are clean and fitting a new gasket, you can put the clutch cover back on. Do not forget the dowel pins! Insert the screws, first screw them in hand-tight, then tighten them with care or use a torque wrench as directed by the manufacturer.
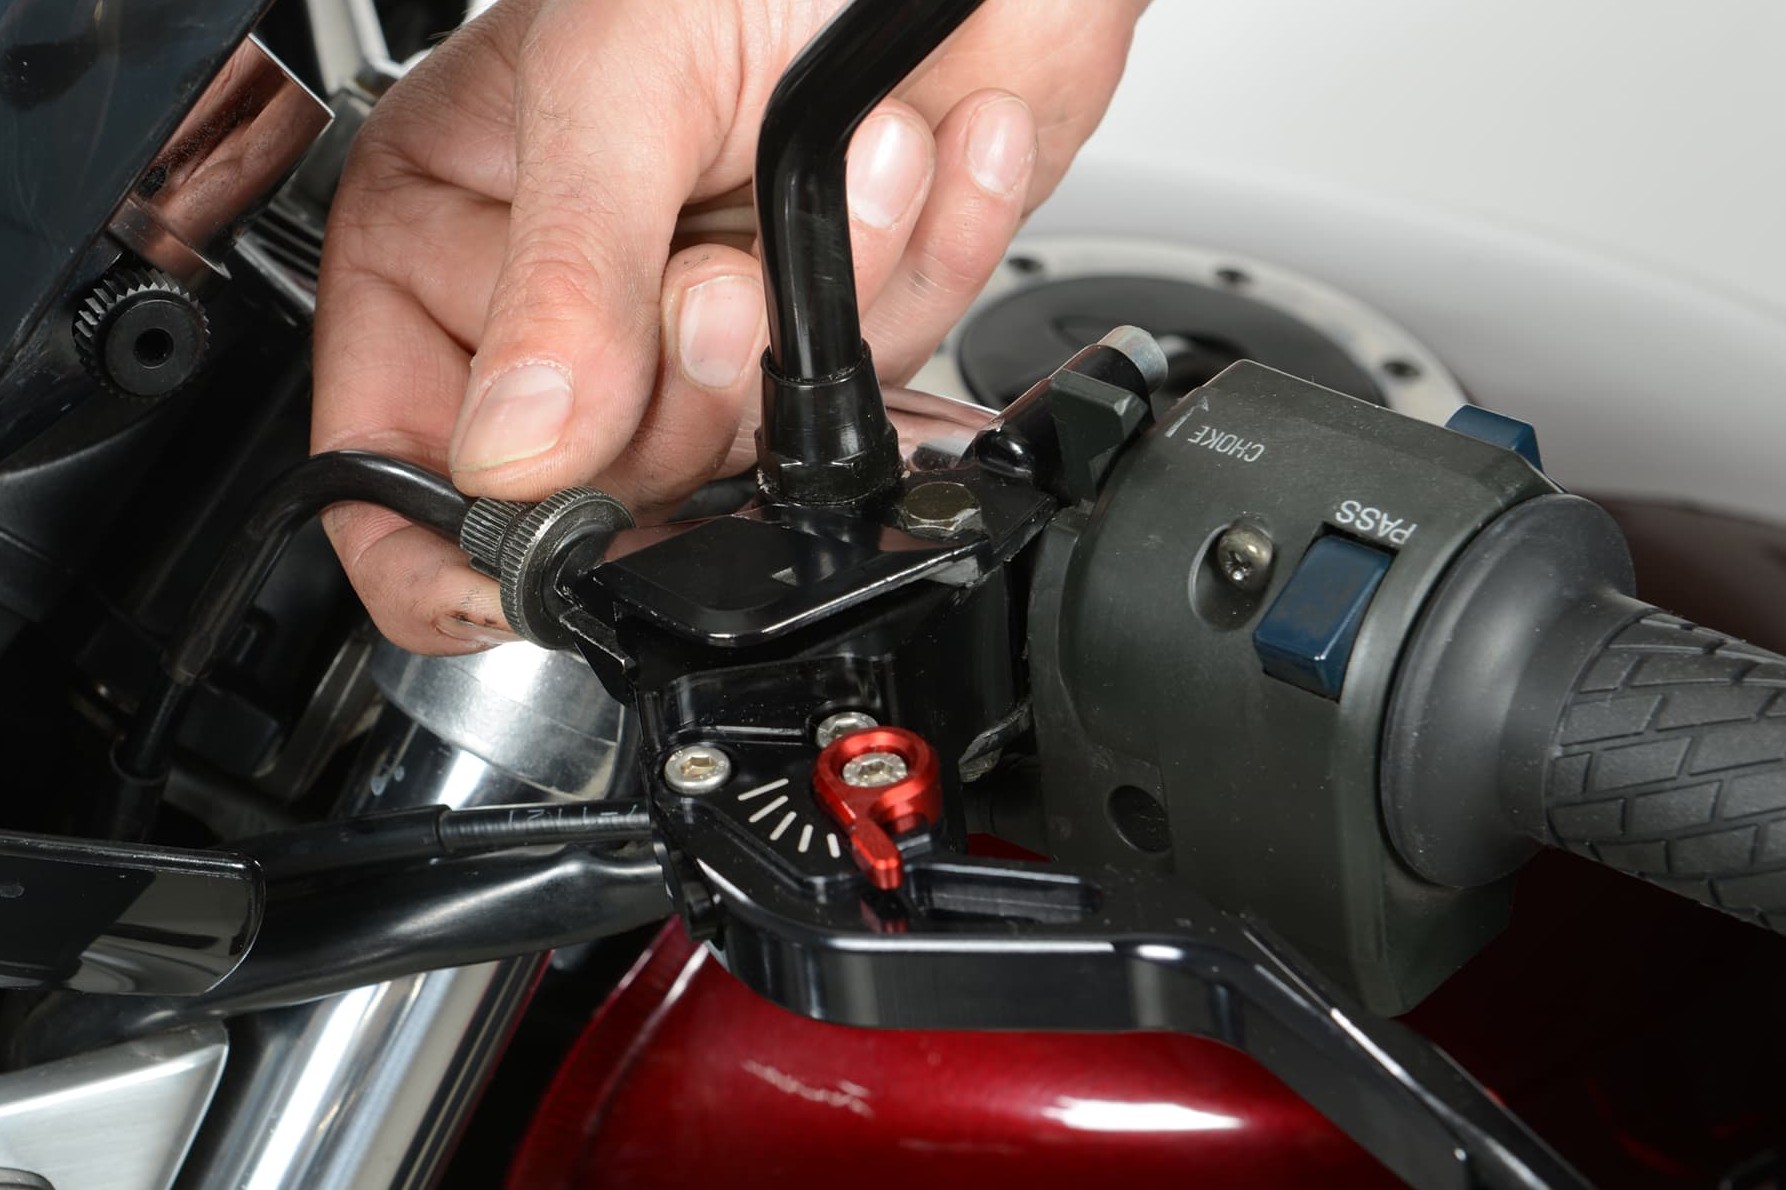
Step 8, Fig. 1: Adjust cable
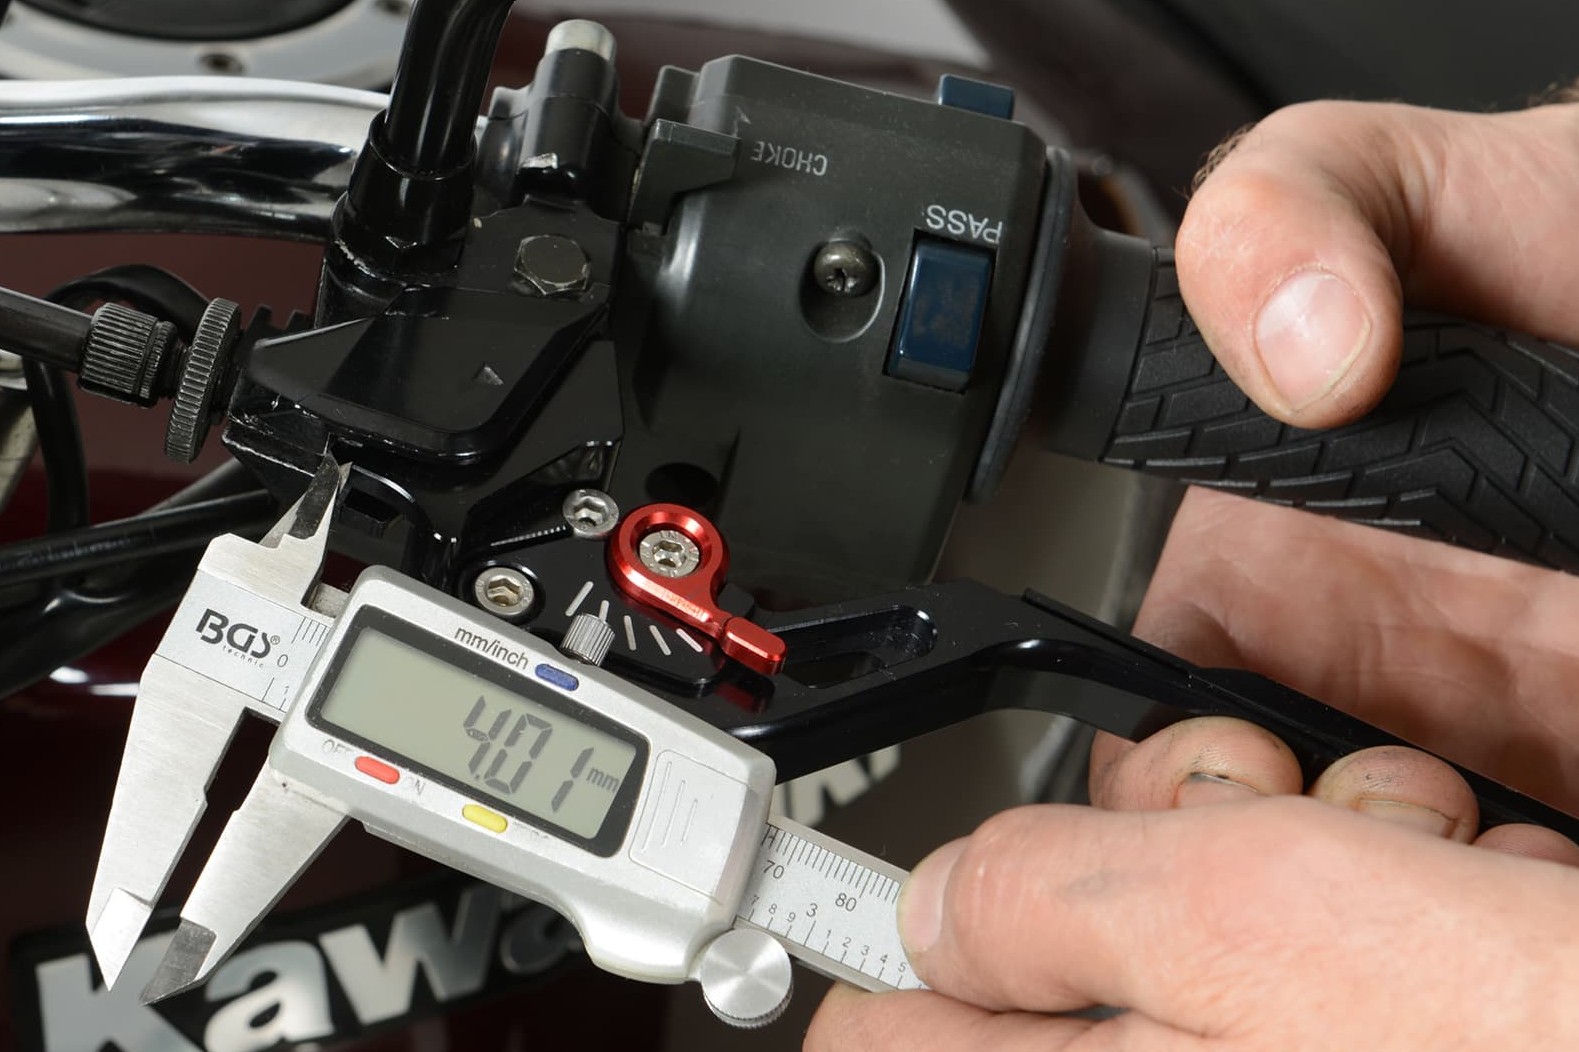
Step 8, Fig. 2: Readjust cable
08 – Readjust cable
For cable adjustment, ensure that there is approx. 4 mm of play in the clutch lever before applying load to the lever. The hollow screw should not be rotated too far out of its seat!
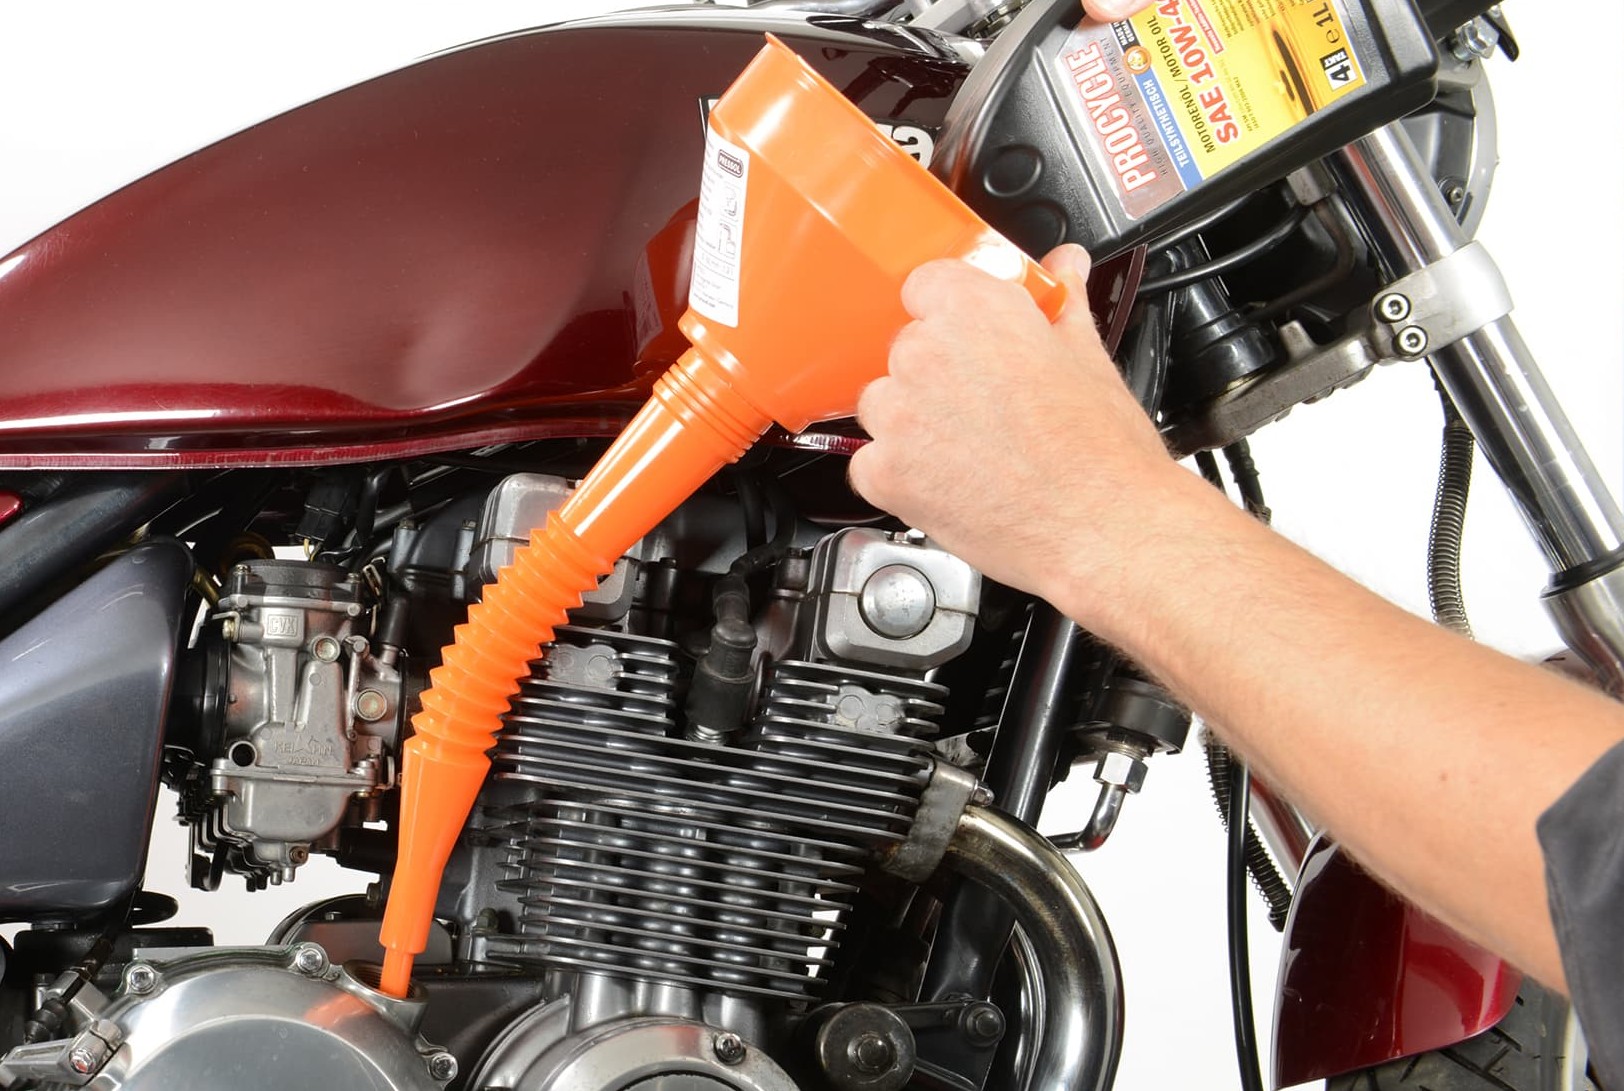
Step 9: Fill in oil
09 – Fill in oil
Now you can put the oil in. Make sure the oil-drain plug is secure! Then install the footrest, kickstarter, etc. and release the brake and rear wheel if necessary. Just to be safe, before you take it for a proper spin, recheck your work: with the brake and clutch pulled, start the engine in neutral, and then gently engage first gear. If you can now accelerate without any catching or slippage, you have done a good job and can look forward to plenty of easy riding again!
Bonus tips for real DIY mechanics
Don't despair – you can do it!
We've all experienced it. Some stupid part or other simply refuses to go together as it should, however much you try. But if, in desperation, you try using brute force, you've basically lost the battle. The damage you do will really annoy you later! So if you notice that you're getting hot under the collar, take a break. Have something to eat and drink, and find something to take your mind off it until your frustration passes. Then you'll soon see: it does work after all...
You need space:
If you plan to dismantle the engine, or anything like that, you should find a suitable place for the job – preferably not the kitchen or living room! If you don't live alone, it's probably best to avoid senseless discussions about whether a motorbike belongs indoors. Look for a suitable spot with enough space for all your workshop equipment, toolboxes etc. Otherwise it's all too easy to lose nuts and bolts, and other small parts.
Always keep a digital camera or mobile phone handy:
Because nobody can memorise everything. It's much easier to take a quick picture of the sprocket arrangement, cable assignment or parts which have to be assembled in a particular way or sequence. With a photo or two, you've got a record of exactly how everything fits together, so you can even carry on with the job weeks later.
Our recommendation
The Louis Technical Centre
If you have a technical question about your motorbike, please contact our Technical Centre, where they have endless experience, reference books and contacts.
Please note!
These tips for DIY mechanics contain general recommendations that may not apply to all vehicles or all individual components. As local conditions may vary considerably, we are unable to guarantee the correctness of information in these tips for DIY mechanics.
Thank you for your understanding.


